
Element Inspector
Finding the right rule for a specific button or screen element can be difficult when you need to know its technical name.The Element Inspector makes this easier. Simply enable the Inspector, click the element you want to control, and create the required restriction directly from there.
Turn on Inspect Mode
Click the shield icon in the top bar (systray). Inspect Mode stays on while you navigate, so you can open the exact screen you want to restrict, and it turns off when you close the tab.
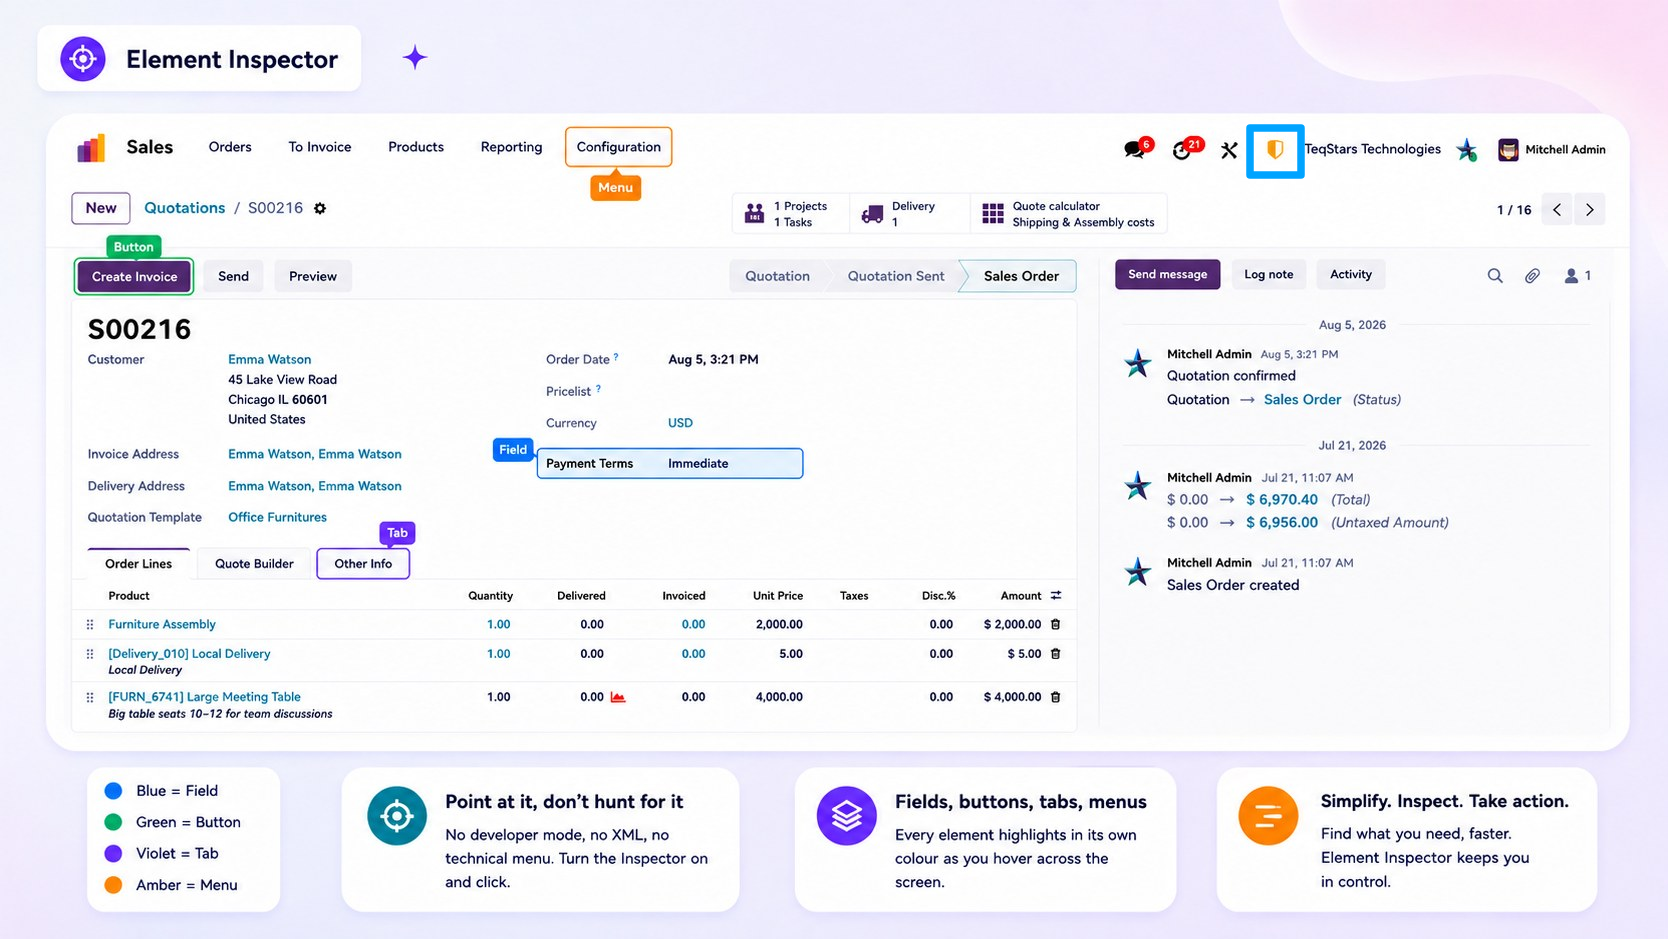
Elements are highlighted as you move over them. Click one to open the Inspector panel for that element.
What you can inspect
The panel lists everything Smart Access Manager can restrict on the current screen, grouped by type:
Fields — Fields available on the current record.
Buttons — Buttons available in the current view.
Tabs — Notebook tabs and settings sections.
Filters — Search filters and Group By options.
Chatter — The entire chatter or individual chatter elements.
Navbar — Discuss, Activities, the company switcher, and other systray icons.
View types — Available view layouts for the current record type.
Search panel — The search bar, filters, Group By, and Favorites menu.
Form layout — Smart buttons, header buttons, attachment preview, and kanban opening.
- Actions — Options such as Export, Import, Duplicate, Archive, Print, and entries available in the record’s
Actions menu.
Menus — The menu that opens the current screen.
Each item shows the number of existing rules that apply to it, making it easy to see which elements are already restricted.
Create a restriction
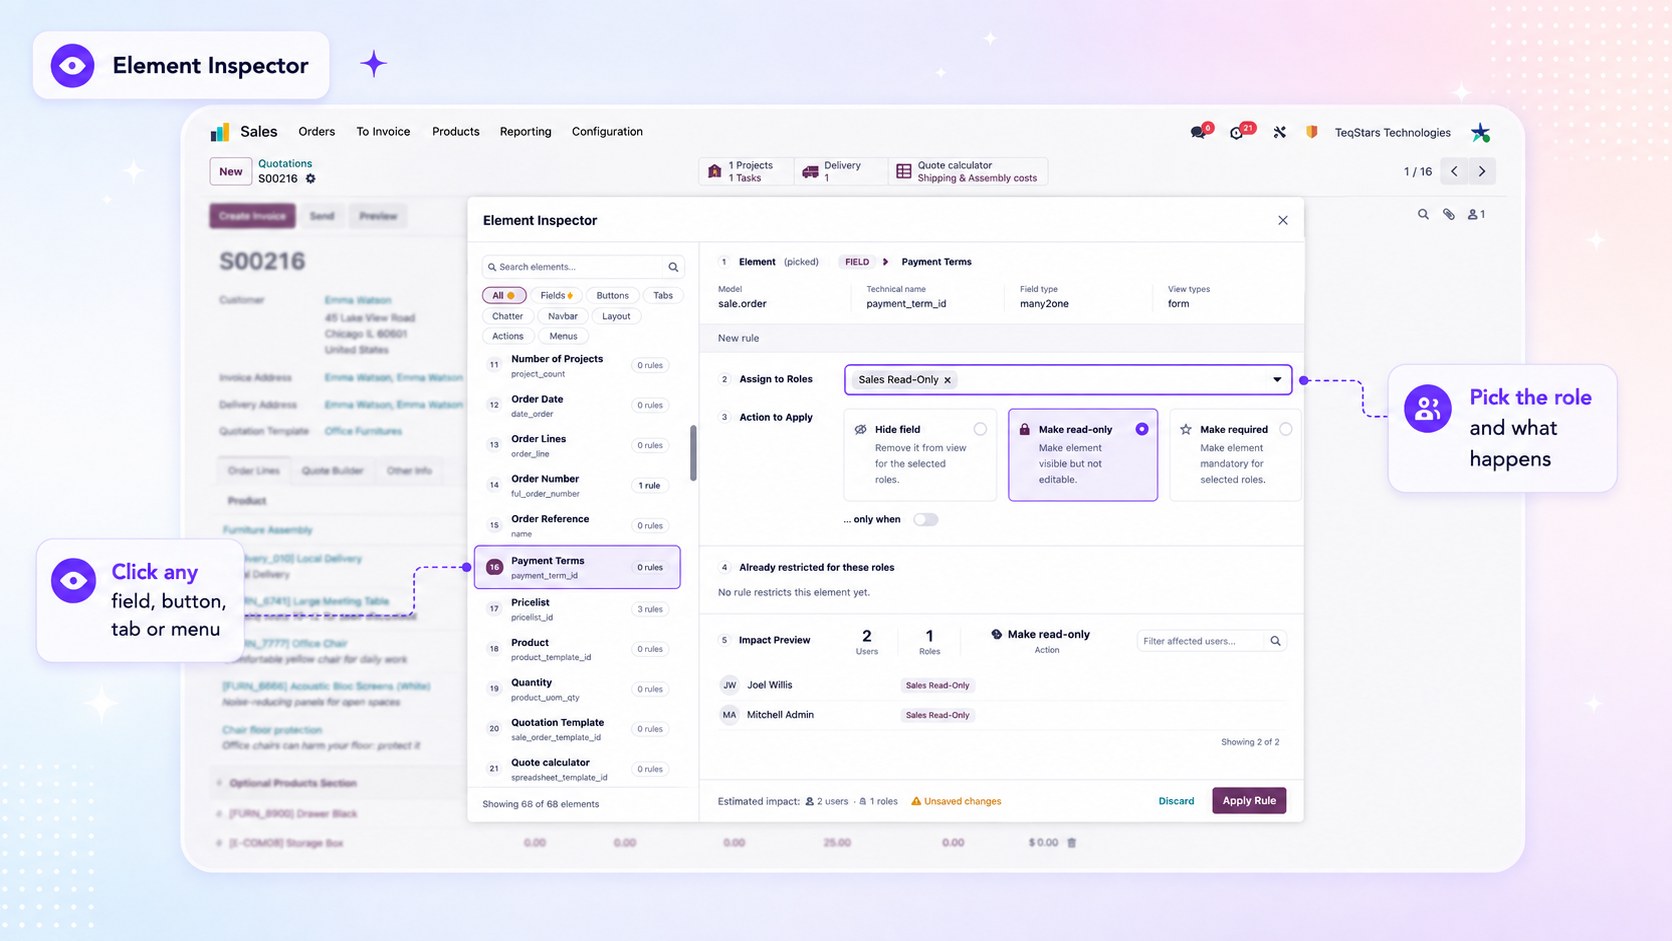
- Roles — Select one or more roles to which the restriction should apply. You can also select users directly.
Smart Access Manager creates or reuses a personal role for each selected user to avoid creating duplicate roles.
Action — Choose what should happen to the selected element:
Hide — Hides the element. Available for all element types.
Read-only — Makes the field read-only. Available for fields only.
Required — Makes the field required. Available for fields only.
- Condition — Optional. Add a condition to apply the restriction only when a record meets specific criteria.
Conditions can be used for fields, buttons, and tabs.
Click Apply to save. The change takes effect immediately — no restart or cache clearing is required.
Review and remove existing rules
For the selected element, the panel shows all existing rules that restrict it. You can see the role associated with each rule, the applied action, and whether the rule has a condition.
From the panel, you can:
Edit a rule — Change the assigned roles, action, or condition.
Remove a rule — Remove the selected restriction while keeping other restrictions unchanged.
Removing a rule affects only the element you are currently inspecting. Other fields or elements that use the same rule remain restricted.
Note
All changes made through the Element Inspector are recorded in the Activity Log and identified as Inspector changes, making them easy to track and review.
See also