Enable & Configure the MCP Server
After installing the module, the MCP Server stays disabled until you flip the master switch. This page walks you through turning it on and reviewing every field on the form.
Enable the MCP Server
Go to .
The Server Settings form opens. This is a singleton — there is only ever one Server Settings record.
Click the large Disabled smart button at the top of the form to flip it to Enabled.
The button colour changes from red to green and the header Connect a New Tool button becomes available.
Note
The master switch controls the /odoo/mcp endpoint globally. While the switch is Disabled, every incoming MCP request is rejected — even from connections that are otherwise valid. This is the kill-switch you can use in an incident.
Warning
Until you create at least one Connection, no AI tool will be able to authenticate — every request keeps returning Unauthorized. Enabling the endpoint alone is not enough. See Connect a New AI Tool for the next step.
Server Settings reference
The rest of this page documents every field on the Server Settings form.
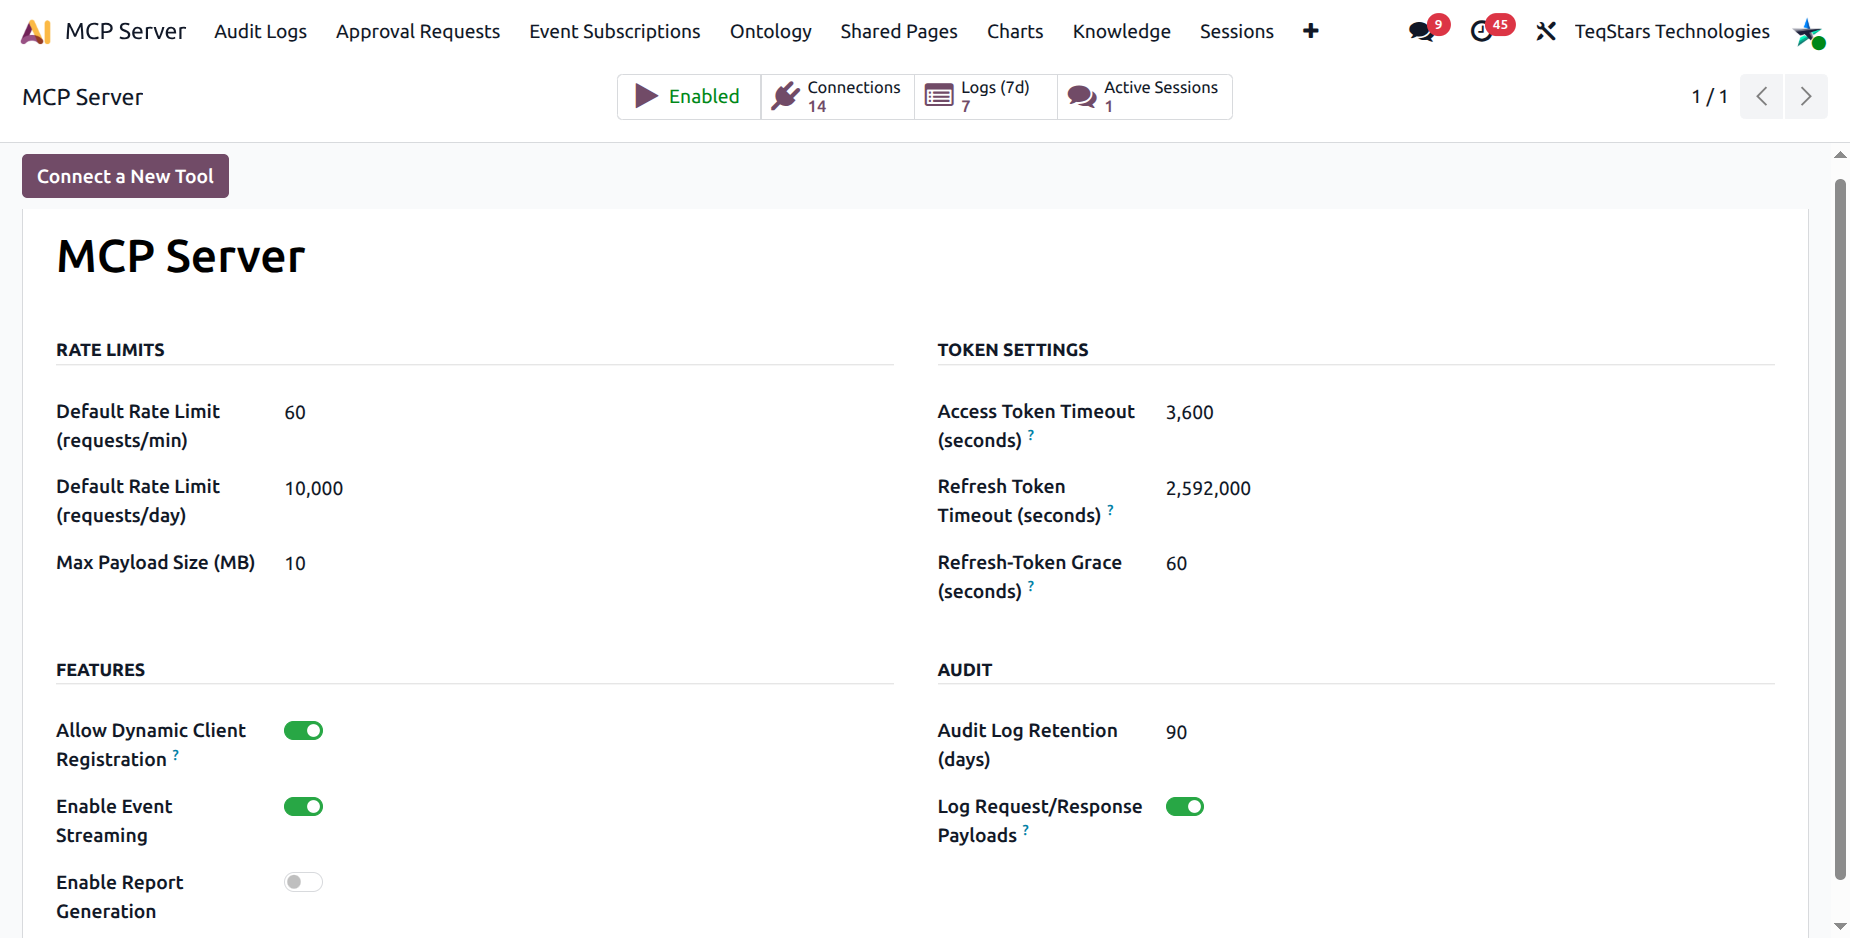
Rate Limits
These limits apply by default to every new connection. You can override them per connection on the Connection form.
Default Rate Limit (requests/min) — maximum number of MCP requests a single connection can make per minute. Default: 60.
Default Rate Limit (requests/day) — daily ceiling per connection. Default: 10,000.
Tip
Tighten these for connections that should be light users (a personal Claude Desktop). Loosen them for high-volume integrations behind a controlled VPN.
Token Settings
Used only for OAuth 2.1 connections.
Access Token Timeout (seconds) — how long an OAuth access token stays valid before the AI client must refresh it. Default: 3600 (1 hour). Lower means tighter security at the cost of more refresh traffic.
Refresh Token Timeout (seconds) — how long a refresh token stays valid. After this, the user has to re-log in to the AI tool. Default: 2,592,000 (30 days).
Refresh-Token Grace (seconds) — short window after a refresh token is rotated during which the old refresh token still verifies. Covers transient network errors where the client retries the same refresh and we already issued the new pair. Default: 60. Set
0to disable.
Features
Allow Dynamic Client Registration (on by default) — enables
POST /oauth/register(RFC 7591) so AI clients like claude.ai and ChatGPT can self-register without an admin pre-creating each OAuth connection. Disable for stricter control.Enable Event Streaming (on by default) — allows the AI client to subscribe to record changes and receive them in real time via the MCP resource-updates channel.
Enable Report Generation (on by default) — enables the
generate_reporttool so the AI can produce Odoo PDF / HTML reports.
Audit
Audit Log Retention (days) — how long audit log entries are kept. After this, the daily cleanup cron deletes older rows. Default: 90.
Log Request/Response Payloads — when on, the full request payload and a summary of the response are stored on each audit log entry. Useful for compliance and troubleshooting. When off, only meta-data (method, tool, user, duration, status) is recorded.
Warning
Payload logging can store sensitive data (customer details, email bodies, etc.) in the audit table. Enable it only when you need it and combine with a sensible retention period.