Connect Your MailChimp Account
To connect Odoo with MailChimp you need an API key from your MailChimp account. The key authorizes Odoo to read and write audiences, contacts, merge fields, segments, templates, campaigns and (with the ecommerce features enabled) stores, products and sale orders on your behalf.
Create the API Key in MailChimp
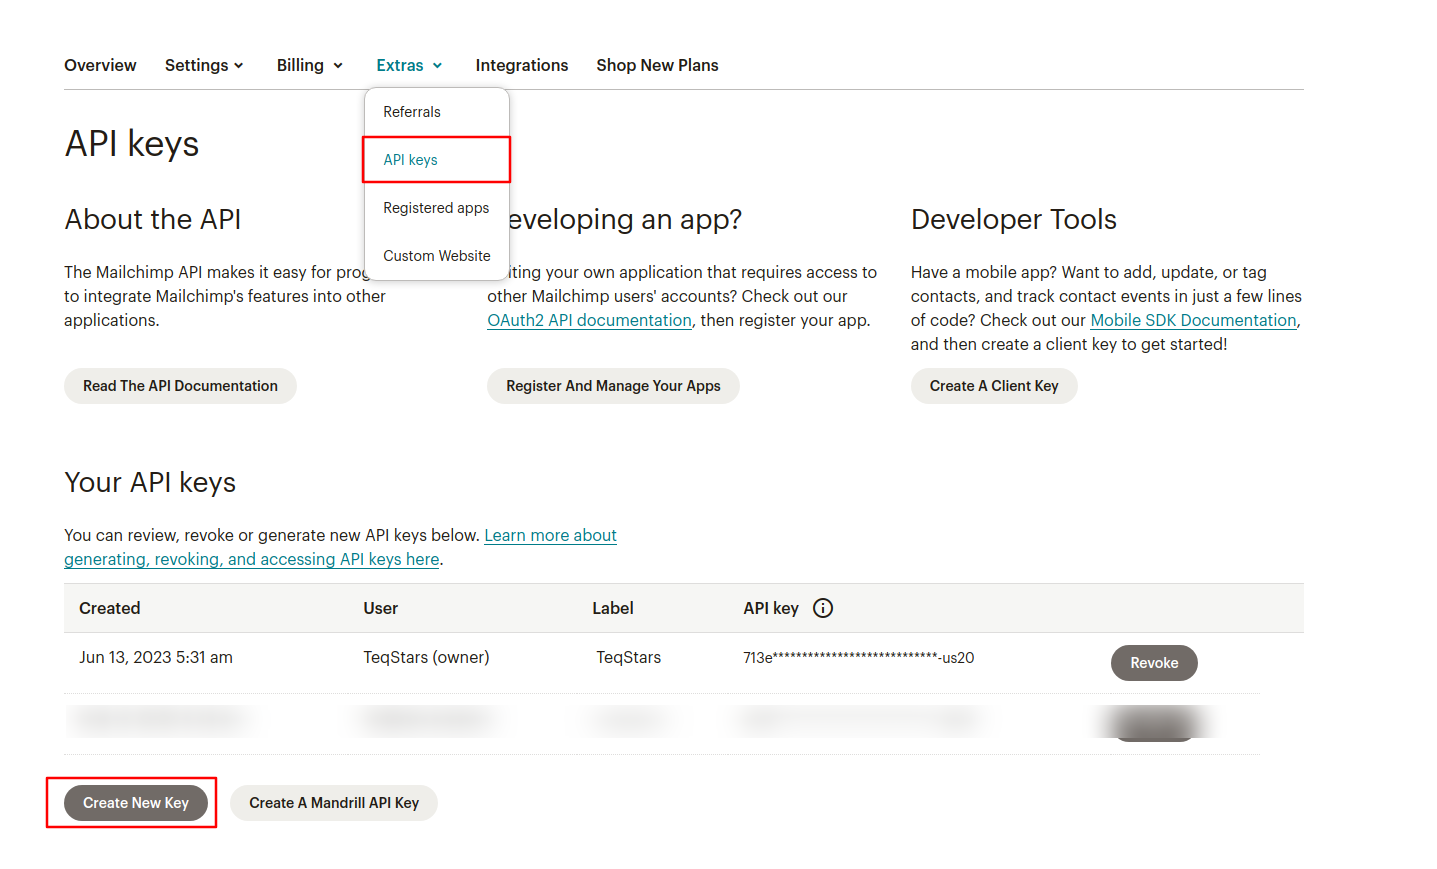
Log in to your MailChimp account at mailchimp.com.
Click your profile icon and go to .
In the Your API keys section, click Create A Key (or Create New Key).
Give the key a label you recognize (for example
Odoo) and copy the generated key to your clipboard.
Warning
Treat the API key like a password. Anyone with the key can access your MailChimp data. If a key is exposed, click Revoke next to it in MailChimp and create a new one.
Note
A MailChimp API key always ends with a data-center suffix (the part after the
-, for example ...-us20). Odoo reads this suffix automatically to reach the
correct MailChimp server, so copy the entire key.
Add the Account in Odoo
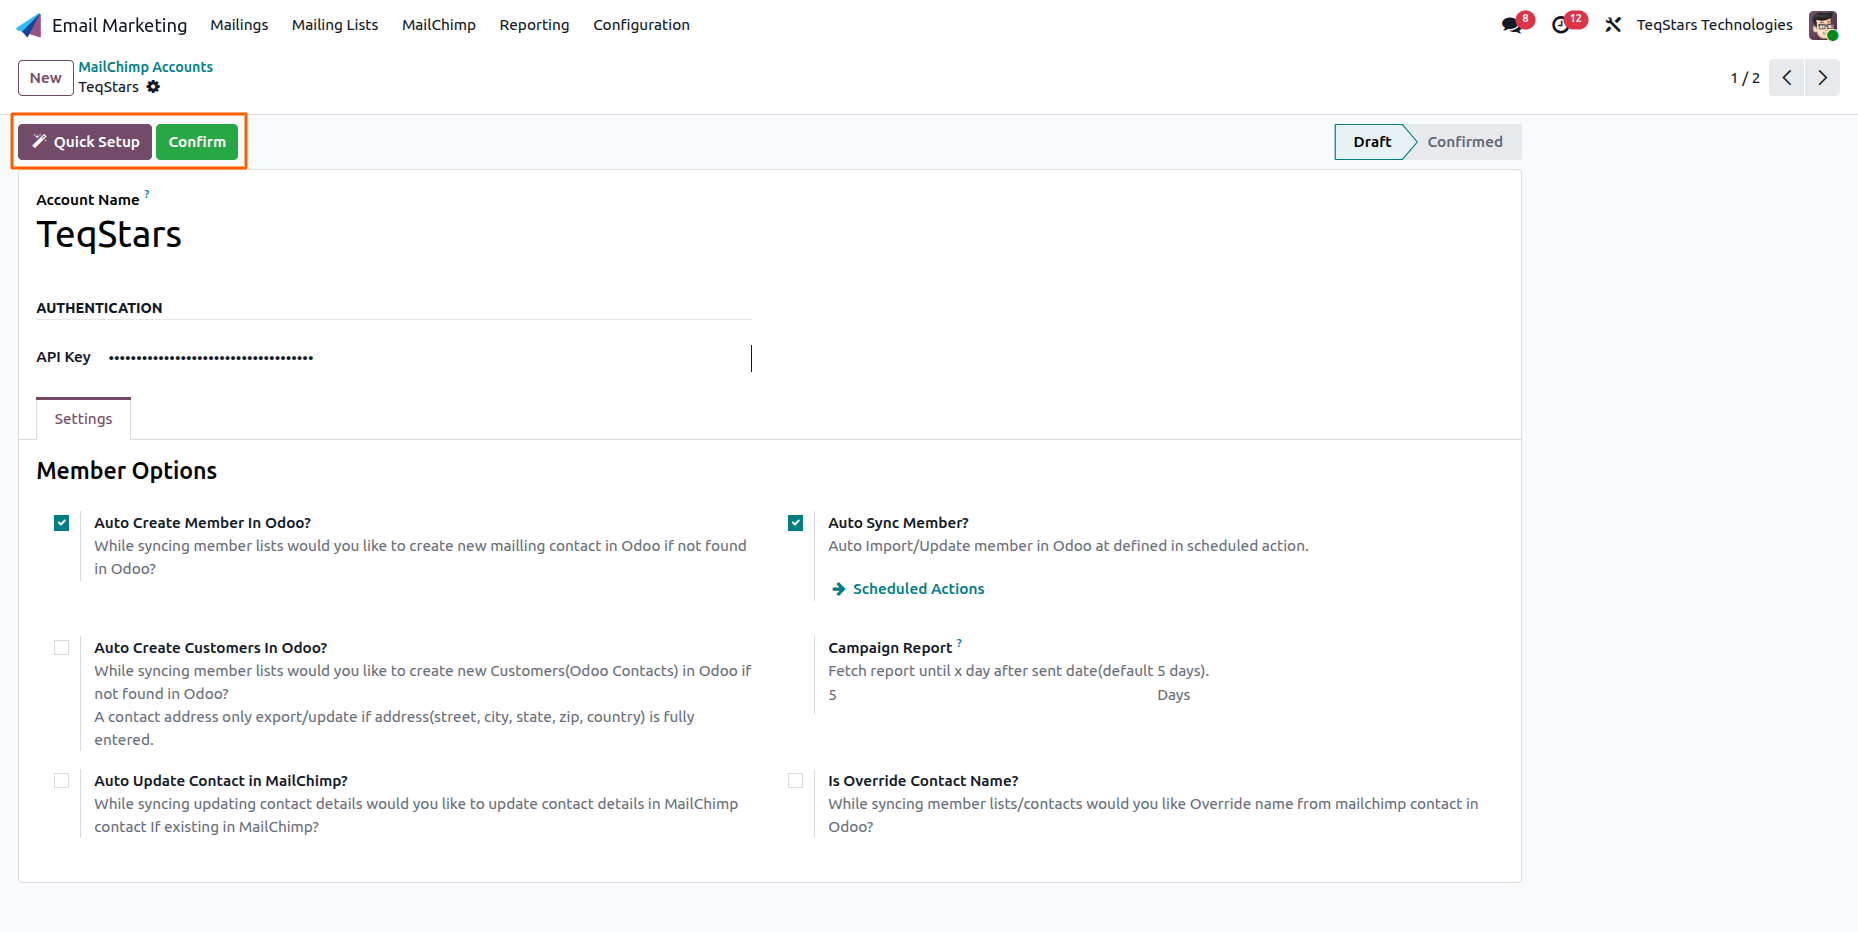
In Odoo, open the Email Marketing app and go to , then click New.
Enter an Account Name (for example
TeqStars MailChimp).Paste the key into the API Key field.
Once the API Key is in place, you can finish the setup in one of two ways. Run the guided Quick Setup wizard, which connects the account, maps the merge fields and links your audiences in a few steps, or click Confirm to validate the key and activate the account manually.
Tip
Click Quick Setup to launch the guided wizard that connects the account, maps merge fields and links your audiences in a few steps. See Quick Setup Wizard.
Tip
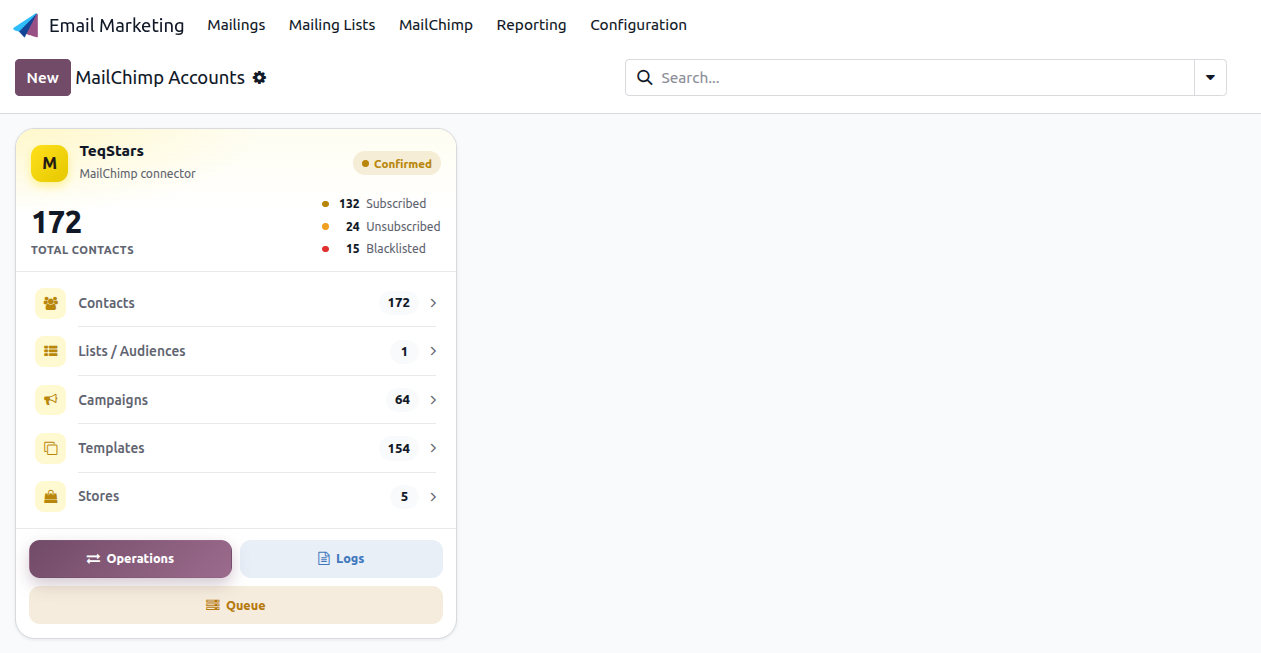
The account dashboard gives you one-click access to Quick Setup, Operations, Logs and the Job Queue, plus live counters for contacts, audiences, campaigns, templates and stores.
Confirm the Connection
Click Confirm at the top of the form. Odoo validates the key against MailChimp. On success, the account moves from Draft to Confirmed and the top of the form reveals:
Stat buttons for Contacts, Lists/Audience, Campaigns, Templates and Stores, so you can see the sync scope at a glance and jump to each area with one click.
The post-confirmation sync actions, such as Fetch Stores.
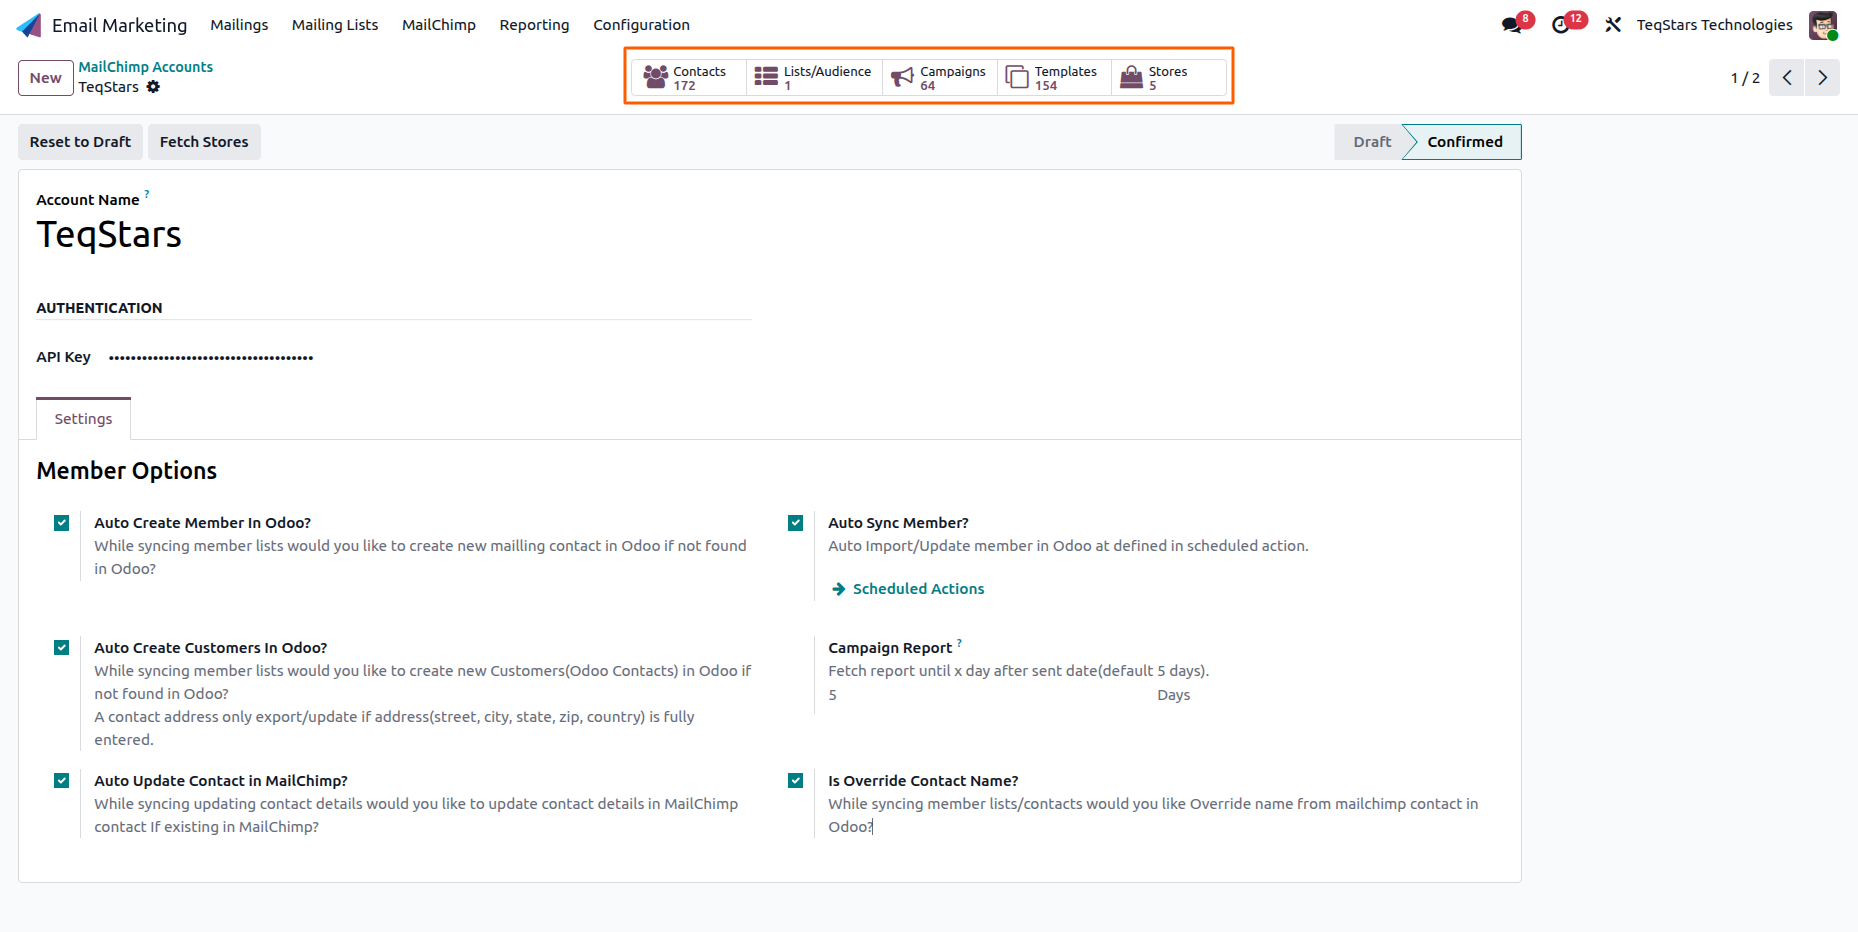
Note
If confirmation fails, the API key may be invalid, incomplete or revoked. Re-copy the full key from MailChimp and try again. Use Reset to Draft to edit the key.
Next Steps
The fastest way to finish setup is the guided Quick Setup wizard, which connects, maps merge fields and links your audiences in a few steps:
Run the guided setup: See Quick Setup Wizard.
Configure sync behavior: See MailChimp Account Configuration.
Enable real-time updates: See Webhook Configuration.