
Configure GLS Connector
This document provides a complete step-by-step guide to configure and use the GLS connector in Odoo. Once the connector is set up, you can create orders, generate shipping labels, track shipments, and cancel them directly from Odoo.
Let’s begin with the configurations.
Configure Shipping partner
To configure a Shipping Partner in Odoo, navigate to and click on New.
The environment is managed on the shipping partner and is applied to every delivery method linked to it. To activate a Shipping Partner in the Production Environment, click the Test smart button at the top of the form. After doing so, the smart button changes to read Production.
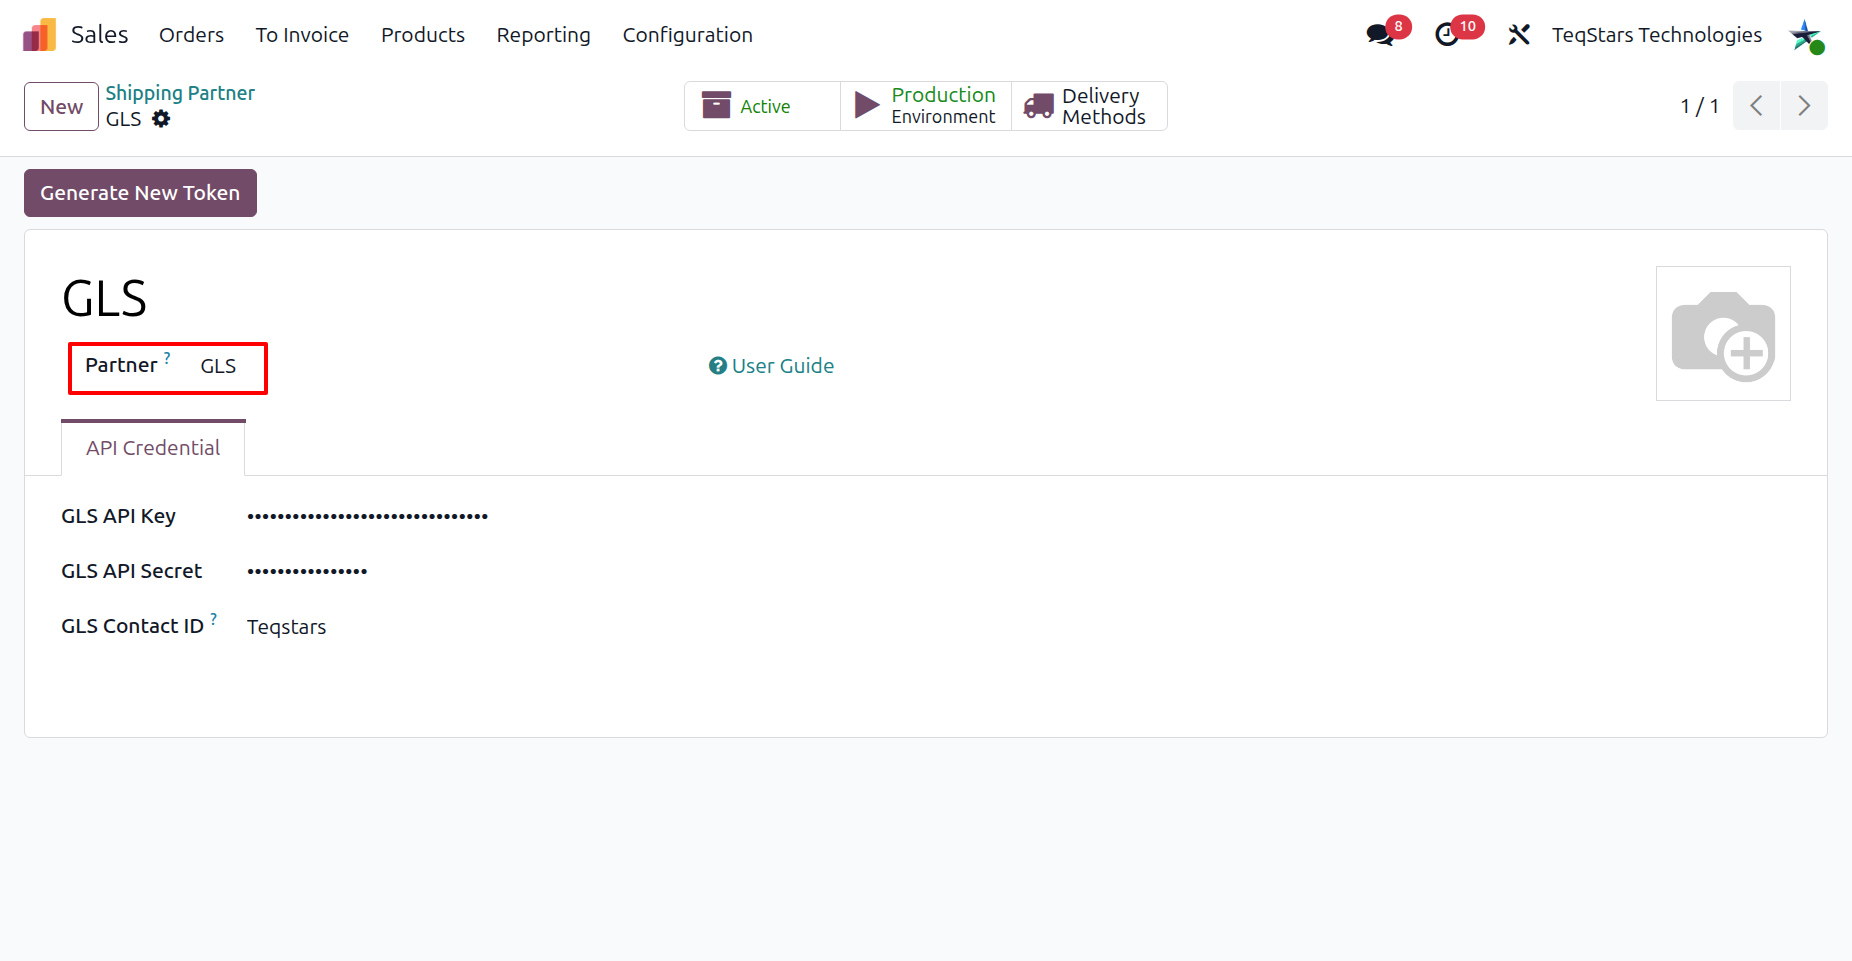
Shipping Partner Configuration
Name: Choose a meaningful name for your account (e.g.
GLS).Partner: Select GLS.
In the API Credential section, enter the identifiers provided by GLS:
GLS API Key: The API key (client ID) of your GLS API application.
GLS API Secret: The API secret (client secret) of your GLS API application.
GLS Contact ID: The shipper contact identifier provided by the GLS team. GLS derives the shipper address automatically from it.
When you save the shipping partner with valid credentials, Odoo automatically authenticates with GLS and stores the access token. You can also refresh it manually at any time using the Generate New Token button. The token is short-lived, and if it expires it is refreshed automatically while any API request is being processed, so no manual action is normally required.
Note
All credentials are issued by GLS. The same credentials are used for both the test and production environments; you switch between them with the Test / Production smart button on the shipping partner. Validate your workflow in the test environment before switching to production for live orders.
Important
The ShipIT-Farm API (v1) must be enabled in your GLS application. A valid access token is still issued without it, but shipment creation and label generation will fail if the ShipIT-Farm API is not enabled for your account. Contact your GLS representative to activate it if needed.
See also
Contact your GLS representative to obtain or certify your API credentials.
Configure Delivery Method
Click on Delivery Methods and then New, or navigate to and click on New.
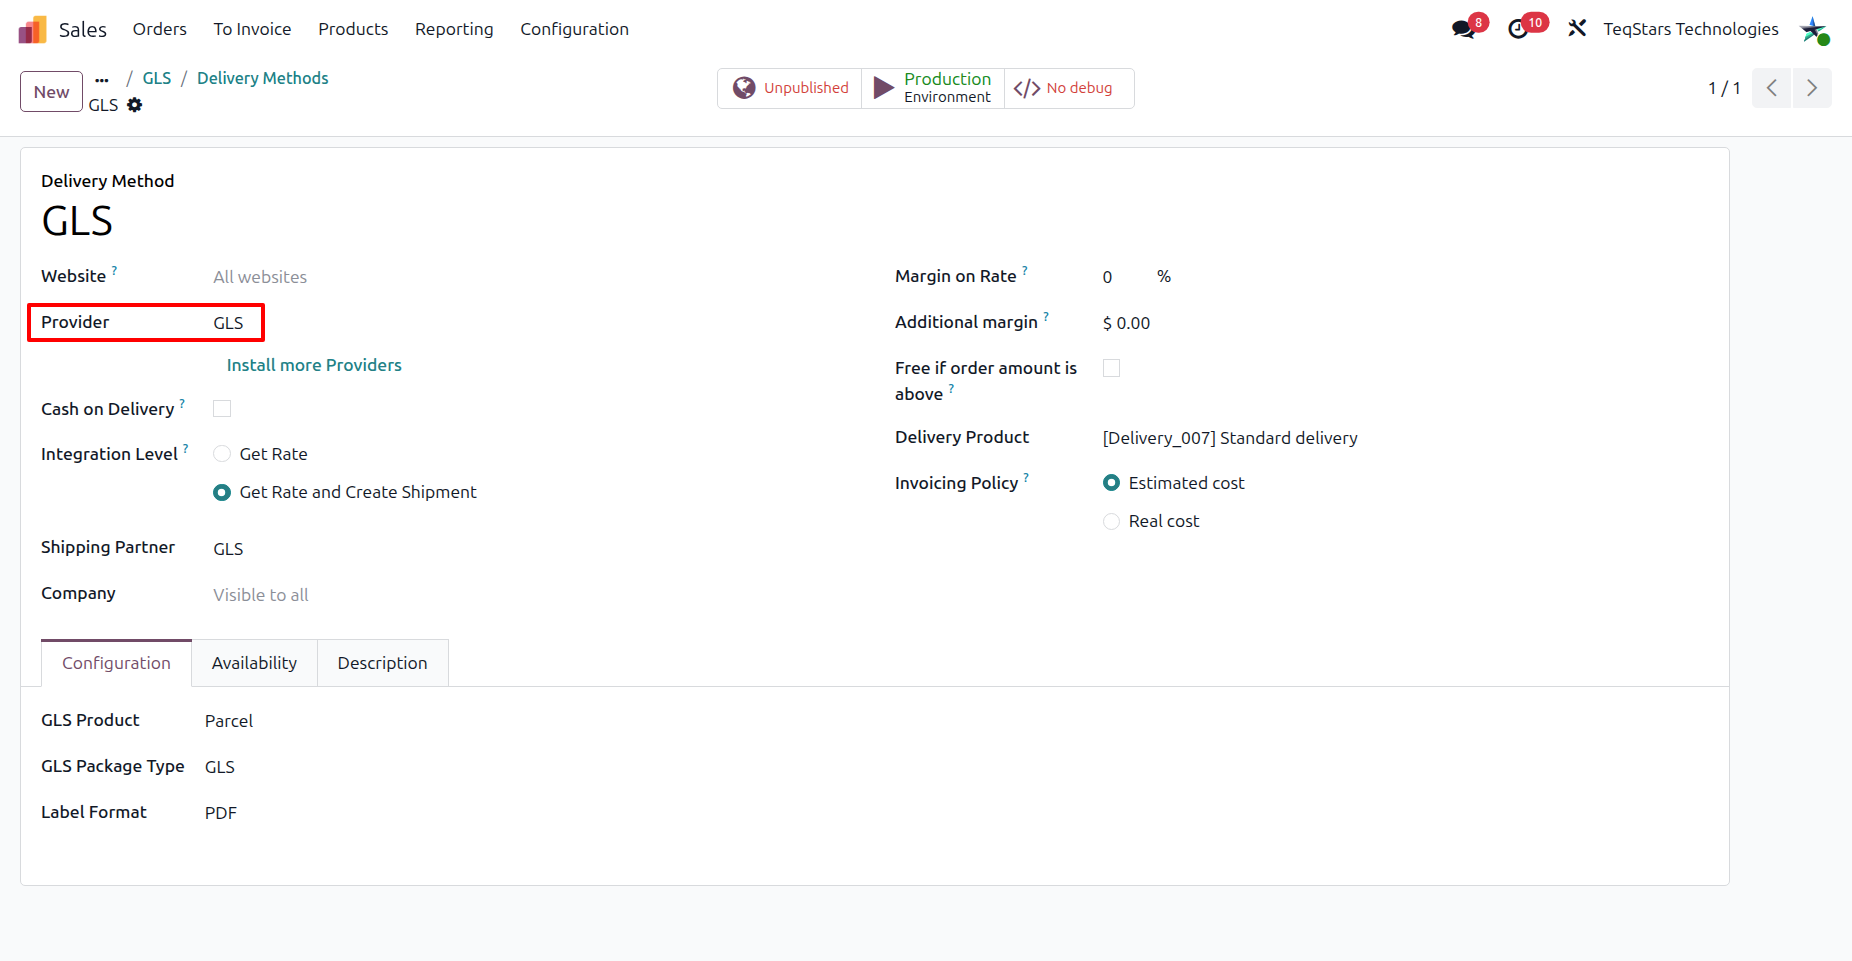
Fill in the main fields of the delivery method:
Delivery Method: Choose a meaningful name for the delivery method (e.g. GLS with Fixed Price or GLS with Based on Rules).
Shipping Partner: Must select a shipping partner which you configured for GLS.
Delivery Product: Select or create the product that represents the shipping charge on the sales order line.
In the Configuration tab, fill out these fields:
GLS Product: The GLS product for the shipment (Parcel, Express, Freight, Pharma, or Pharma Plus).
Label Format: The format in which GLS returns the shipping label. Choose PDF or PNG for a ready-to-view file, or ZPL (Zebra 200 dpi) / ZPL (Zebra 300 dpi) to print directly on a Zebra thermal printer (select the resolution that matches your printer).
GLS Package Type: The package type whose weight is used when generating the parcel.
Tip
GLS does not support real-time rate calculation. You must configure pricing manually by choosing one of the supported providers:
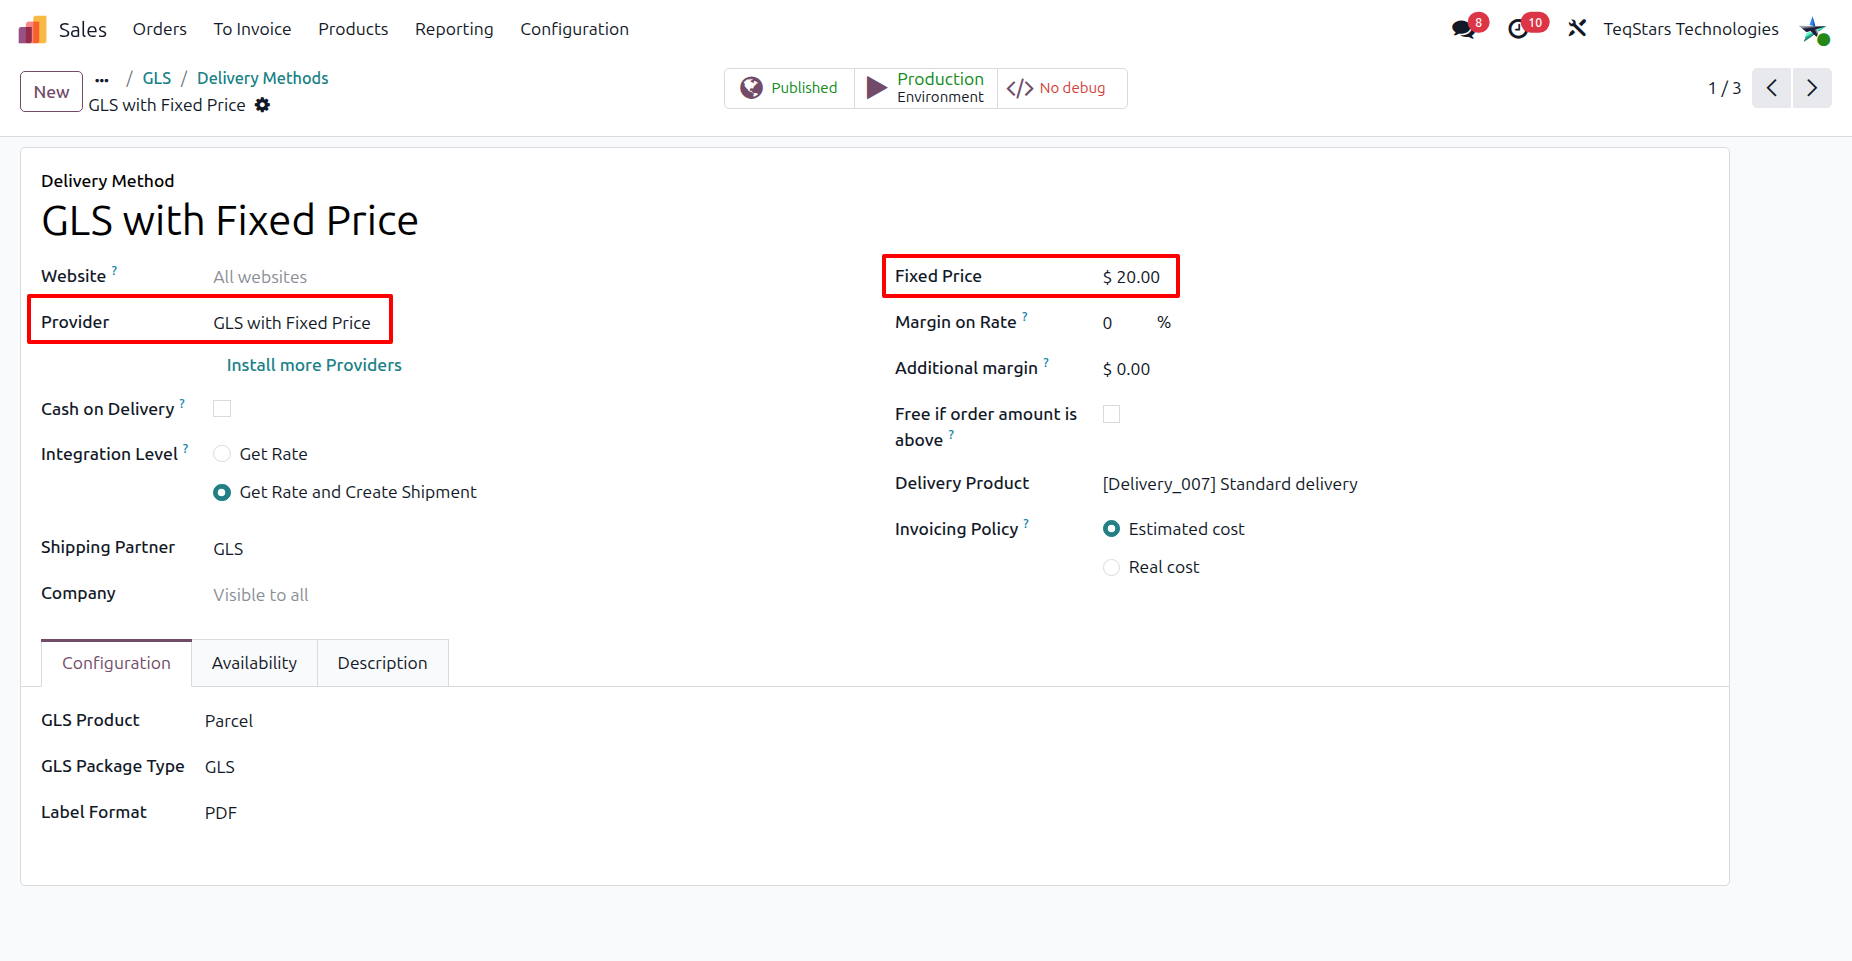
GLS with Fixed Price: Charges a predefined cost.
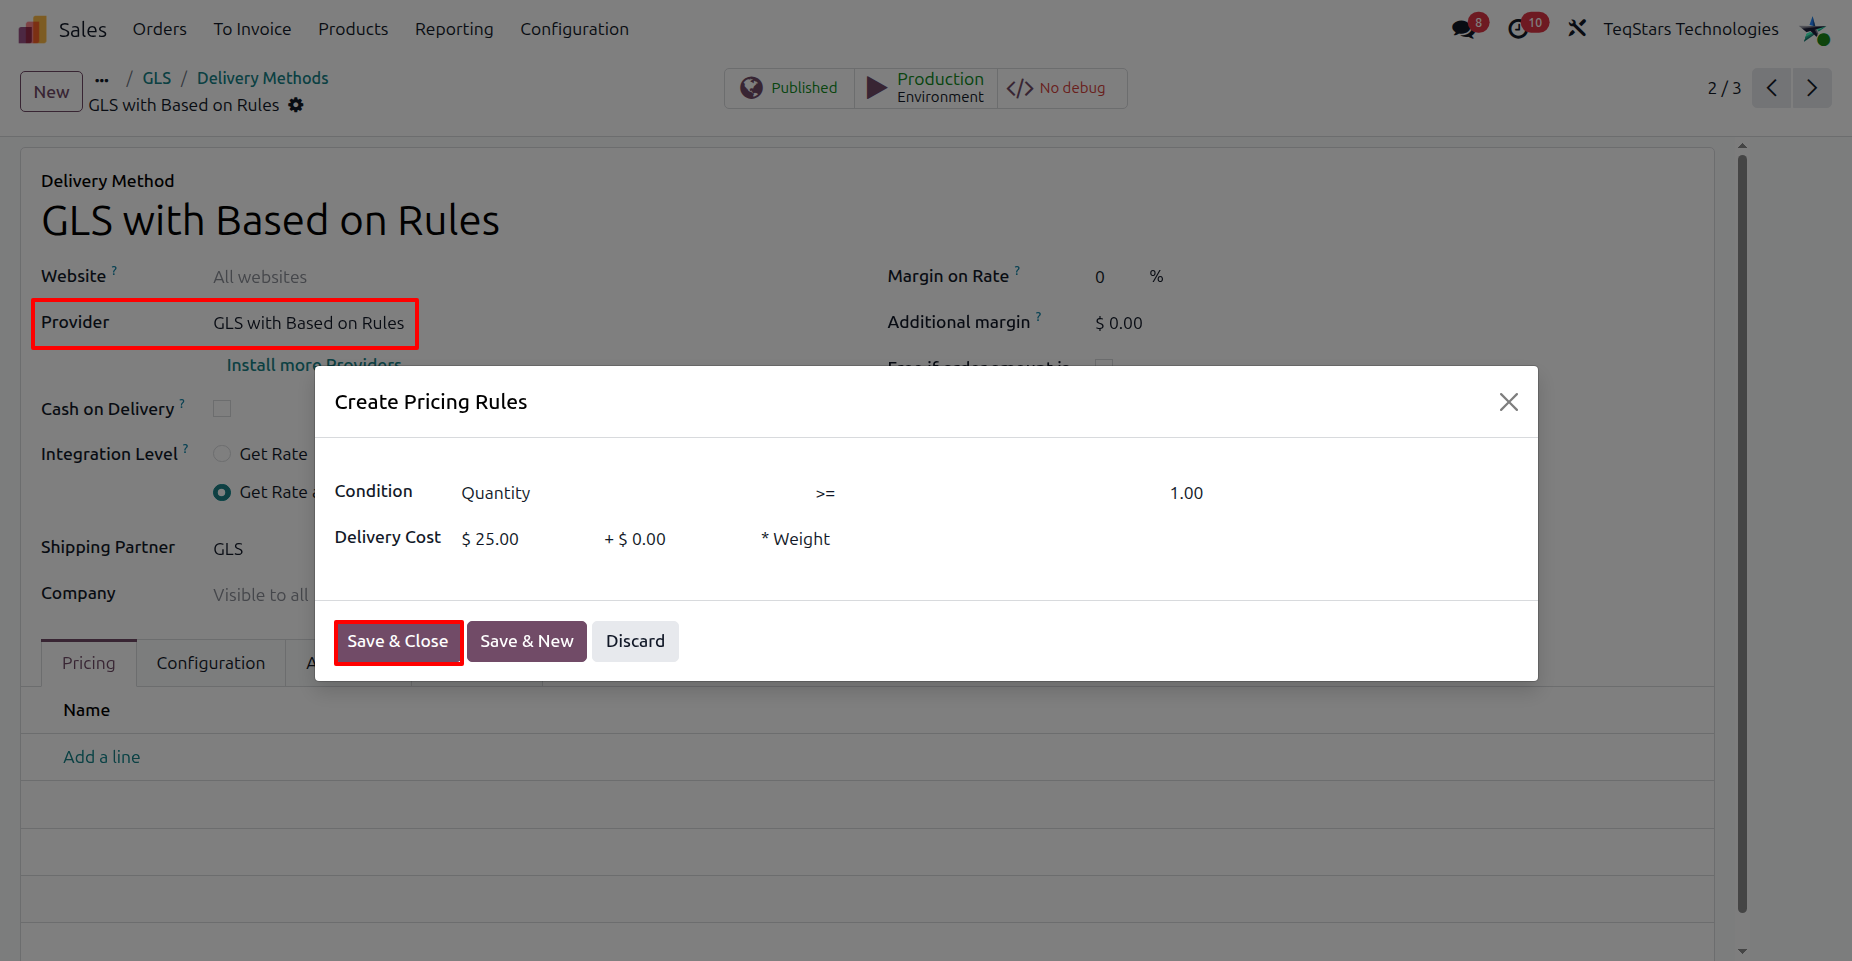
GLS with Based on Rules: Calculates the charge from your Odoo shipping rules.
GLS with Fixed Price
With the fixed-price method, the price of the assigned delivery product is charged as the shipping cost.
GLS with Based on Rules
With the rule-based method, define pricing rules that calculate the shipping charge from order criteria such as quantity, weight or amount.
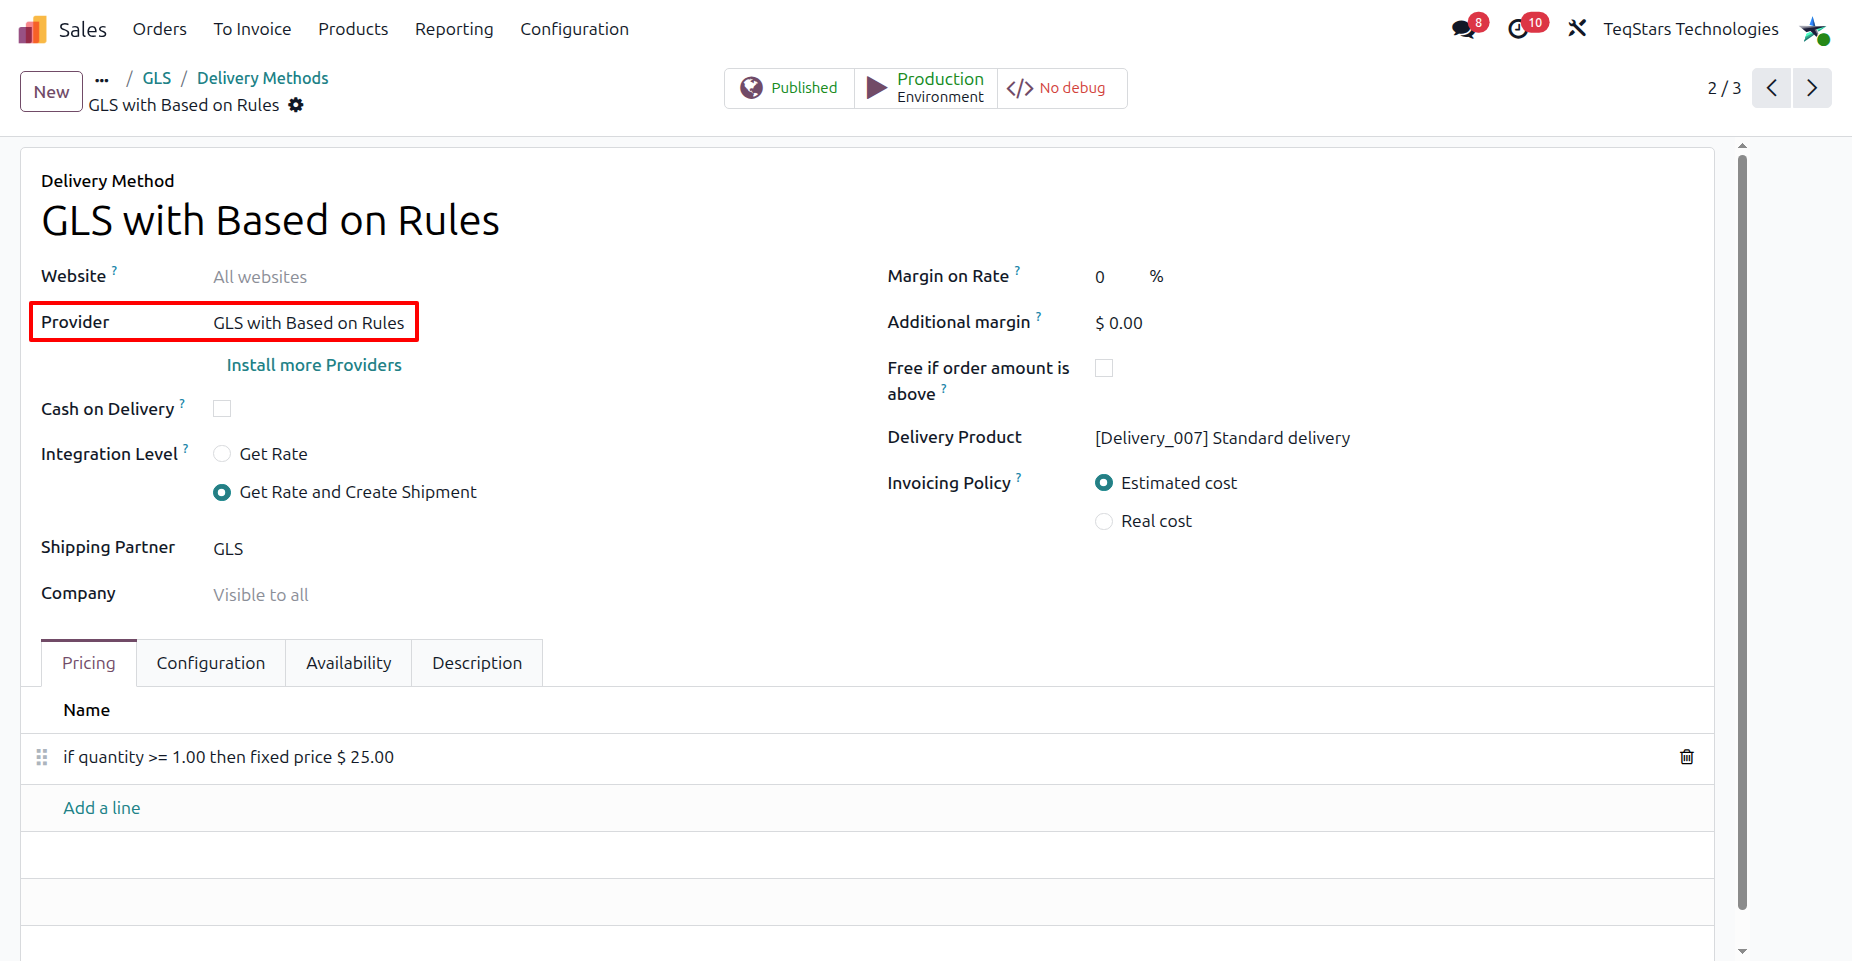
Tip
Delivery Methods can also be accessed by going to .
Note
If the Delivery Methods option is not available from the Configuration drop-down menu, verify whether the feature is enabled by following these steps:
Go to .
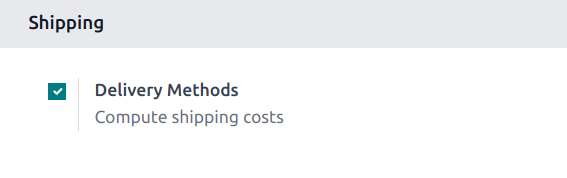
Scroll to the Shipping section and enable the Delivery Methods feature by checking the corresponding checkbox.
Use Delivery Method In Sale Order
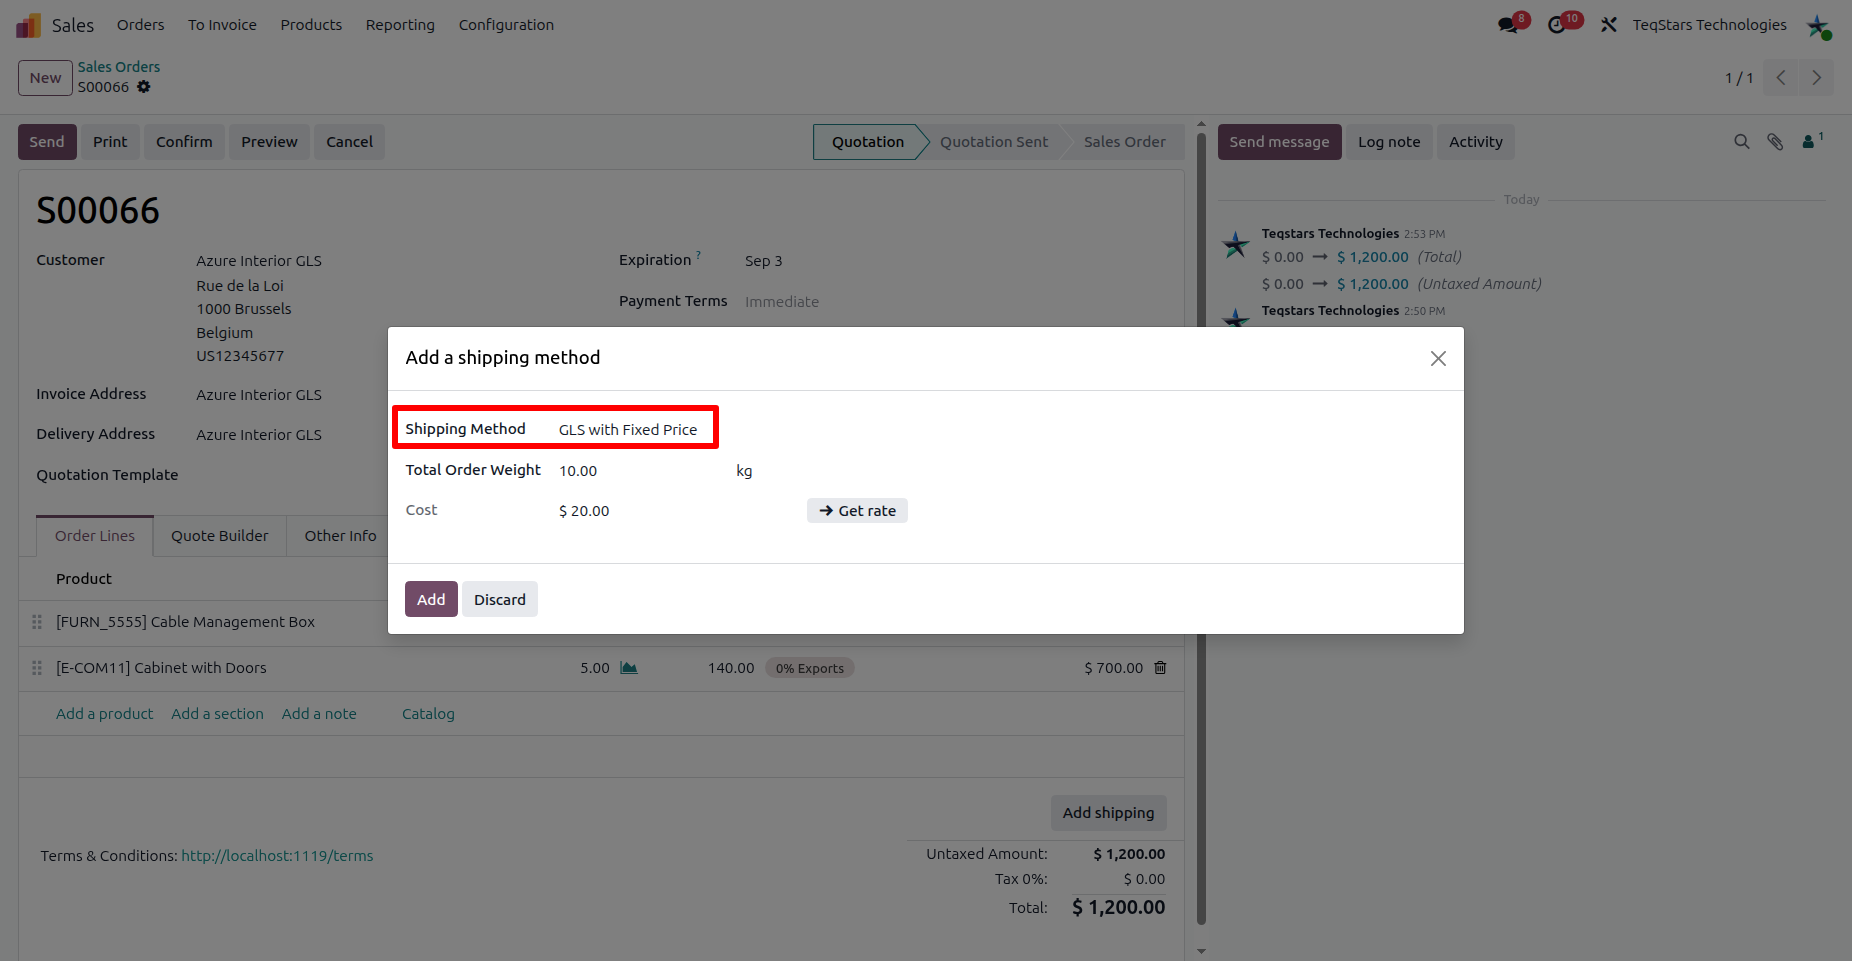
To add a shipping cost to a Sales Order, click the Add button on the quotation and select the desired GLS delivery method.
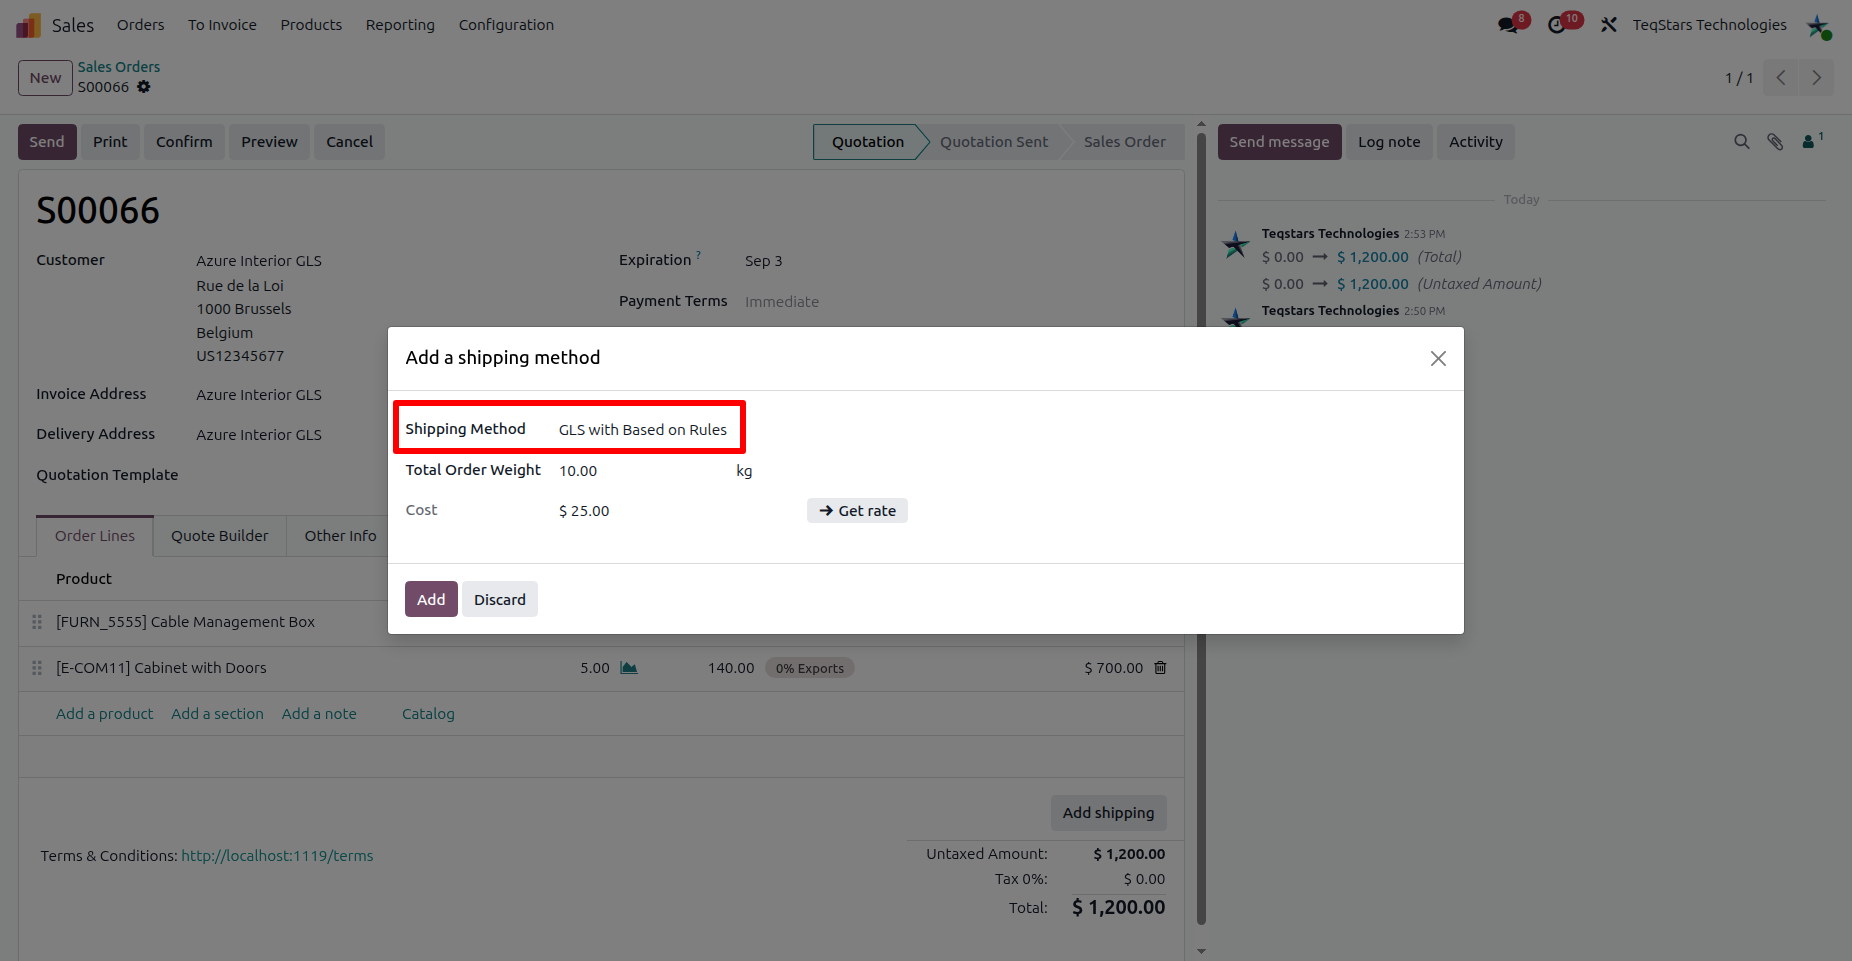
Shipping Method: Select the GLS delivery method you configured (e.g. GLS with Fixed Price or GLS with Based on Rules).
Total order weight: Odoo calculates the order weight from the selected products, or you can enter it manually.
Get Rate: Click this button to fetch the shipping rate based on the selected delivery method. Since GLS does not support real-time rate calculation, the rate is taken from the delivery method you configured (fixed price or based on rules).
GLS with Fixed Price
The predefined fixed price is applied.
GLS with Based on Rules
The price is calculated from your configured shipping rules.
Click the Add button to add the shipping charge to the sale order.
Use Delivery Method In Website Order
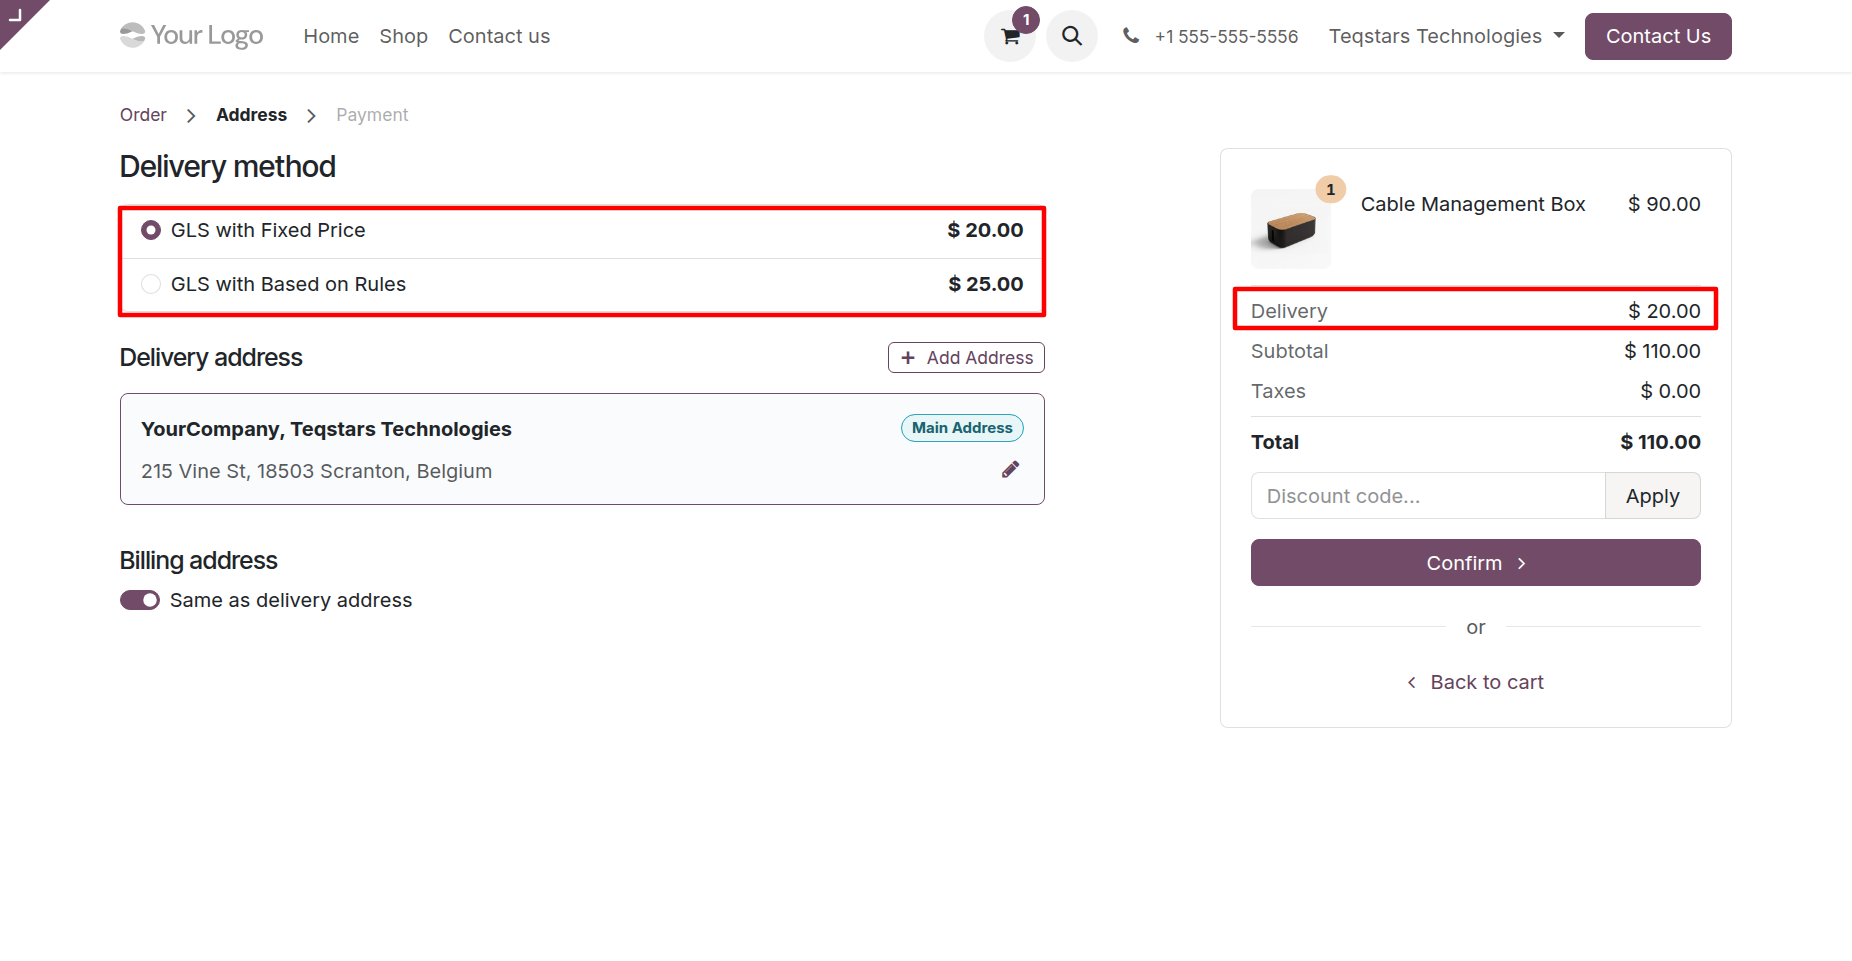
If you use Odoo eCommerce, customers can select the configured GLS delivery method directly during checkout.
Configure Delivery Order
After confirming the sale order, process the delivery order in the Inventory app.
Multiple Parcel Handling
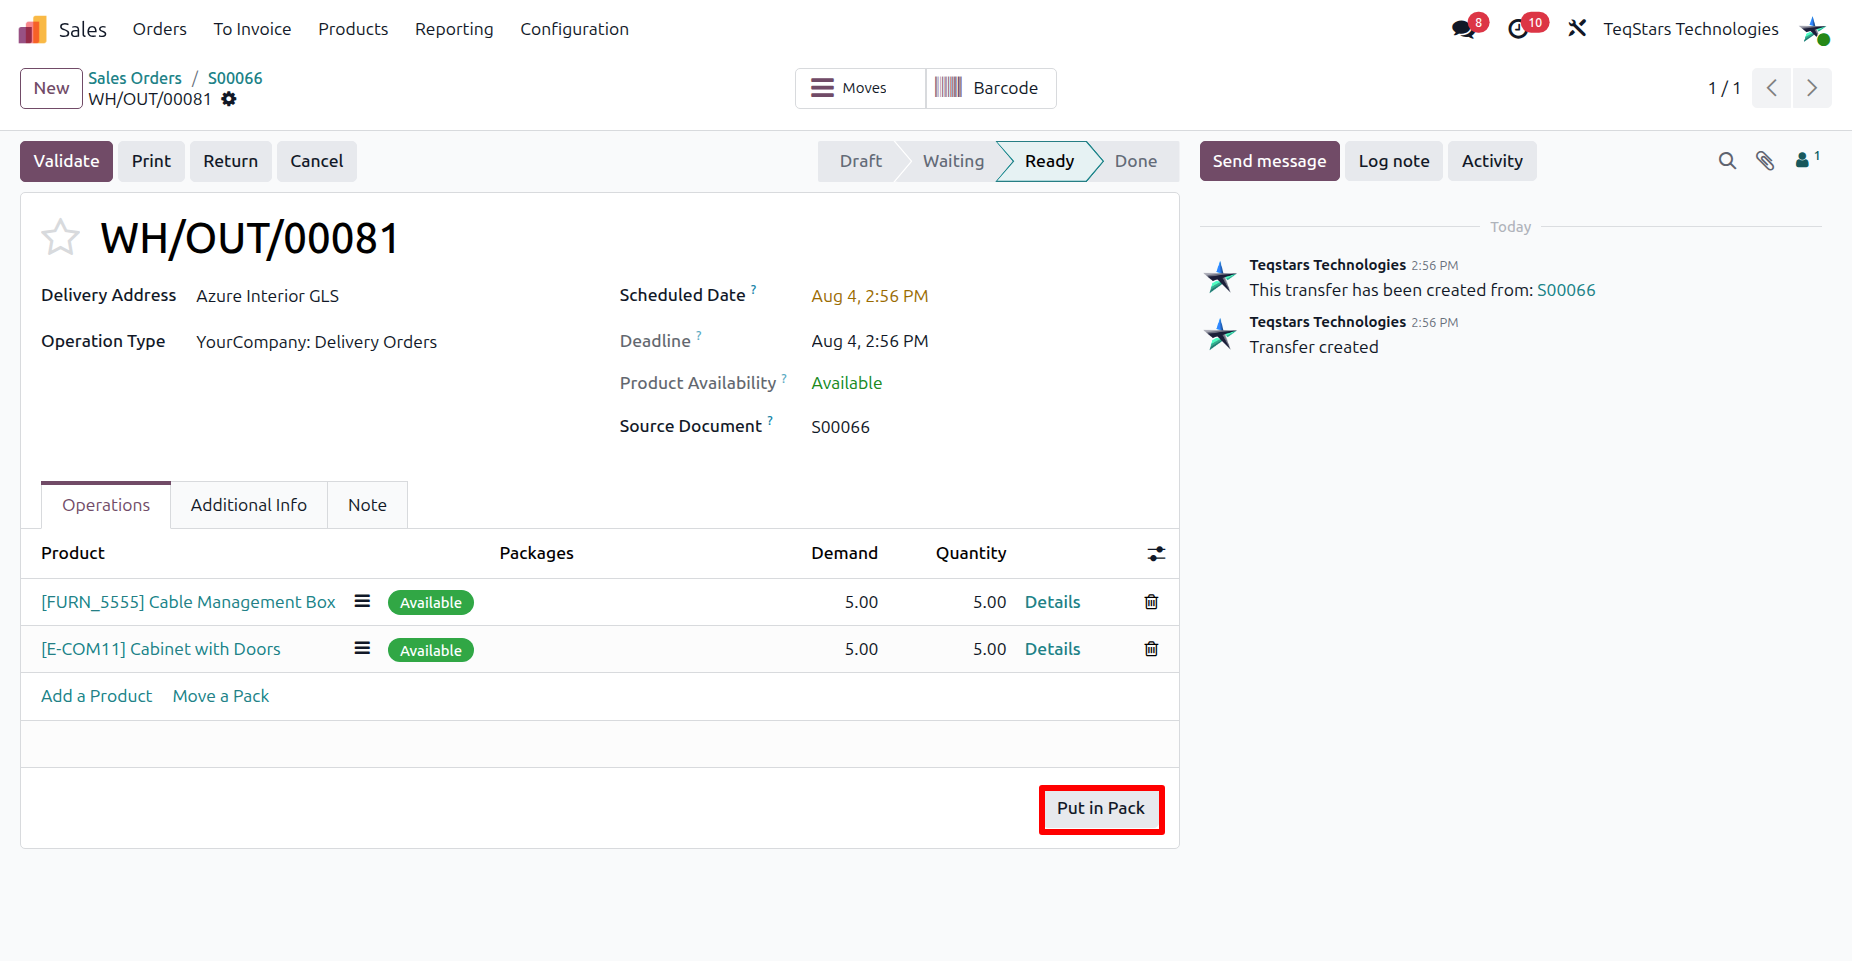
When an order ships in several boxes, use the Put in Pack operation to organize the products. Each package is registered with GLS as a separate parcel with its own weight.
Tip
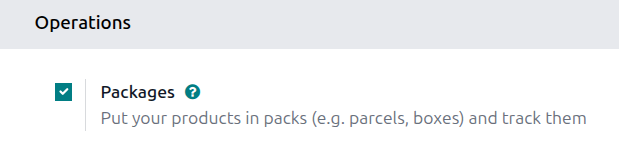
To split shipments into multiple packages with the Put in Pack operation, enable the Packages feature in .
Select Carrier on Delivery Order
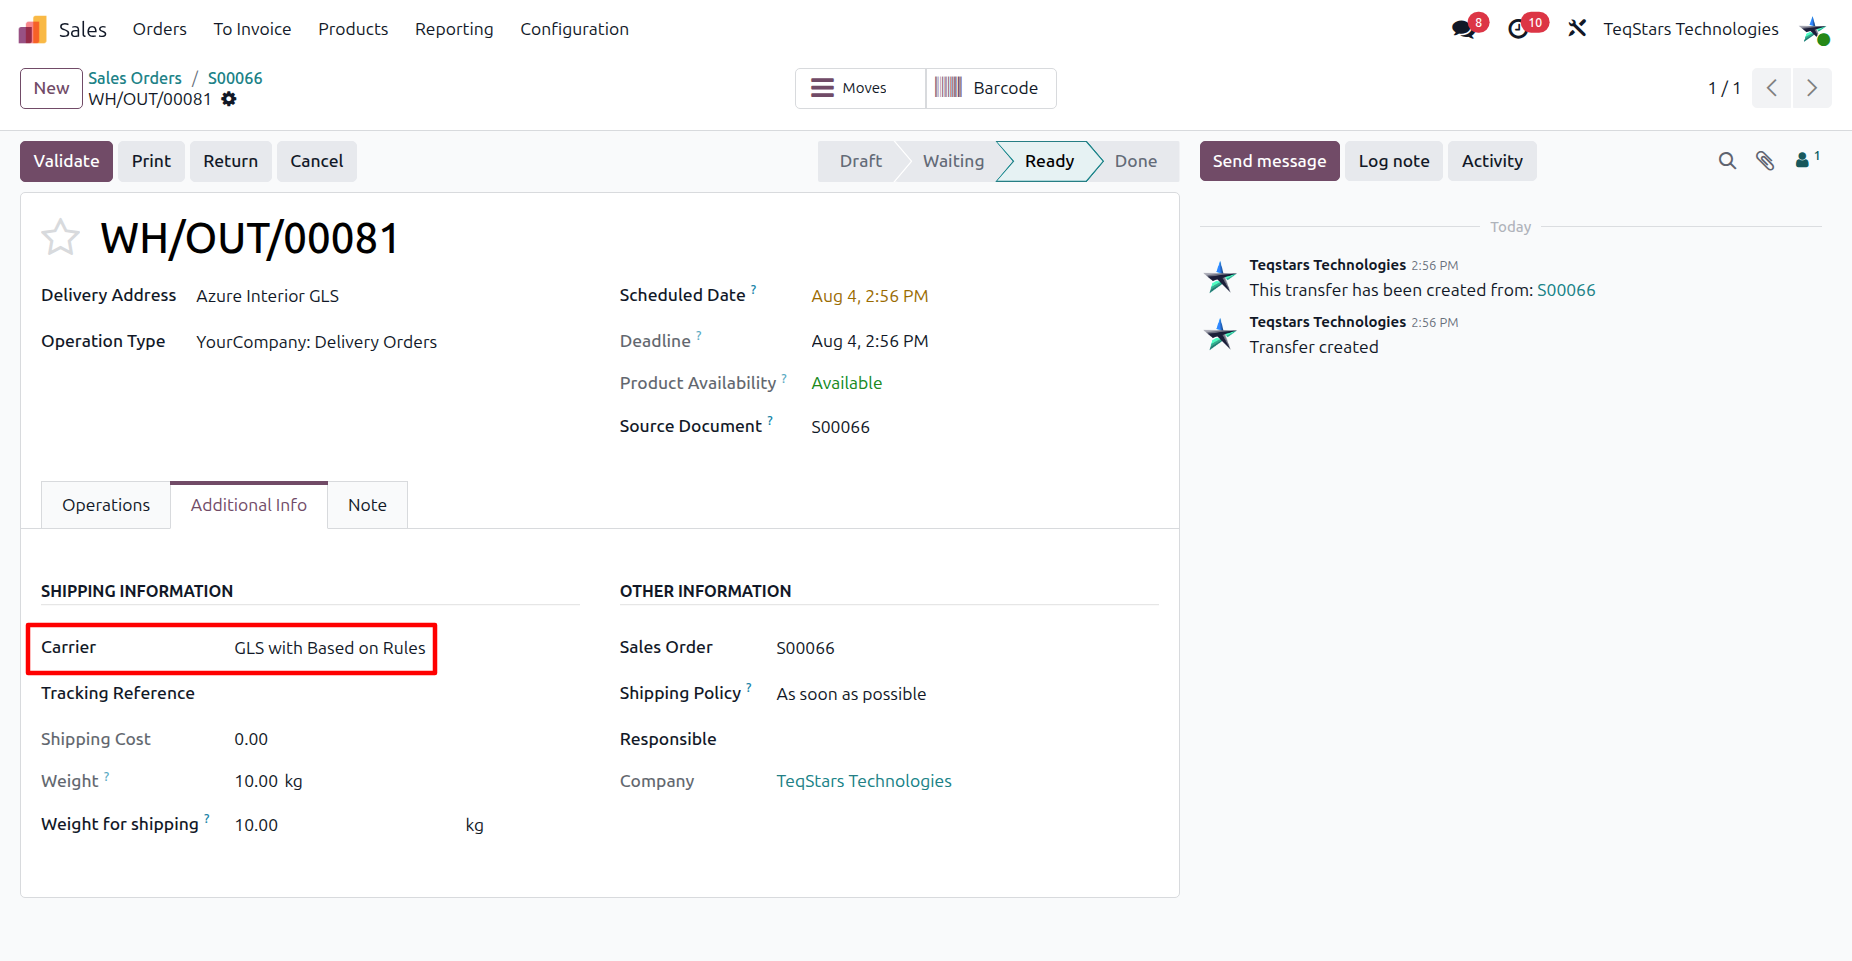
Carrier: Choose the GLS delivery method you configured.
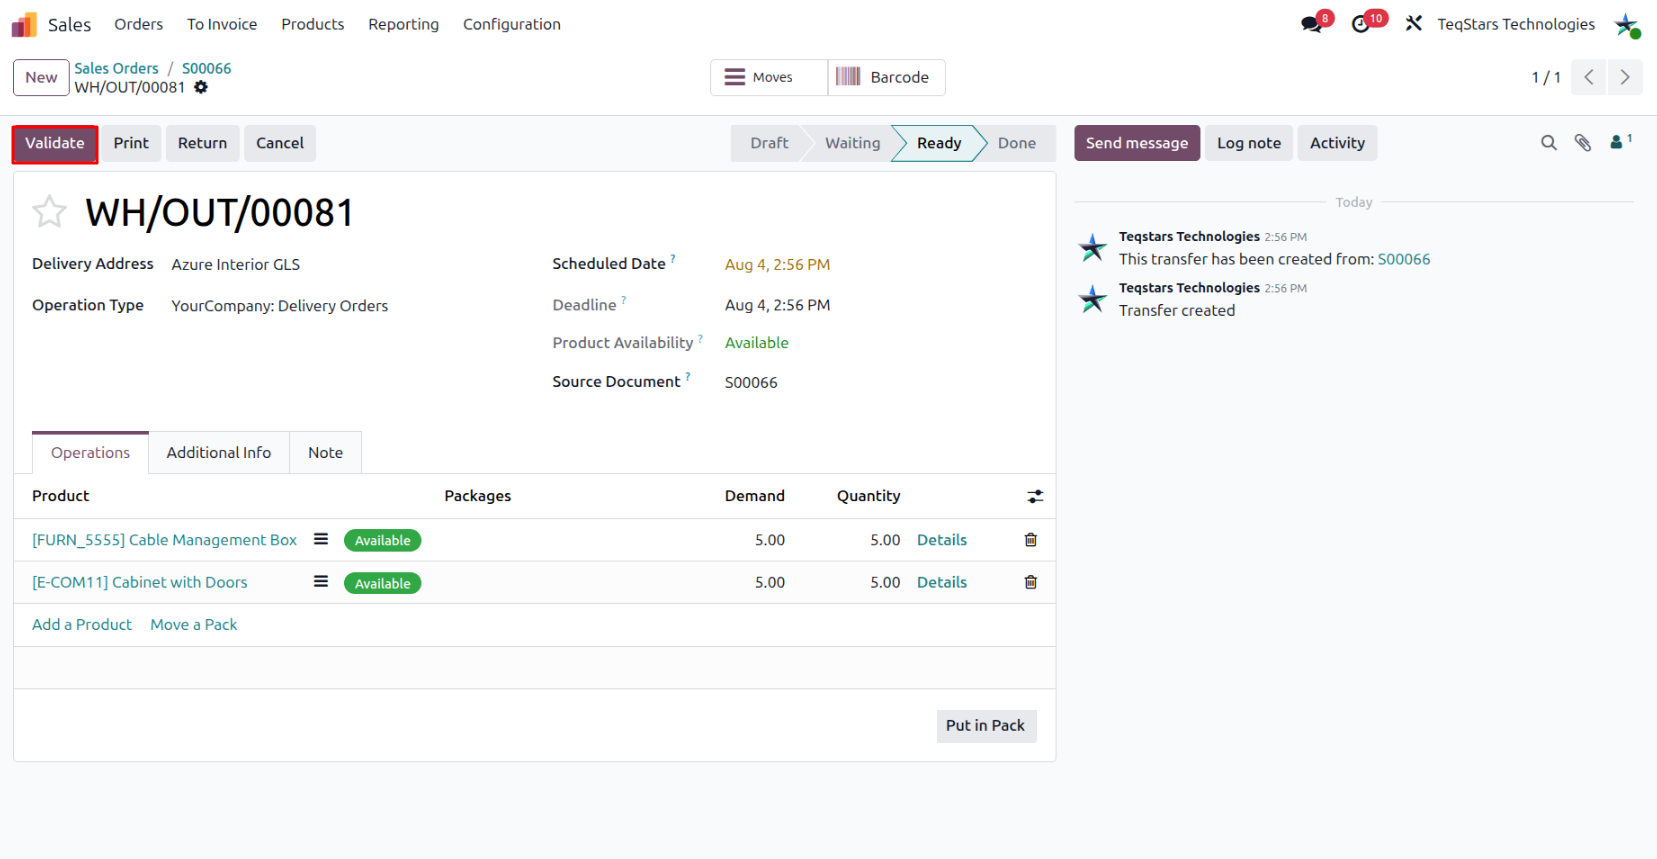
Validate Delivery Order
Click Validate to create the shipment in GLS and generate the label.
Warning
GLS validates the whole shipment before creating it. If any detail is wrong or unsupported, the API rejects the request with a Bad Request error, no label is generated, and the delivery order stays un-validated. Odoo shows the error message returned by GLS. Review it, correct it, and validate again.
Tracking and shipping information in delivery order
Once the delivery order is validated, the shipment is registered with GLS and the tracking and label information is recorded on the Delivery order.
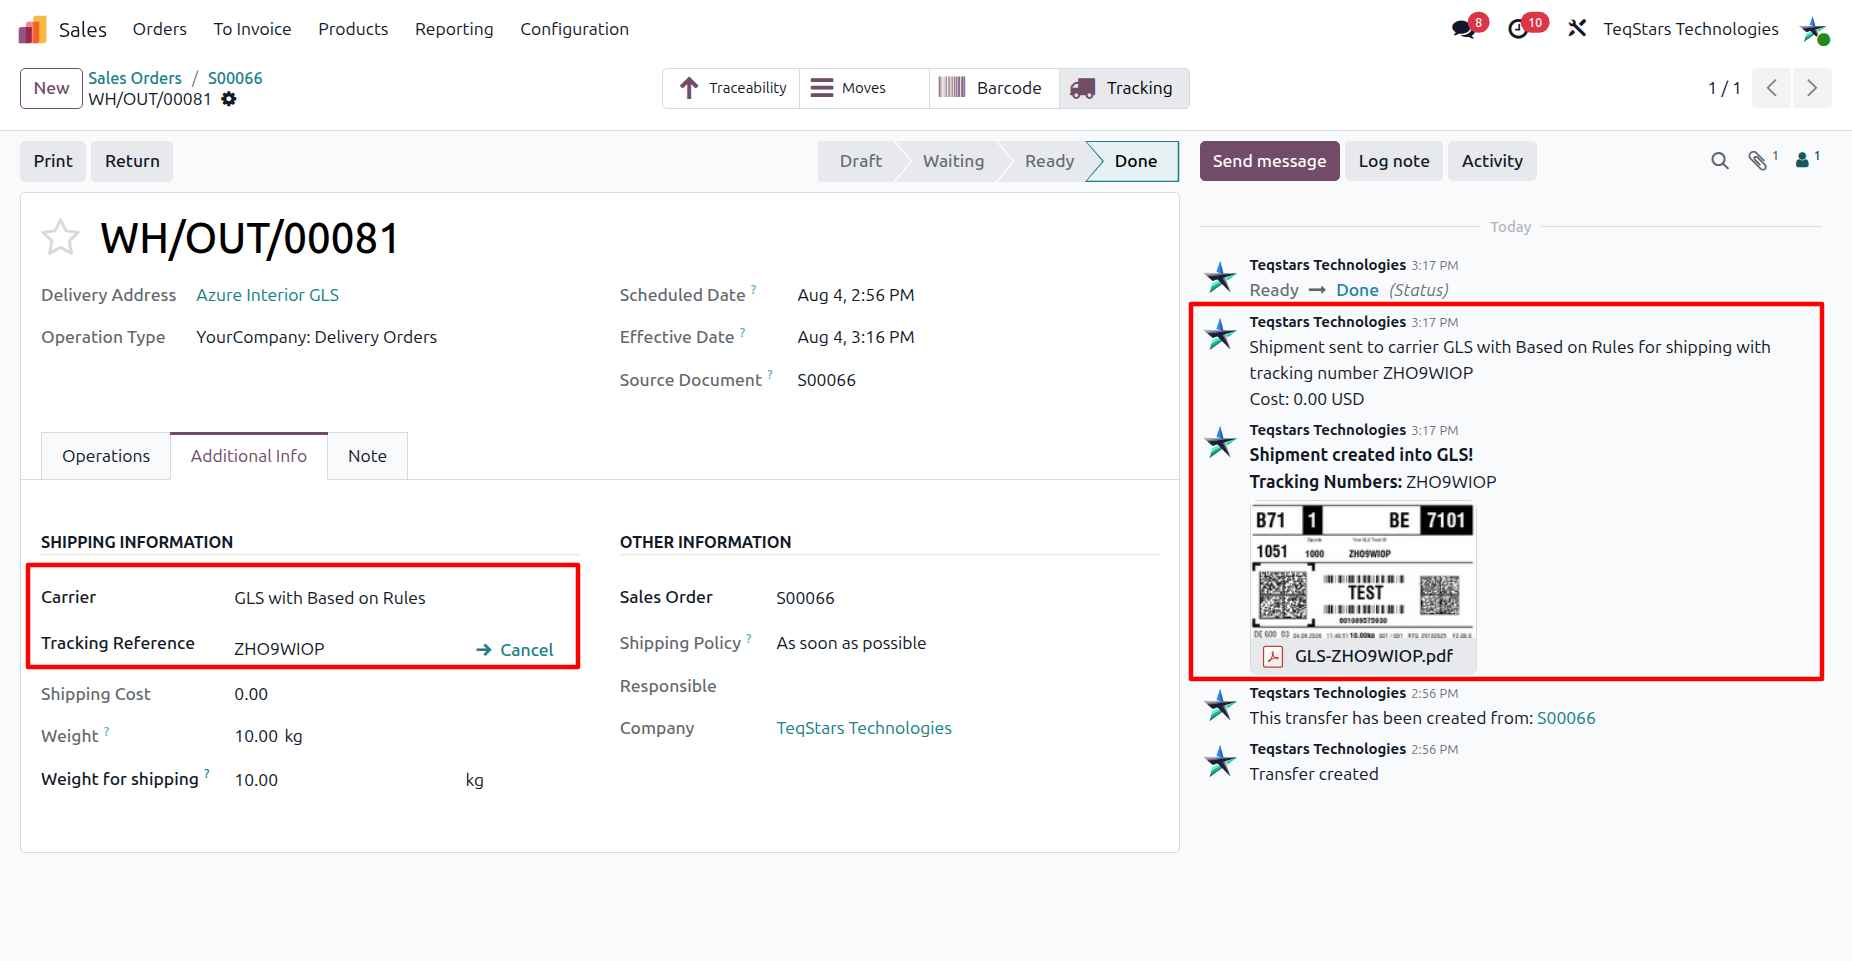
- After validation:
The Tracking number(s) are generated, and a message listing them is posted in the chatter.
The Shipping Label is attached to the delivery order chatter.
Realtime Tracking
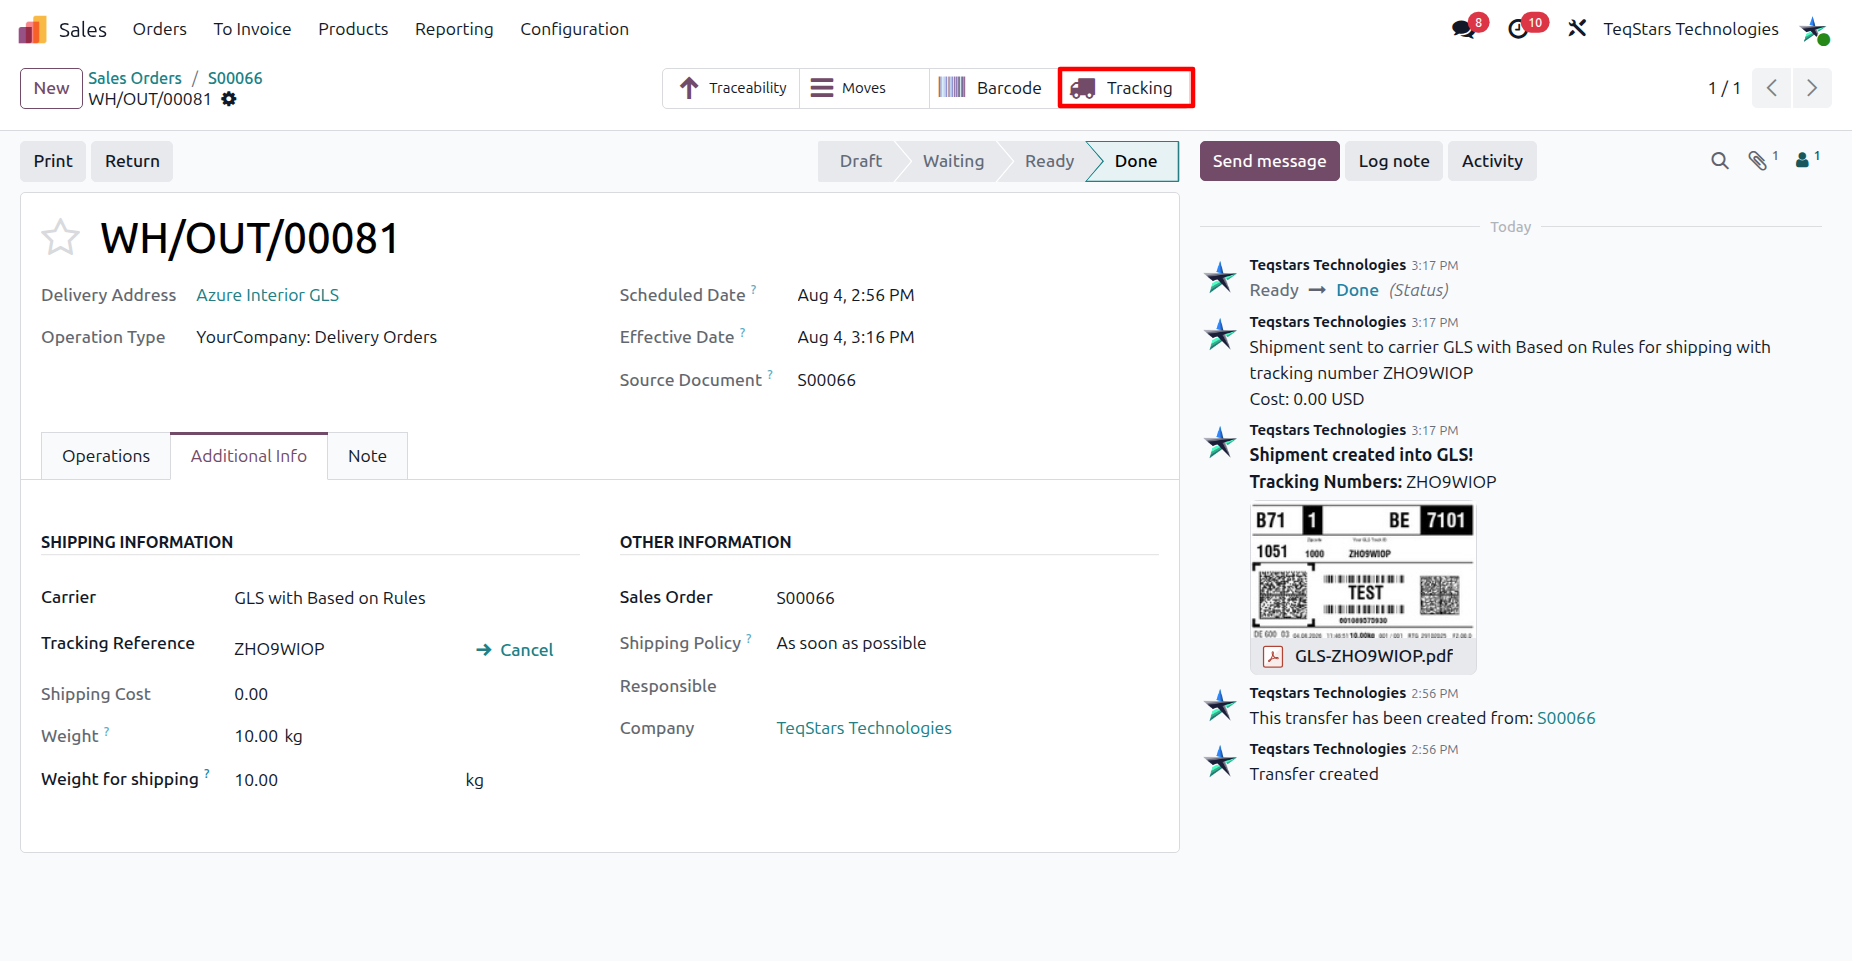
When you click on Tracking, it will show the detailed status, location, and updates for the shipment, allowing you to stay informed on its progress in real-time.
Note
Tracking opens GLS’s own tracking page in a new tab; the delivery status is not synced back into Odoo.
View Generated Label
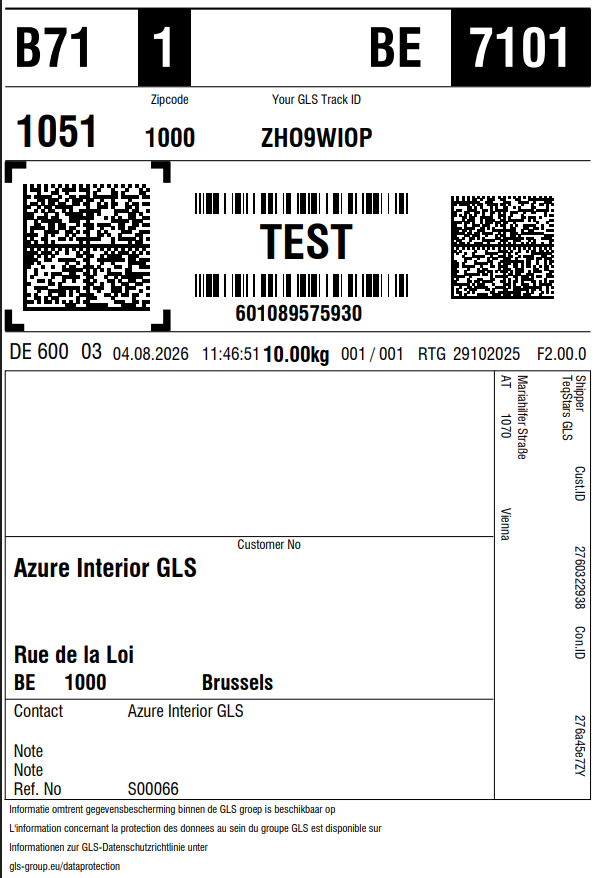
Shipping labels are automatically generated in the chosen format (PDF, PNG, or ZPL) and attached to the delivery order. When an order ships in several parcels, all PDF labels are merged into a single document.
Shipment Cancellation
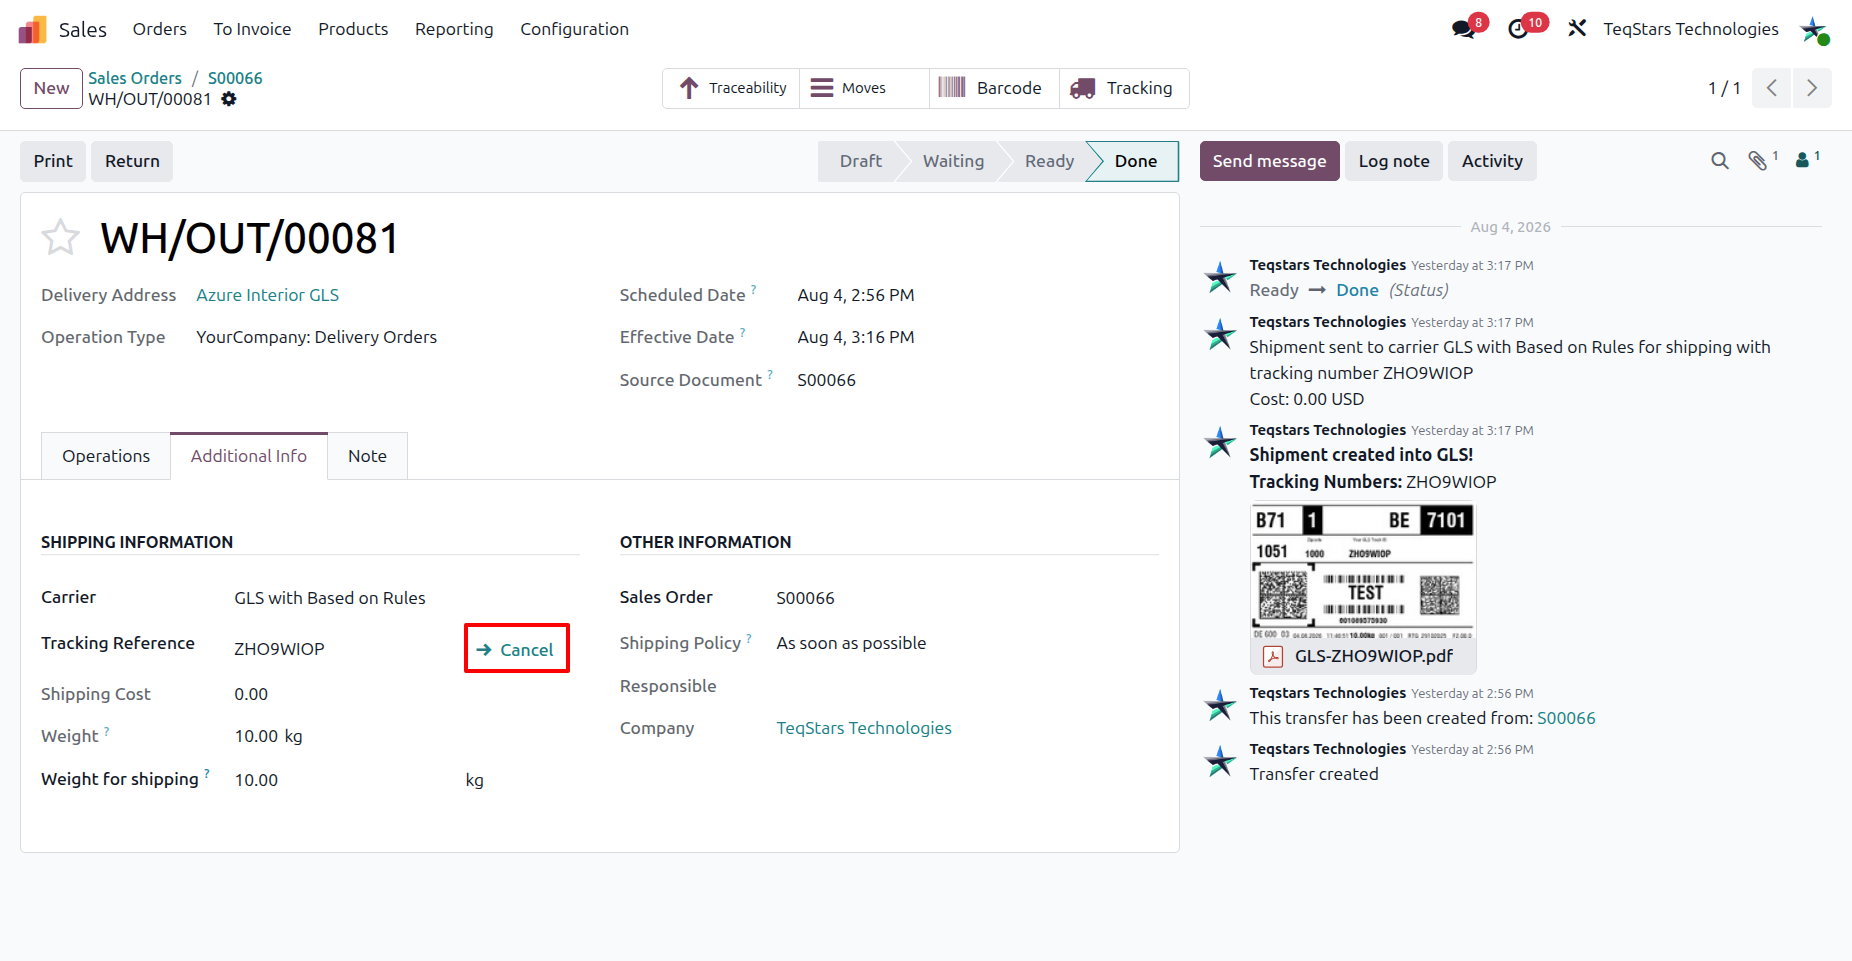
You can cancel a registered GLS shipment directly from Odoo. Open the delivery order and click Cancel. Odoo sends the cancellation request to GLS for each parcel and posts the result in the order chatter.
Note
Cancellation is a request to GLS. It succeeds only while the parcel has not yet been handed over for transport, and GLS may confirm it immediately or mark it as pending; either way the shipment is cancelled. If the parcel is already in transit, GLS refuses the request.