Connect a New AI Tool
The Connect a New Tool wizard is the single starting point for creating any connection — whether it is a quick API key for a desktop client, a browser-login OAuth connection for claude.ai or ChatGPT, or a custom OAuth client for a server-to-server integration.
This page is the overview of the wizard. Each authentication path has its own dedicated page with the full step-by-step walkthrough.
Where to find it
Two entry points open the wizard:
→ click the Connect a New Tool button in the header.
→ click Connect a New Tool at the top of the list.
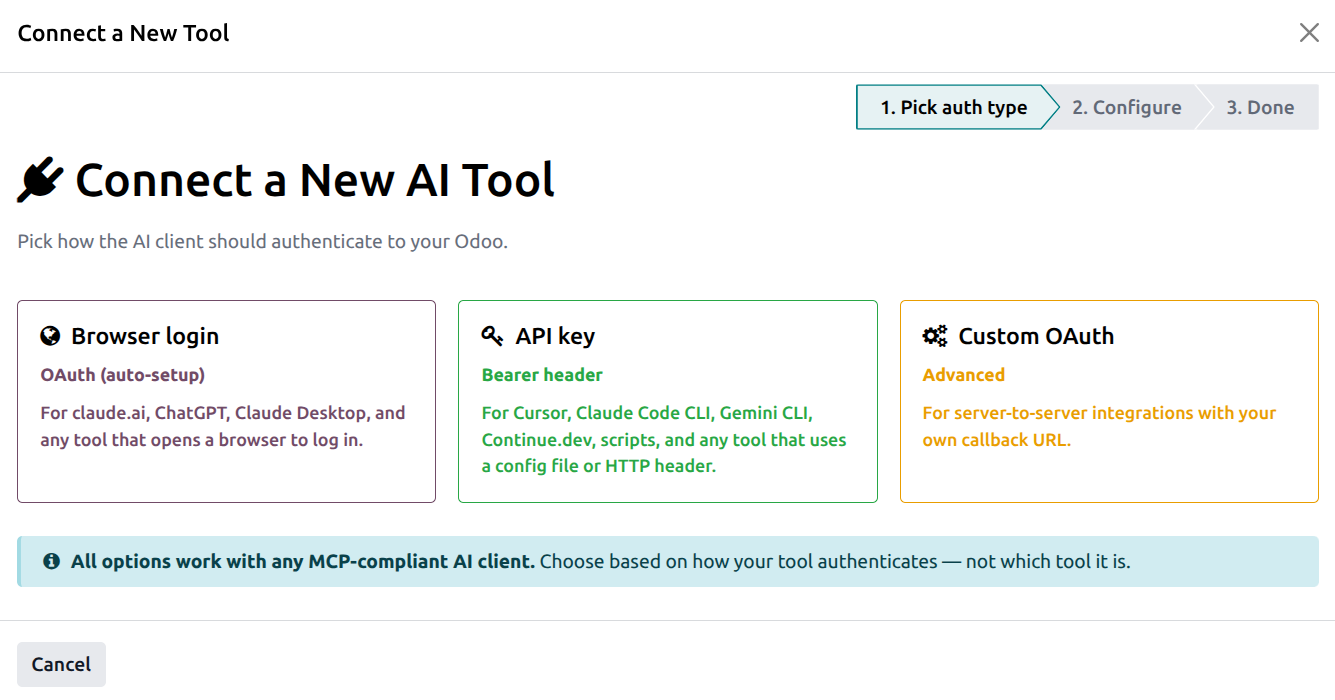
Pick how the AI client should connect
The wizard’s first screen shows three large cards. Pick the one that matches your AI client and continue on the dedicated page for that path:
Browser login (OAuth, auto-setup) — For claude.ai, ChatGPT, Claude Desktop, and any tool that supports MCP browser-based OAuth. The AI tool opens a browser, you log in to Odoo, click Allow, and the connection appears automatically.
Full walkthrough: Browser Login (OAuth) — claude.ai, ChatGPT.
API key (Bearer header) — For Cursor, Claude Code CLI, Gemini CLI, Continue.dev, custom scripts, or anything that lets you set an HTTP
Authorization: Bearer <token>header. You’ll get a one-time plaintext key to copy into the tool.Full walkthrough: API Key (Bearer) Connections.
Custom OAuth (advanced) — For server-to-server integrations with your own callback URL — e.g. a custom internal app, a chatbot platform, or any service that runs the OAuth flow on a backend.
Full walkthrough: Custom OAuth Connections.
Tip
Pick by how your tool authenticates, not by which tool it is. The same Claude Desktop, for instance, supports both the browser-login OAuth flow and an API key — either works.
Note
The wizard never writes anything to the database until you reach its final step and click Save Connection (or Finish for Browser login). Closing the wizard early discards everything — no half-created connection ever ends up in your Connections list.