Generate PrestaShop Credentials
To connect Odoo to your PrestaShop store you need two values: your store Shop URL and a Webservice API Key, generated from the Web Service settings in the PrestaShop Back Office.
Enable the Web Service and Create a Key
In your PrestaShop Back Office, go to .
Set Enable PrestaShop’s webservice to Yes and save.
Click Add new webservice key, then Generate a key (a 32-character key is created).
Set Status to Enabled and grant the key View (GET), Modify (PUT), Add (POST) and Delete permissions on the resources you want to sync (products, combinations, orders, stock, categories, manufacturers, and so on). Save.
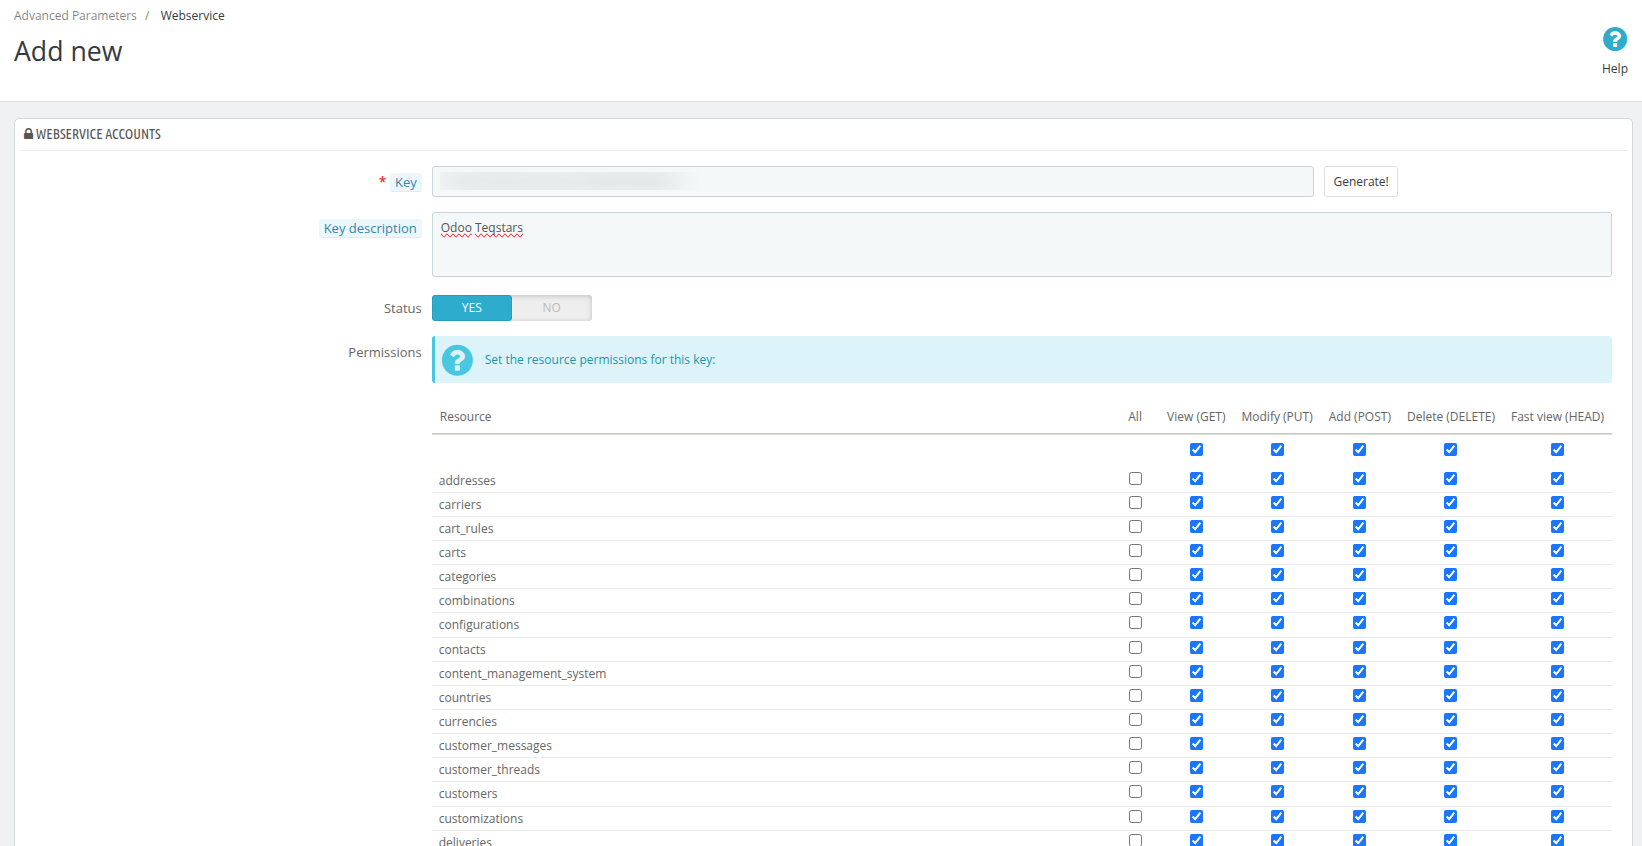
Warning
A key without write permissions cannot export products, update stock or push order status. Grant the resources you need with full (GET/POST/PUT/DELETE) access.
Tip
The Admin Folder is the randomized folder name of your PrestaShop install (e.g.
admin123uzpyye). It is optional, but required for the Show in Marketplace
button to deep-link a listing into the Back Office.
Paste the Credentials in Odoo
Open your PrestaShop instance and, on the Credentials tab, fill in the Shop URL
(with https://), the Webservice API Key and, optionally, the Admin Folder.

Test the Connection
Click Test Connection. On success a confirmation appears and you can finish configuring the instance.

Note
Your Shop URL must include http or https and must not contain the admin
folder, it should end with the domain (e.g. https://mystore.com).