Create an Etsy instance in Odoo
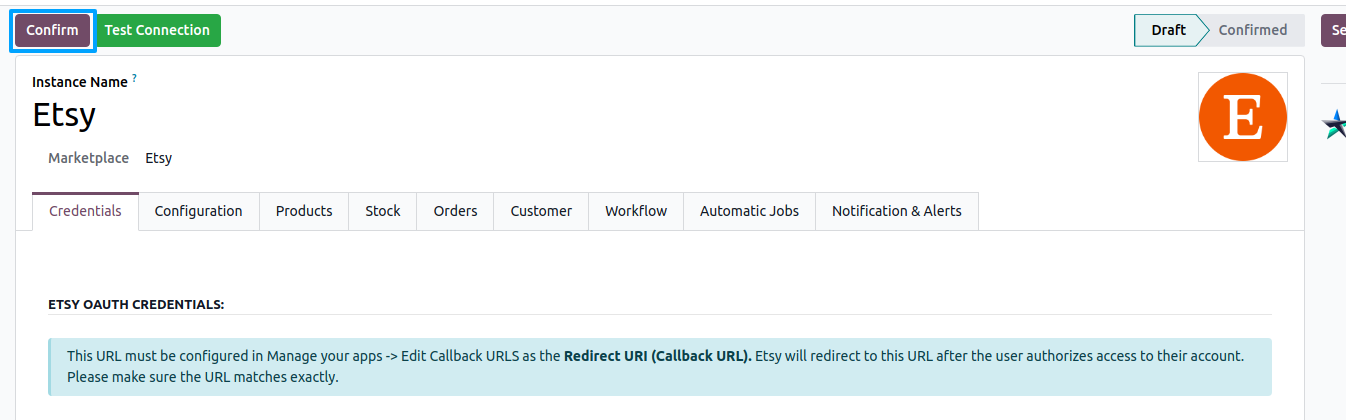
To create your Etsy instance in Odoo, navigate to and click on New.
Choose a meaningful name for your Instance (e.g.
Etsy Store), and selectEtsyon Marketplace.On the Credentials tab, fill the required Etsy API credentials. Follow the Generate Etsy API Credentials guide to set up credentials from the Etsy Developer Portal and connect your Etsy account.
Let’s begin with the instance configuration process for the Etsy Odoo Connector. By following the configurations below you’ll be able to set up and customize the integration according to your business needs.
Last Processed On
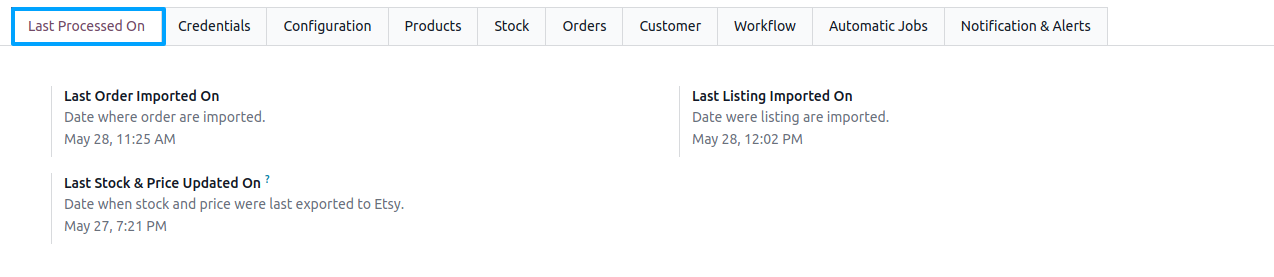
Last Processed On refers to the date that indicates the last time a specific operation or task was processed or executed. It typically represents the date and time of the most recent successful execution of a particular operation.
In most cases, the Last Processed On date is set when the Scheduled Actions are executed.
Configurations
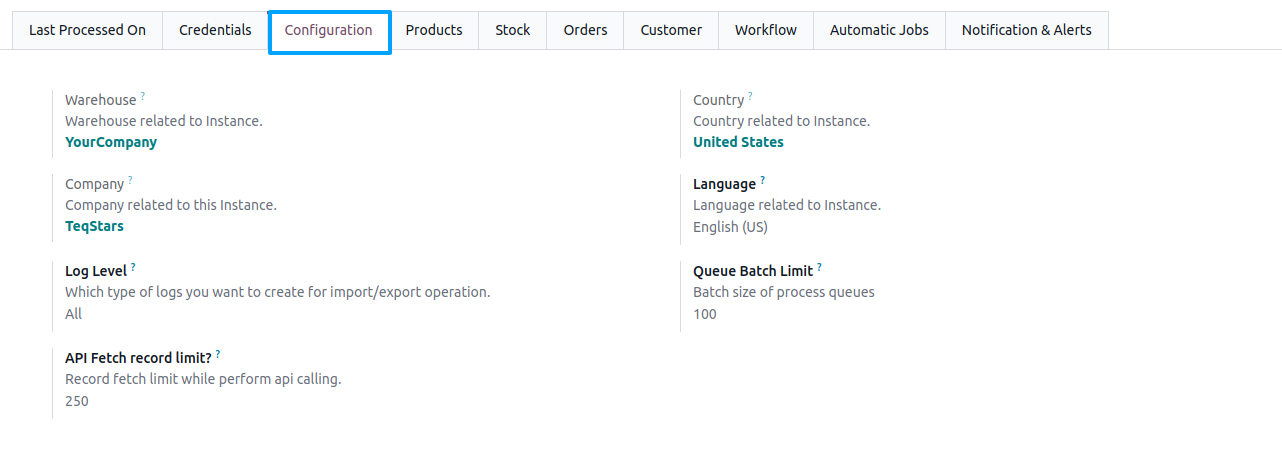
Warehouse
This warehouse will act as the default warehouse for the instance.
Language
Select the language related to the instance (e.g., English (US)).
Company
Choose the company related to the instance.
Country
Select the country related to the instance (e.g., United States).
Log Level
Choose which type of log level you would like to have. You can choose between
ALL,SUCCESS, orERROR. Defaults toERROR. The system creates logs for each marketplace operation. To view the logs, navigate to .
Queue Batch Limit
Defaults to 100 records. We do not suggest changing this.
Note
To modify the Queue Batch Limit, activate the developer mode and navigate to and open the Configuration tab.
Product Configurations
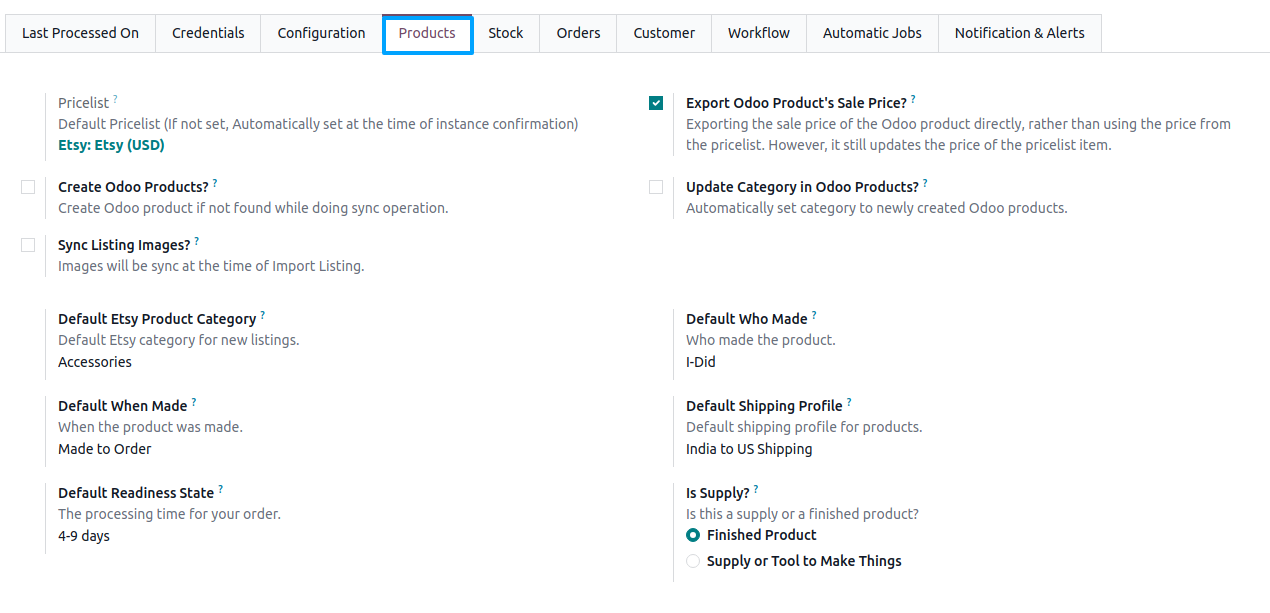
Pricelist
Pricelist refers to a pricing configuration that determines the prices of products during the product sync operation between Etsy and Odoo. When prices are exported during synchronization, this pricelist is used to set the appropriate prices.
Export Odoo Product’s Sale Price?
When exporting Odoo products, the standard behavior is to export the prices based on the pricelist configured in the Instance. However, if you want to export the product’s sale price directly, bypassing the pricelist, you can customize the export functionality by enabling this option.
Create Odoo Products?
Enabling the Create Odoo Products? option allows the Etsy Odoo Connector to automatically create new products in your Odoo catalog when a matching product is not found based on the SKU. This feature streamlines the product synchronization process by creating products in Odoo, ensuring that all products from your Etsy store are accurately represented in your Odoo ERP system.
Tip
If you already have existing products in your Odoo ERP system, it is not recommended to enable the Create Odoo Products? option.
Update Category in Odoo Products?
This ensures that when a new product is added to the Odoo ERP system, it is automatically set to the category received from Etsy.
Sync Listing Images?
This means that the images associated with the products or items being imported from the Etsy to Odoo. By syncing the listing images during the import process, the images will be available and properly associated with the respective listings within the Odoo system.
The following defaults are applied to new listings created in Odoo before they are exported to Etsy:
Default Who Made
Default value for the Etsy Who Made attribute -
I Did,Someone Else, orCollective.
Default When Made
Default value for the Etsy When Made attribute (e.g.
Made to Order, a year range).
Is Supply?
Whether the shop’s items are a
Finished Productor aSupply or Tool to Make Things.
Stock Configurations

Stock Based On
When exporting inventory from Odoo to Etsy, you can choose
Free To Use Quantity,Quantity On Hand, orForecasted Quantitybased on your requirements, ensuring accurate inventory management between Etsy and Odoo.Tip
Forecasted Quantity: Quantity on Hand - Outgoing + Incoming
Free To Use Quantity: Quantity on Hand - Reserved Quantity
Orders Configurations
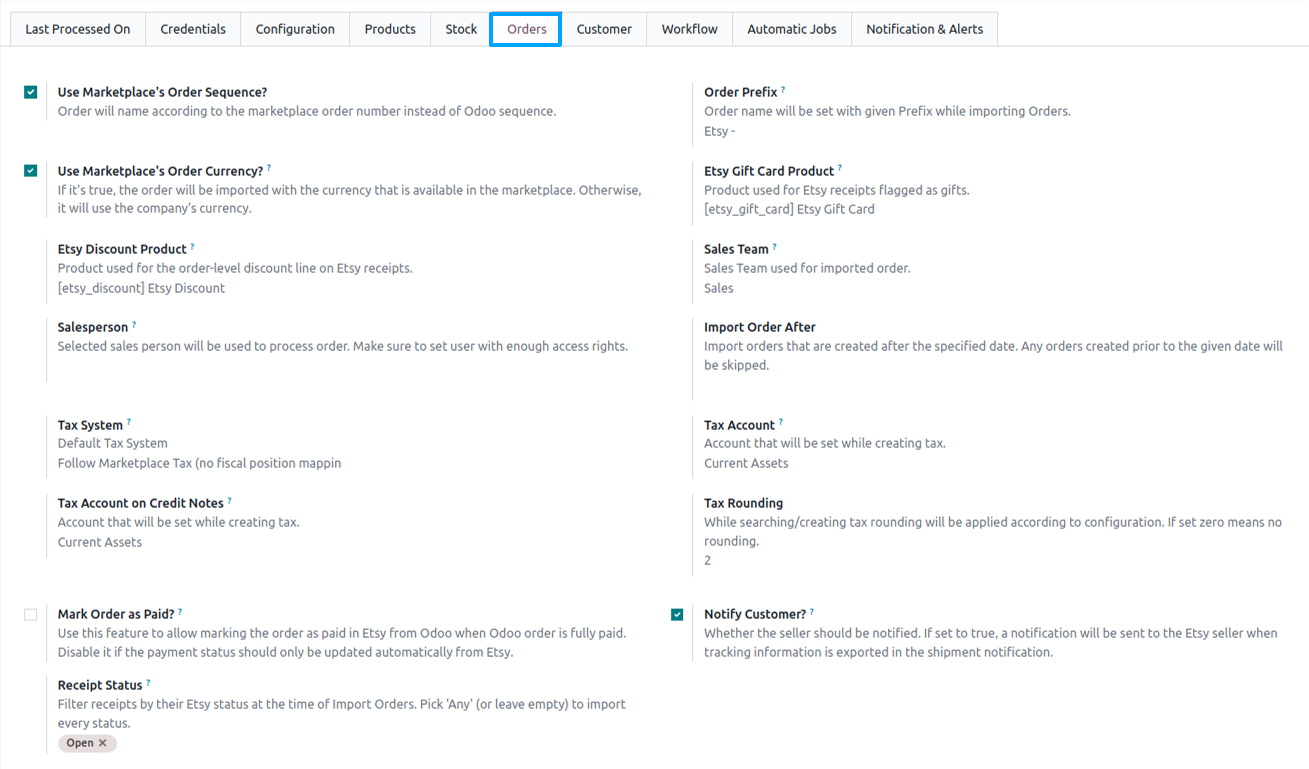
Use Marketplace’s Order Sequence?
This feature allows you to name orders in Odoo based on the Etsy order number rather than using the default Odoo sequence. This ensures that the order names in Odoo correspond directly to the order numbers generated by Etsy, providing consistency and easier cross-referencing between Odoo and Etsy.
Order Prefix
This feature allows you to specify a prefix that will be added to the names of imported orders. When importing orders from your Etsy store to your Odoo ERP system, the connector will automatically set the order name with the given prefix. This helps to easily identify and distinguish the imported orders in your Odoo system.
Use Marketplace’s Order Currency?
When enabled, imported orders are assigned the currency available on Etsy. In this case, the order currency will match Etsy’s currency.
If the feature is disabled, the company’s default currency will be used for the imported orders.
Receipt Status
Filter the receipts imported from Etsy by their status at the time of Import Orders. You can pick statuses such as Open, Payment Processing, Paid, Completed, or Canceled. Pick
Any(or leave empty) to import every status.
Mark Order as Paid?
When enabled, a button appears on the order to push the paid status back to Etsy once all Odoo invoices for the order are paid. Disable it if the payment status should only be updated automatically from Etsy.
Notify Customer?
When enabled, the seller is notified by email when tracking information is exported to Etsy in the shipment notification.
Delivery Product
The product used to represent the shipping charges on imported Etsy orders.
Etsy Gift Card Product
The service product used when an Etsy receipt is flagged as a gift.
Etsy Discount Product
The service product used for the order-level discount line created when an Etsy receipt’s discount exceeds the per-line coupons.
Sales Team
By configuring this feature, you can ensure that all imported orders from Etsy are automatically assigned to the specified default Sales Team in Odoo.
Salesperson
Select a salesperson who will be responsible for processing the orders received from your Etsy store. It is important to ensure that the assigned user has sufficient access rights in Odoo.
Import Order After
This feature allows you to import orders from your Etsy store that were created after a specific date. By setting this date, any orders created before the specified date will be skipped during the import process.
Tax System
The tax system in Etsy Instance offers three options for handling taxes when importing orders from Etsy:
Odoo’s Default Tax Behaviour (Taxes will be taken from Odoo Product):
With this option selected, Odoo will use the tax information defined on the Odoo products and related fiscal rules. When importing orders from Etsy, the connector ignores Etsy tax lines and applies the taxes configured on the corresponding Odoo products. This keeps tax calculation fully aligned with your Odoo tax configuration.
Follow Marketplace Tax (no fiscal position mappings):
With this option, the connector follows the tax amounts coming from Etsy. For each tax in the Etsy order, Odoo looks for a matching tax; if it does not exist, a new tax can be created and linked to the configured Tax Account fields. The resulting Odoo taxes from Etsy are applied directly on the order and shipping lines without applying any fiscal position mappings.
Follow Marketplace Tax and applies fiscal position mappings:
This option also starts from the taxes provided by Etsy, creating or reusing matching Odoo taxes as needed. After determining the Odoo taxes based on Etsy tax lines, the connector applies the fiscal position of the order to remap those taxes before posting them on the order lines. This lets you respect Etsy tax amounts while still using Odoo fiscal position rules for accounting and reporting.
Tax Account
This allows you to specify the account to be associated with a tax when it is created in Odoo. This account is used for recording tax-related transactions and ensures accurate tracking and reporting of tax amounts within your Odoo ERP system.
Tax Account on Credit Notes
This allows you to specify the account to be associated with a tax on credit notes when it is created in Odoo.
Tax Rounding
When the Tax Rounding is enabled and set to zero, no rounding will be applied. This feature ensures that tax calculations are accurate and aligned with your specific tax regulations and requirements.
Create Single Invoice? (Only visible in developer mode)
When enabled, the invoice is created only when all products in the order are ready to be invoiced. This ensures a single consolidated invoice instead of multiple partial invoices.
Customer Configurations

Receivable Account
This allows you to specify the default account for receivables when creating customers. By setting this field to Account Receivable instead of the default account, you ensure that the receivable transactions, such as invoices and payments, associated with the customer are correctly accounted for in the Odoo ERP system.
Workflow Configurations
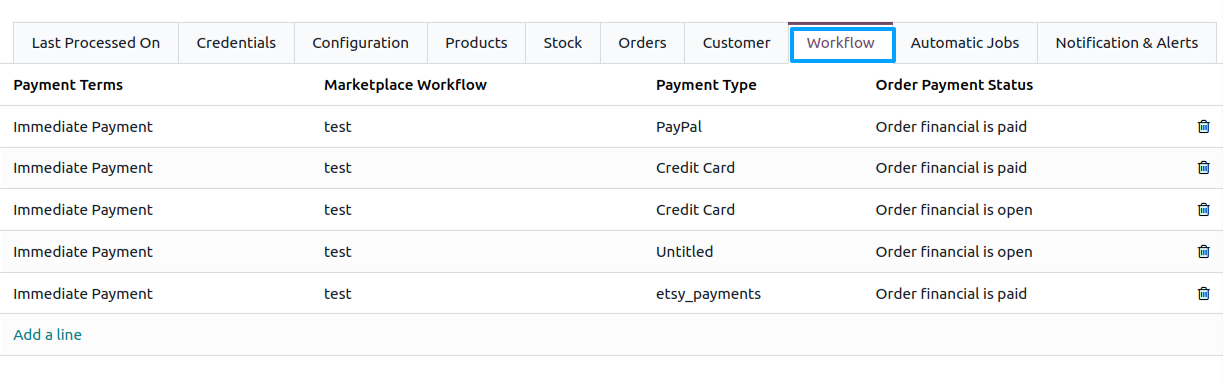
Workflow is a configuration setting used in the Etsy Odoo Connector that enables the automatic processing of orders imported from Etsy. This workflow automates various actions, including confirming orders, creating invoices, validating invoices, and registering payments.
By setting up the Marketplace Workflow, you can streamline the order processing cycle and save time by eliminating manual interventions. The workflow ensures that orders from Etsy are seamlessly processed and managed within your Odoo system.
Payment Terms
Payment Terms are set on the order at the time of creation and specify when and how the customer is expected to make the payment for their purchase.
Marketplace Workflow
It enables the automatic processing of orders from Etsy, including confirming orders, creating invoices, validating invoices, and registering payments.
To learn more about the details and configuration options of the Marketplace Workflow, please refer to the following link: Configure Marketplace Order Workflow
Payment Type & Order Payment Status
The order workflow can be defined based on the combination of the Payment Type (e.g. Etsy Payments) used for the transaction and the Order Payment Status of the order (Open, Payment Processing, Paid, Completed, Canceled, or Any).
The order processing is triggered based on the Order Payment Status received for the matched Payment Type.
By considering the Payment Terms, Payment Type, and Order Payment Status of an order, businesses can define an appropriate workflow that ensures smooth order processing and accurate payment handling.
Scheduled Actions Configurations
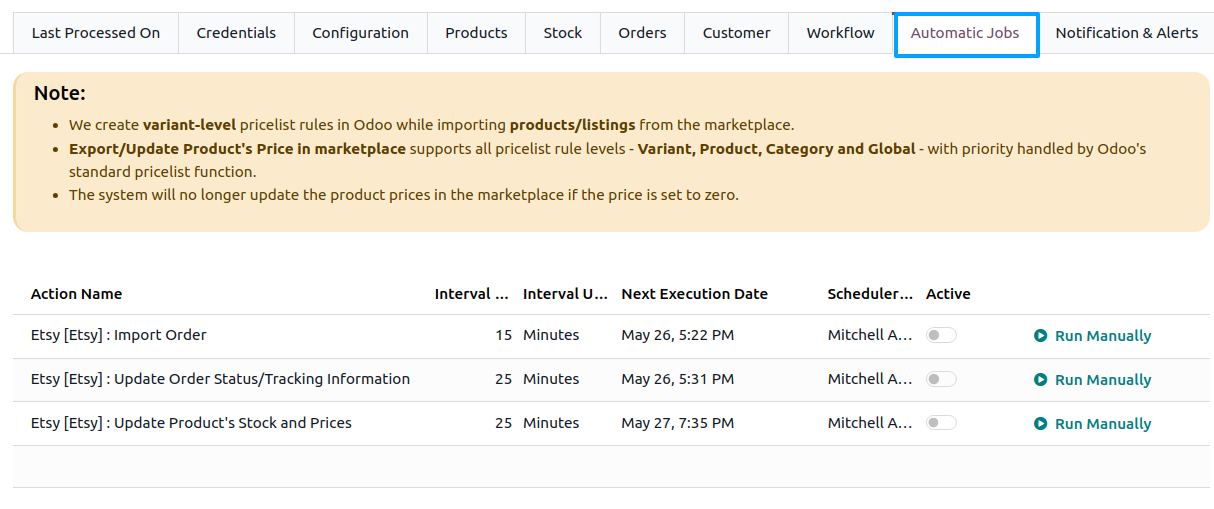
Scheduled Actions automate synchronization tasks between Etsy and Odoo. They run automatically at the configured intervals. The Etsy connector provisions the following scheduled actions when the instance is confirmed:
Import Order
Automatically imports new orders (receipts) from Etsy to Odoo for further processing and fulfillment.
Order configuration and Workflow configuration are used while importing and processing orders.
Update Order Status/Tracking Information
Exports the carrier and tracking number from Odoo to Etsy, marking the order as shipped.
Update Product’s Stock and Prices
Exports stock quantities and prices together from Odoo to Etsy through the Etsy
updateListingInventoryendpoint, keeping marketplace inventory and pricing accurate.Stock Based On and Pricelist are used while exporting stock and prices.
Note
It’s important not to schedule all your processes to run at the same time interval because it can consume a significant amount of your system resources. Leave a gap between them so your system can handle the workload efficiently.
Notification & Alerts
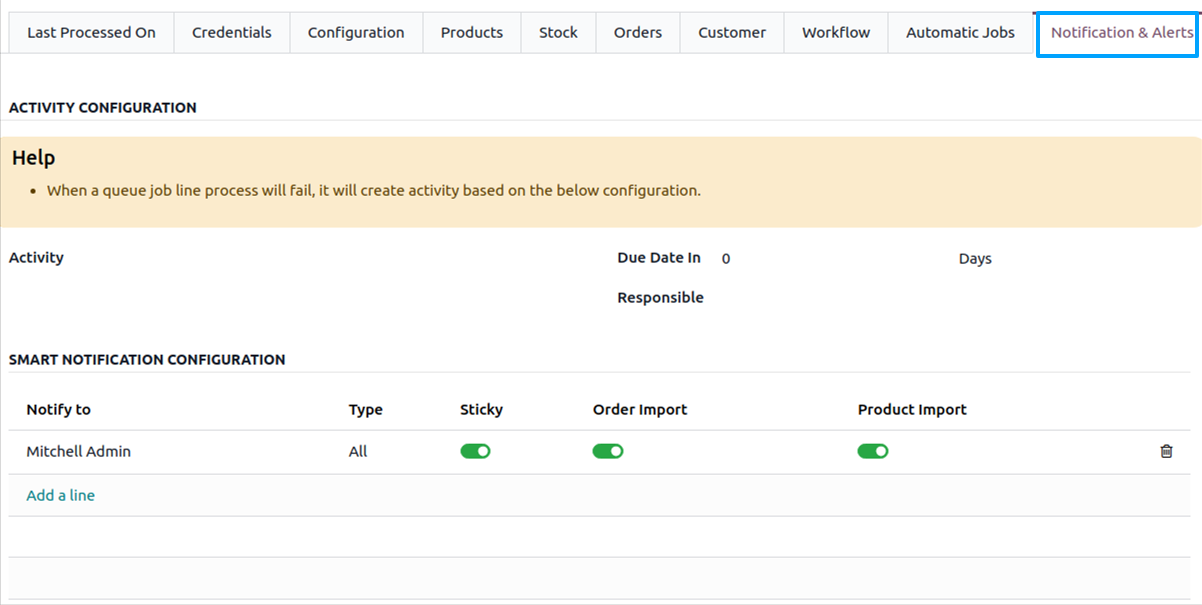
- Activity Configuration
When a queue job line process fails, the system creates an activity based on the specified configuration.
By configuring Activity, Due Date In and Responsible the system can automatically generate an activity when a queue job line process fails. The activity will be assigned to the responsible person and categorized based on the specified type of activity. This helps ensure that appropriate follow-up actions are taken to address and resolve any issues or errors encountered during the Queue job process.
Smart Notification Configuration
By configuring Smart Notification Configuration, users will receive timely updates regarding the success or failure of order processing and product imports. This helps them stay informed and take appropriate actions promptly when needed.
Confirming Instance
Once you are satisfied with the configuration, click the Confirm button.
When confirming the instance for the first time, the connector automatically imports the Etsy master data:
Shop details: Fetches and stores your Etsy shop information.
Shipping Profiles, Return Policies, and Readiness States: Imported from your Etsy shop.
Product Categories: Fetches the Etsy taxonomy. After the categories are imported, a wizard appears prompting you to fetch the category metadata (item conditions and category attributes).
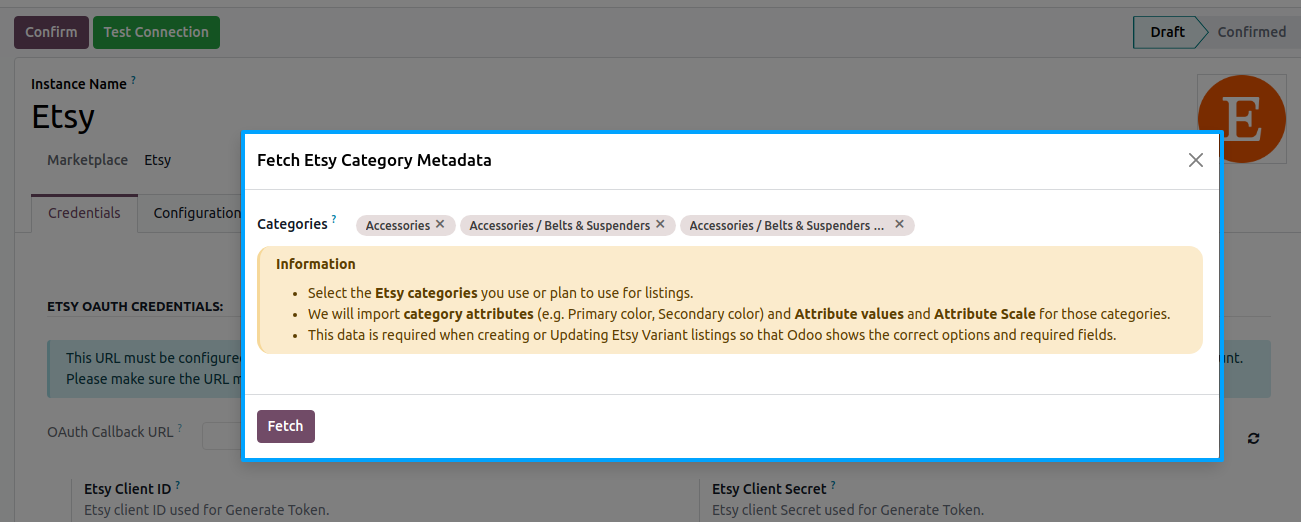
You can choose to:
Fetch: Select the categories (the ones you use or plan to use for listings) and fetch their item conditions and attribute properties and values from Etsy.
Ignore & Confirm: Skip this step and confirm the instance without fetching the metadata.
You can re-run this fetch at any time from the instance via the category metadata fetch action.
Sets Currency and Pricelist: Reads the shop currency from Etsy and sets the matching pricelist on the instance.
After confirmation, the instance state is set to Confirmed and ready for operations. You can then manually import master data, listings, and orders via the Operations popup.
Note
The Etsy account must be connected (via the Connect Etsy Account button on the Credentials tab) before confirming the instance.