
Quick Setup Wizard
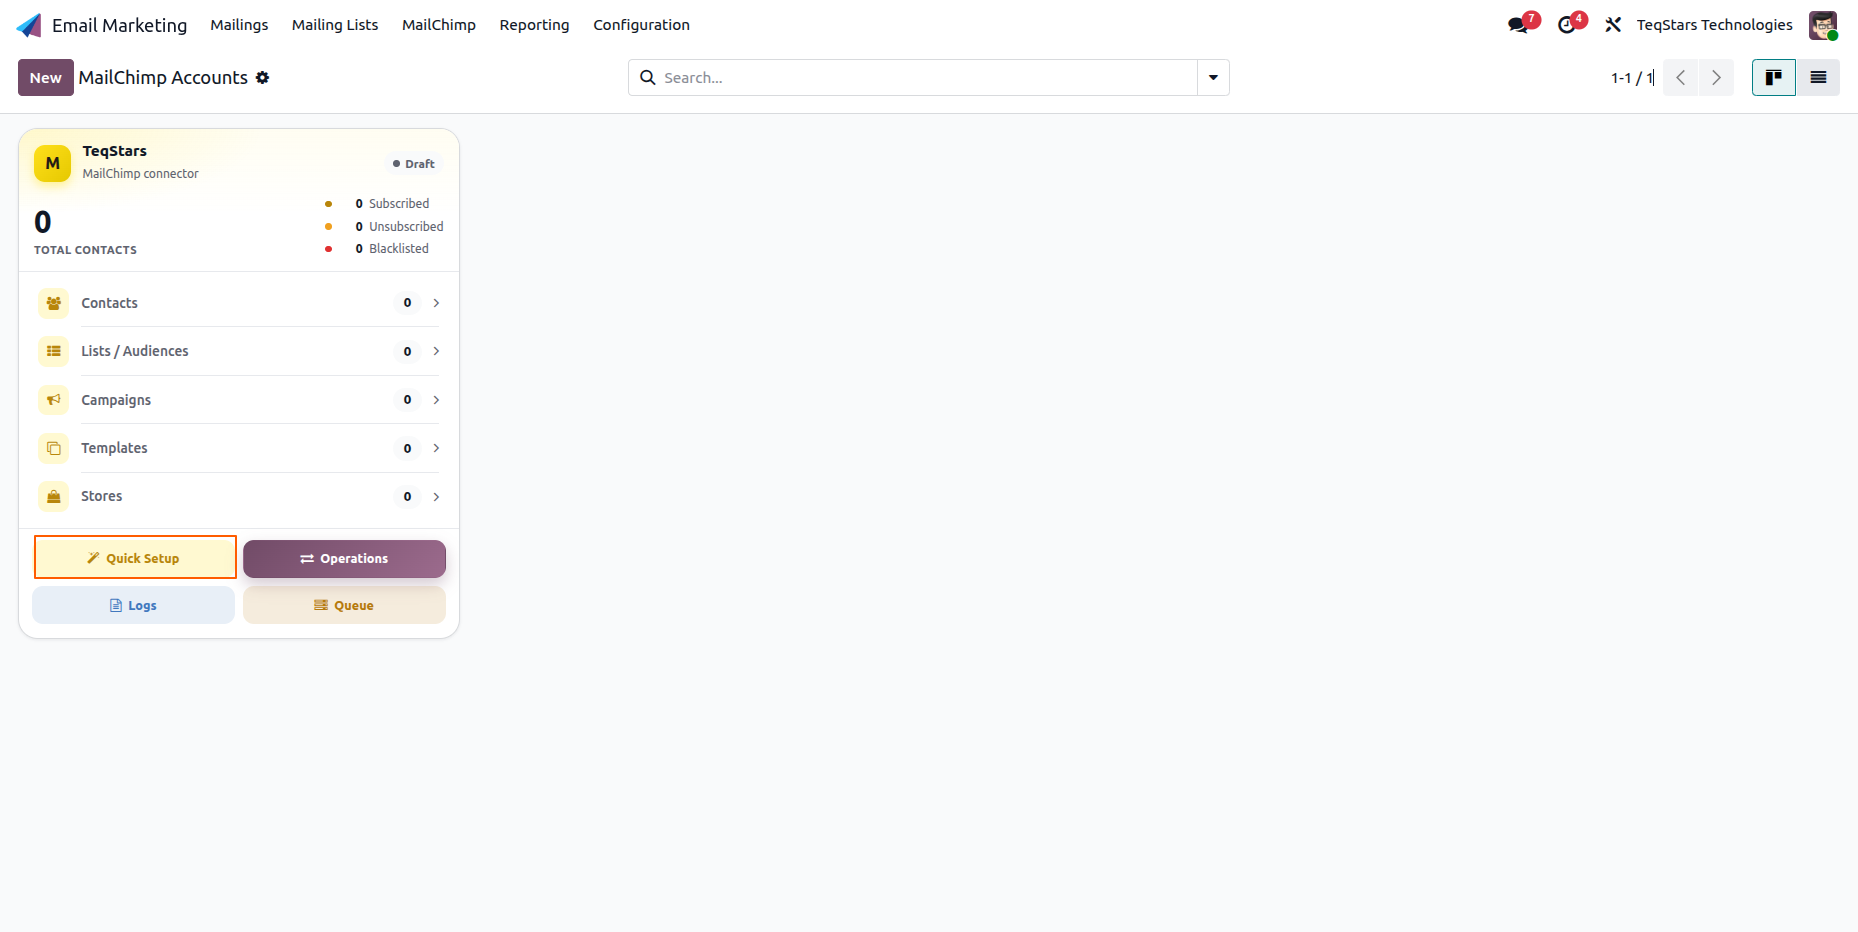
The Quick Setup wizard is the easiest way to connect a MailChimp account. It guides you through five simple steps such as connect your account, choose what to sync, link your audiences, map your fields, and finish. By the end, your account is ready for its first sync, with no need to set up each tab by hand.
Open it from the Quick Setup button on the MailChimp account dashboard ().
Step 1: Connect
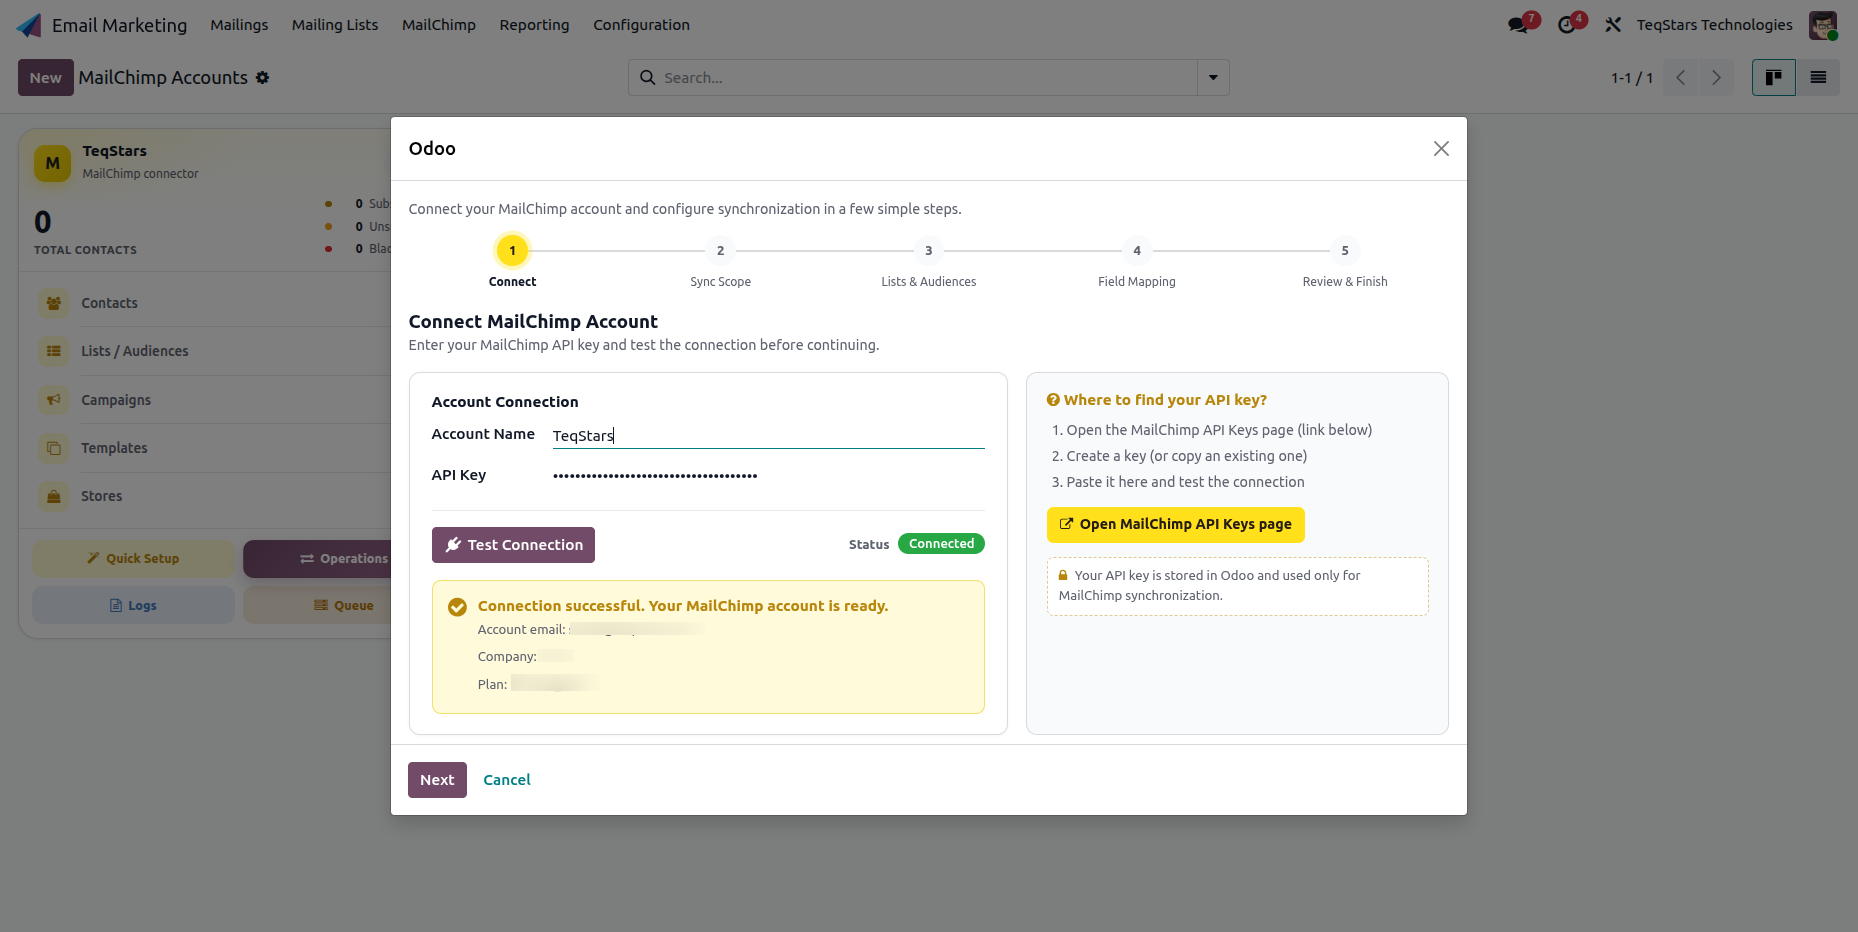
Enter an Account Name and paste your MailChimp API Key, then click Test Connection. The wizard verifies the key and shows the connected account email, company and plan.
Tip
The Where to find your API key? link takes you directly to the page in MailChimp where you create the key. See Connect Your MailChimp Account.
Step 2: Sync Scope
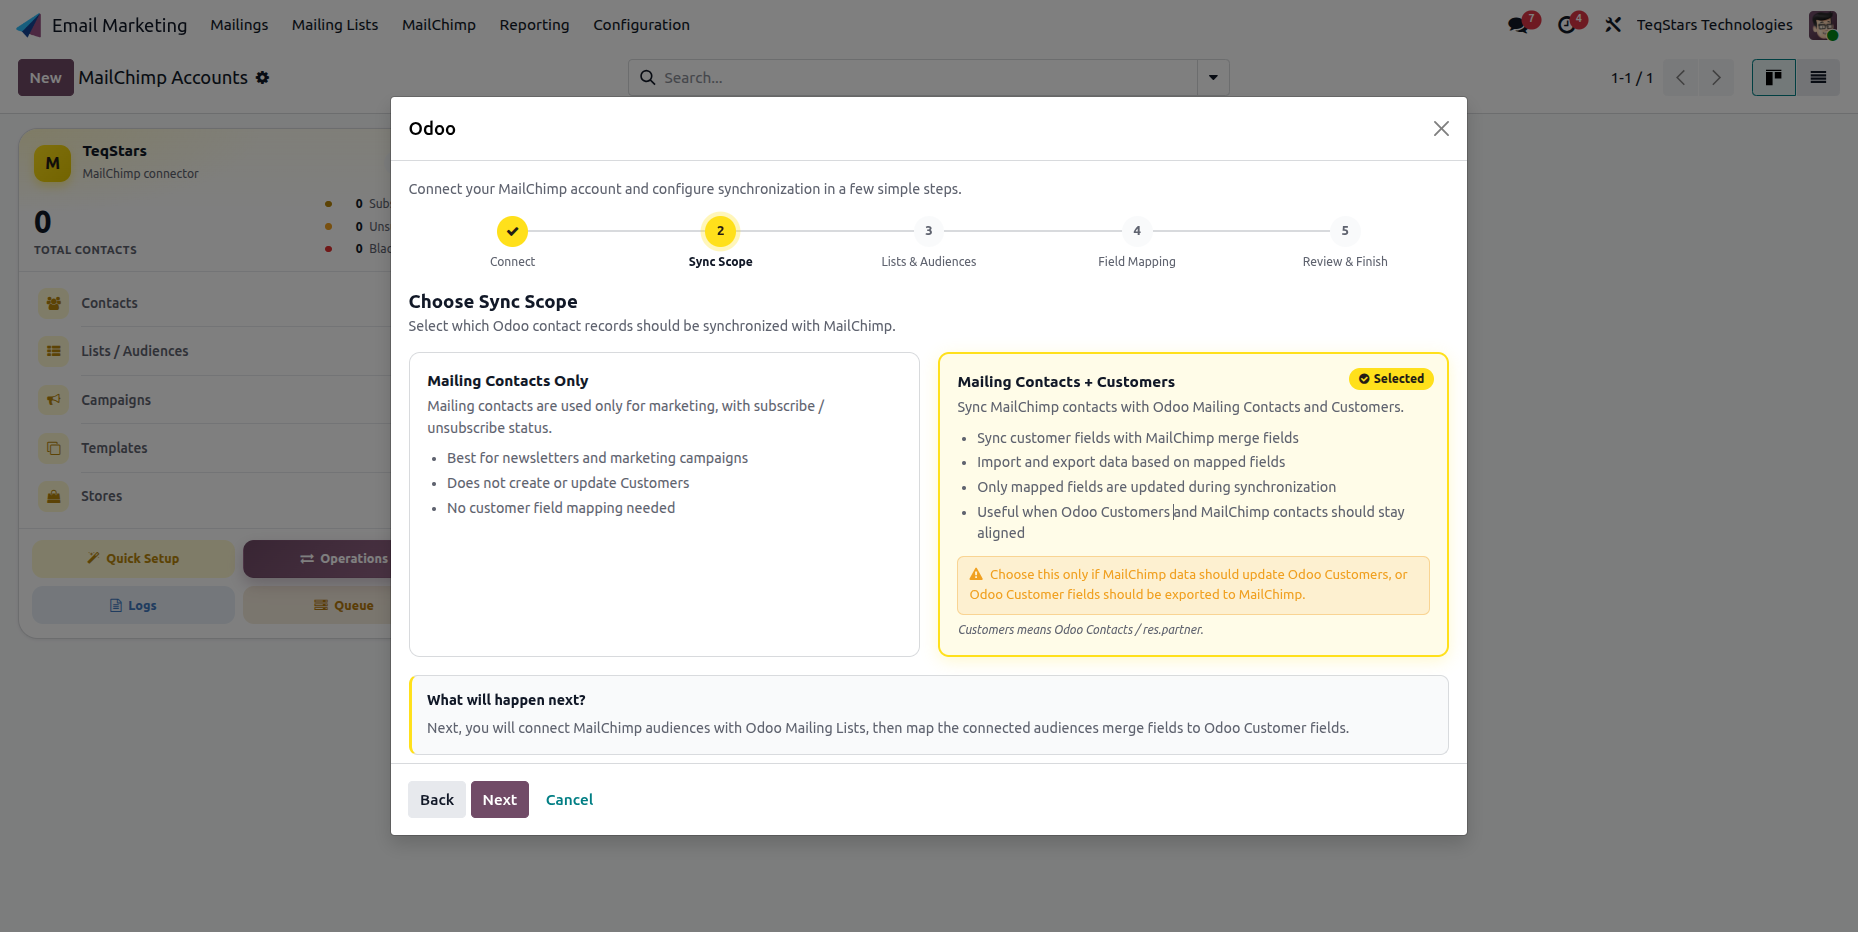
Choose how much of MailChimp you want to mirror in Odoo:
Mailing Contacts Only: Best for newsletters and marketing. MailChimp members become Odoo mailing contacts only.
Mailing Contacts + Customers: Also creates or links Odoo customers, so members are available for CRM, sales and ecommerce.
Step 3: Lists & Audiences
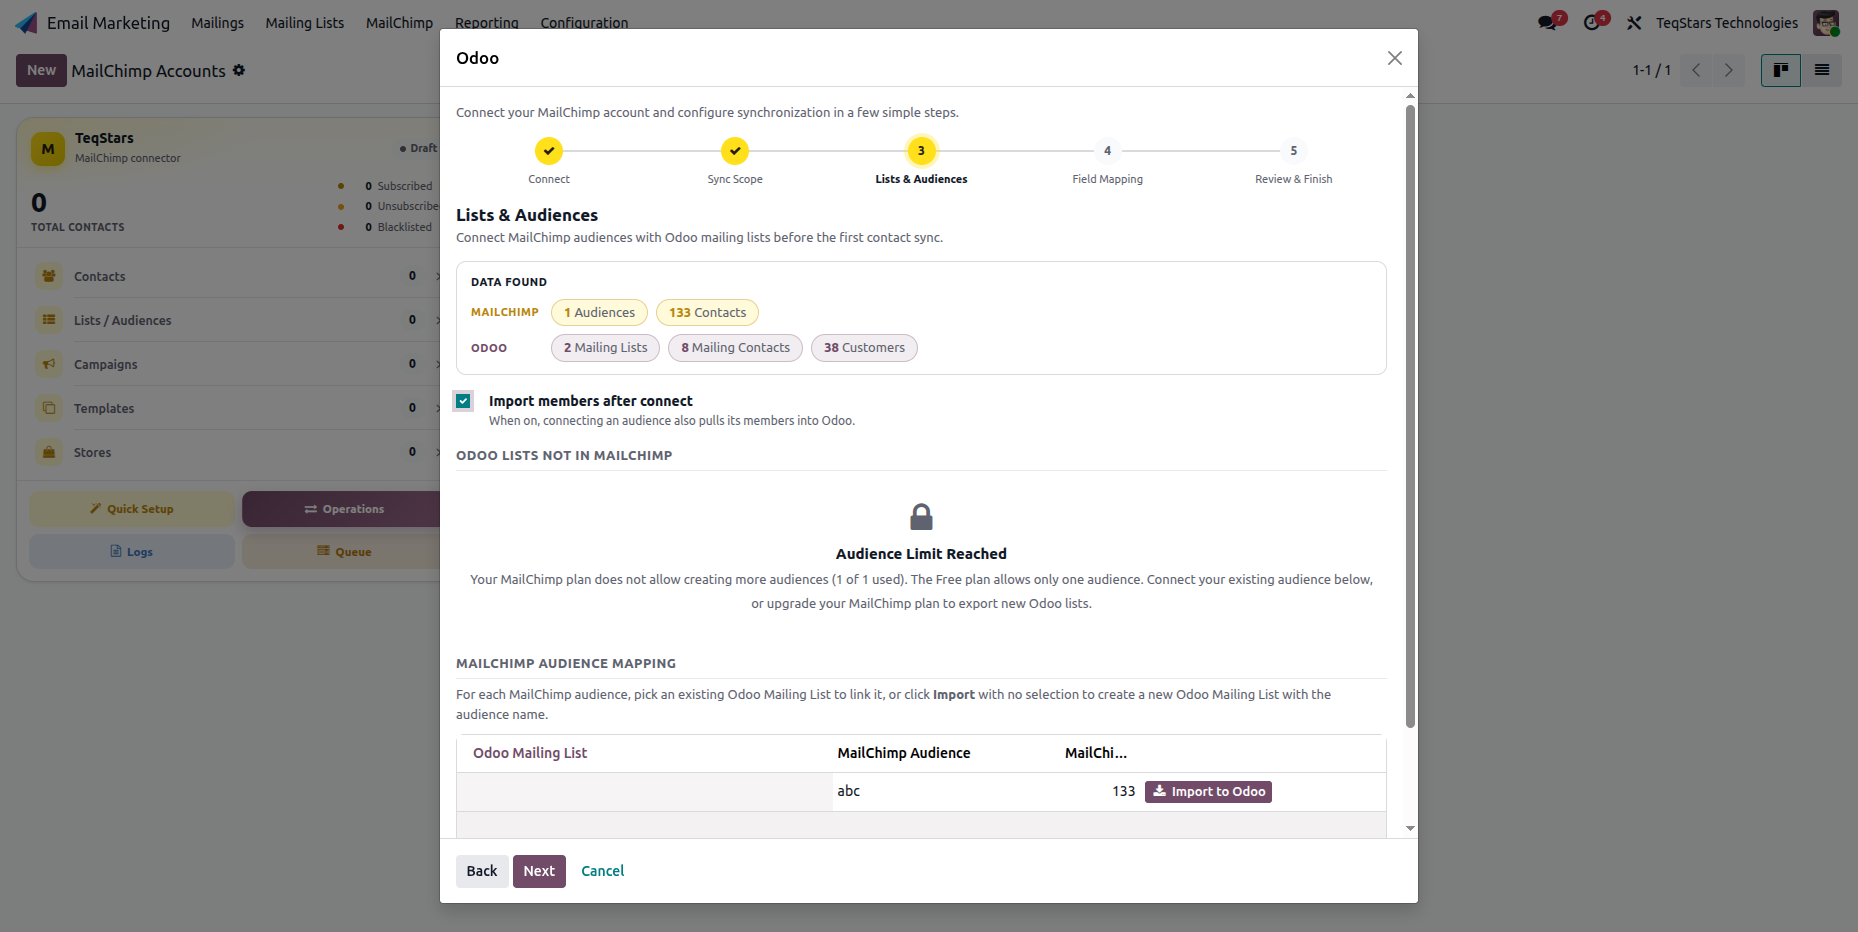
The wizard compares your MailChimp audiences with your Odoo mailing lists and lets you link them before the first sync:
Odoo Lists Not In MailChimp: Click Export to MailChimp to create the matching MailChimp audience, then Export Contacts to push the members.
MailChimp Audience Mapping: For each MailChimp audience, pick an Odoo list to link, or leave it blank and click Import to Odoo to create a new one.
Leave Import Members After Connect switched on to pull each audience’s members into Odoo right away.
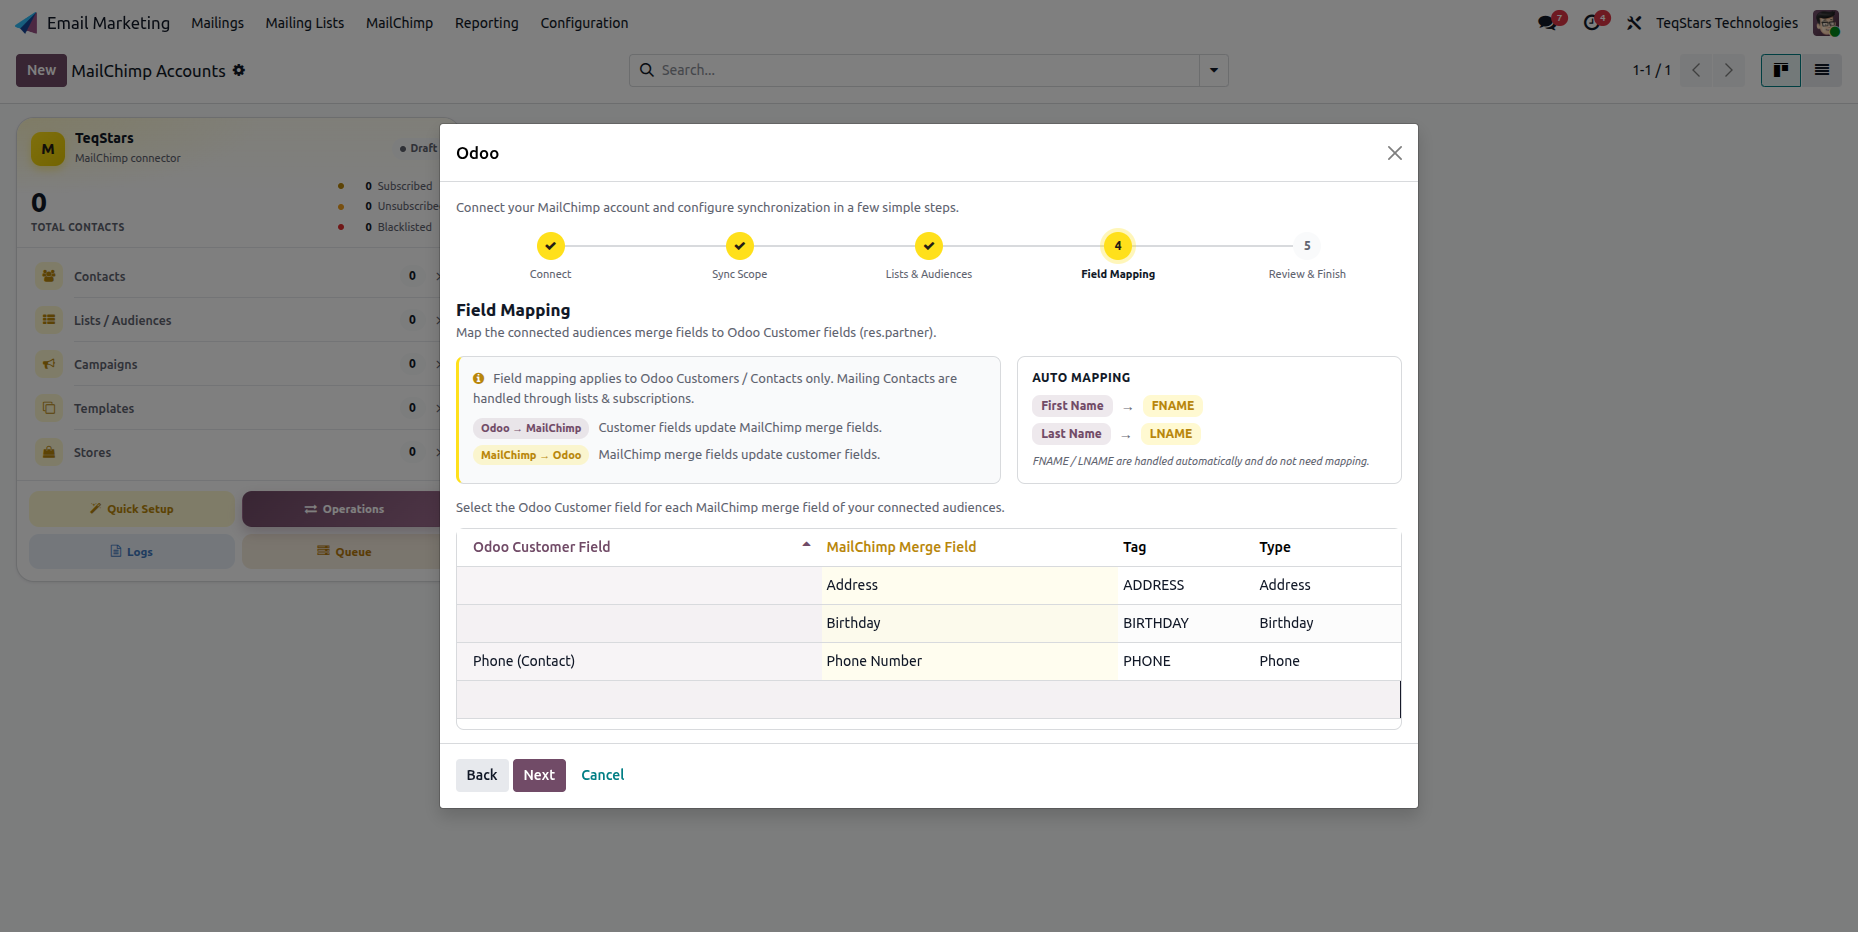
Step 4: Field Mapping
Map MailChimp merge fields to Odoo customer fields so values are filled automatically during export and update. First Name (FNAME) and Last Name (LNAME) are pre-mapped for you.
Note
You can refine this mapping any time later on the audience’s Merge Fields tab. See Lists / Audiences Management.
Step 5: Review & Finish
Review the Setup Summary (connection details, sync scope, mapped fields and connected audiences), then click Finish to confirm the account and activate synchronization.
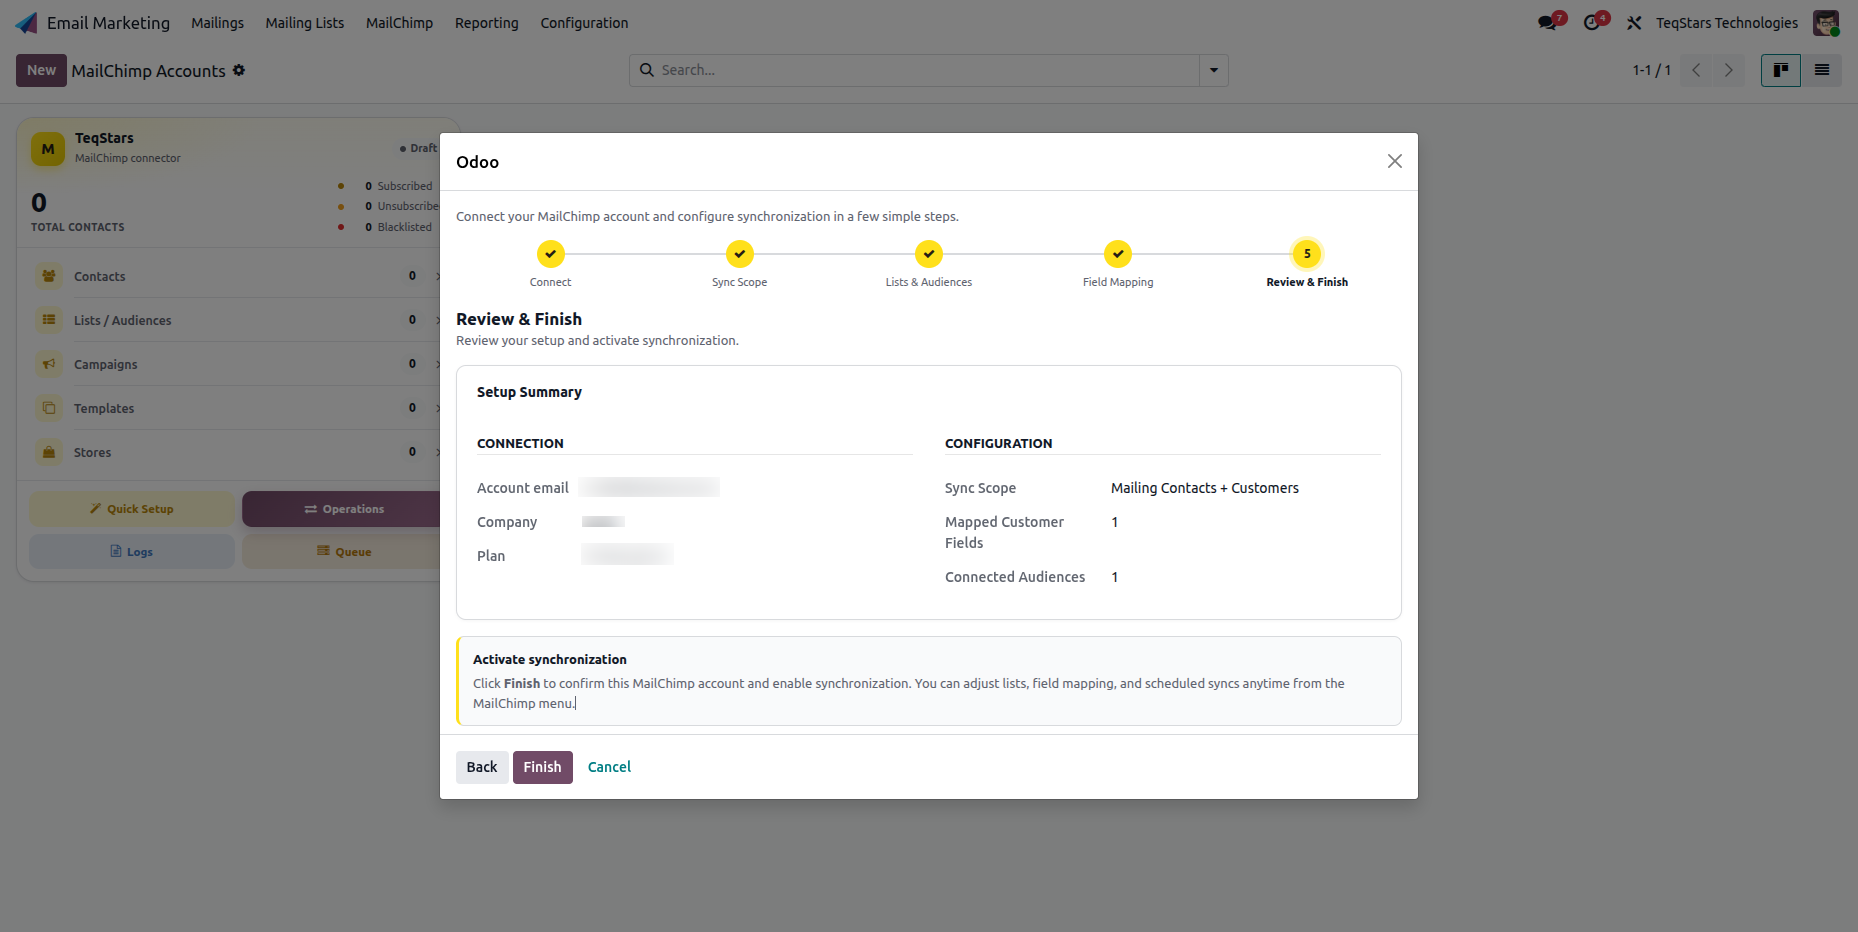
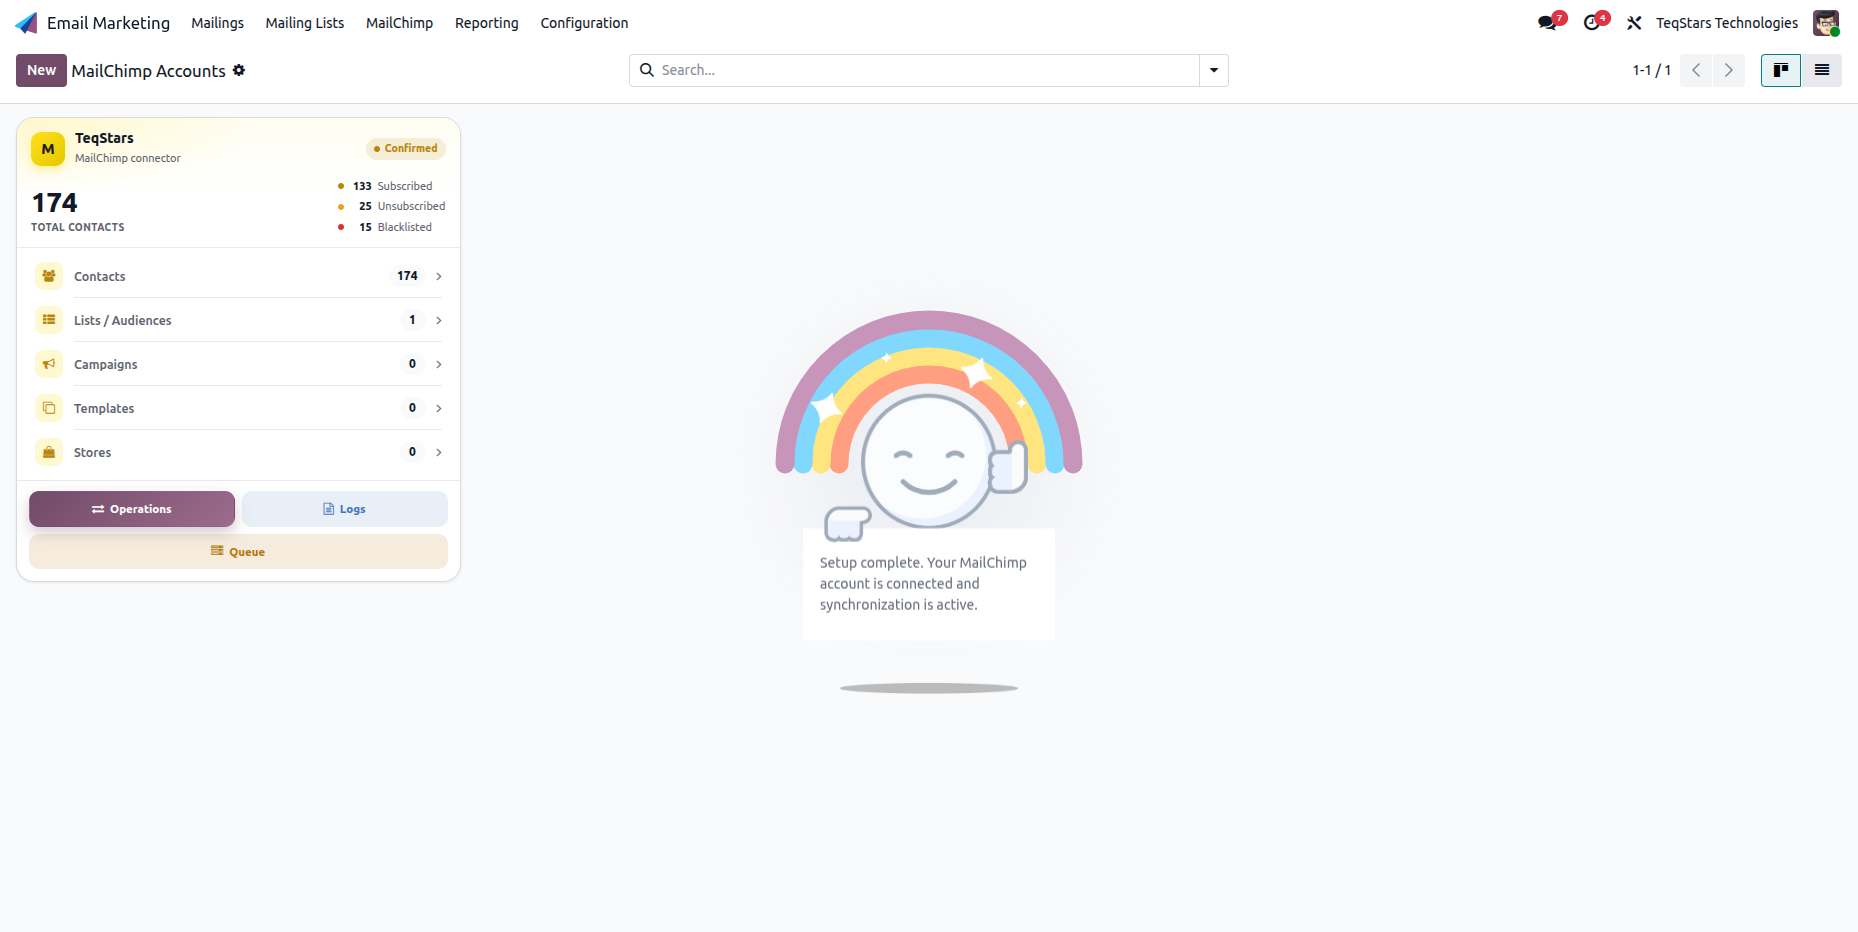
The account is now Confirmed and ready to use.
Tip
Everything chosen in the wizard (audiences, field mapping, scheduled syncs) can be adjusted later from the MailChimp menu. The wizard just gets you to a working state fast.