
Create and configure a role
A role defines what a specific type of user can and cannot do in Odoo. Instead of managing restrictions in multiple places, you can group them into a single role based on the user’s job, such as Junior Salesperson, Invoicing Clerk, or External Auditor.
To create a role, go to and click New.
General Information
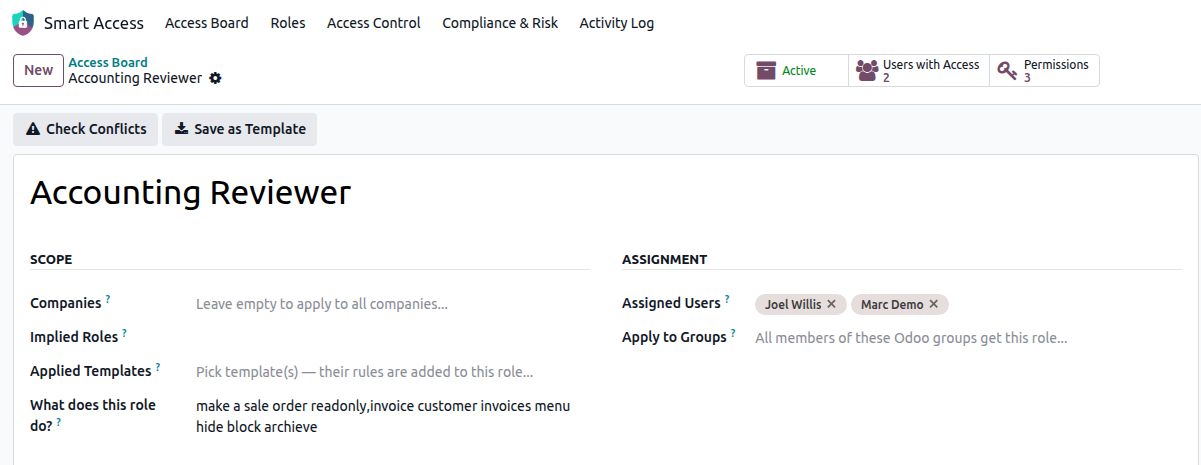
Role Name
Enter a clear and recognizable name for the role. This name is displayed throughout Smart Access Manager, including the Access Board, conflict messages, Activity Log, and audit reports.
What does this role do?
Describe the purpose of the role and why it is needed. This helps administrators and auditors understand the role and its purpose when reviewing it later.
Companies
Select the companies where this role should apply. Leave it empty if the role should apply to all companies.
Note
The role follows the company selected in the company switcher. For example, if the role is assigned to My US Company, its restrictions apply while the user is working in that company. If the restriction should apply across all companies, leave Companies empty.
Assigned Users
Select the individual users who should receive this role. The role remains assigned until you remove the user.
Apply to Groups
Select Odoo groups whose members should automatically receive this role. This also applies to users who belong to the selected group indirectly. If a new user is added to the group later, they automatically receive the role.
Tip
Use Apply to Groups when the same restrictions should apply to everyone in a group, such as Sales / User. Use Assigned Users when the role is intended for specific users. You can use both options together.
Implied Roles
Select other roles that should also apply to users who receive this role. The restrictions from the selected roles are automatically inherited.
Example: Create a base role called Sales — Common Restrictions with common restrictions such as hiding margin fields and blocking export. Then make Junior Salesperson and Senior Salesperson imply this role. Any changes made to the base role will automatically apply to both roles.
Circular inheritance is not allowed, so a role cannot indirectly inherit itself.
Active
Keep this enabled while the role is in use. Disable it to archive the role. An archived role stops applying immediately, while its history remains available in the Activity Log and audit reports.
Permissions
Record Permissions
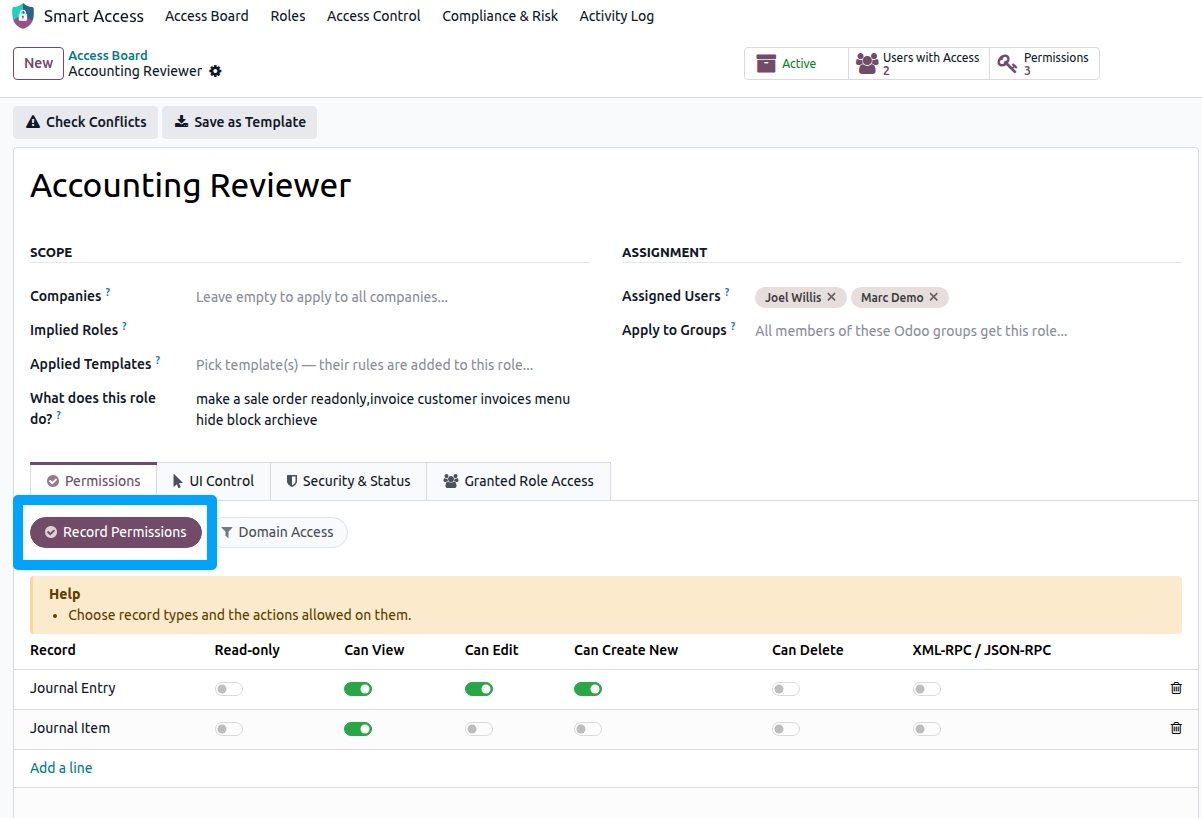
Controls what users can do with a specific type of record, such as Contacts, Sales Orders, or Invoices.
Record — Select the type of record this permission applies to.
Read-only — Enable this to allow users to view records while disabling Can Edit, Can Create New, and Can Delete.
Can View / Can Edit / Can Create New / Can Delete — Enable the individual operations you want to allow for the selected record type.
XML-RPC / JSON-RPC — Restricts access through external APIs only. The user keeps their normal access through the Odoo web interface. This is useful when an integration account should have limited API access but normal web access.
Note
Only one permission line can be added for each record type within a role. Each line must allow at least one permission.
Domain Access
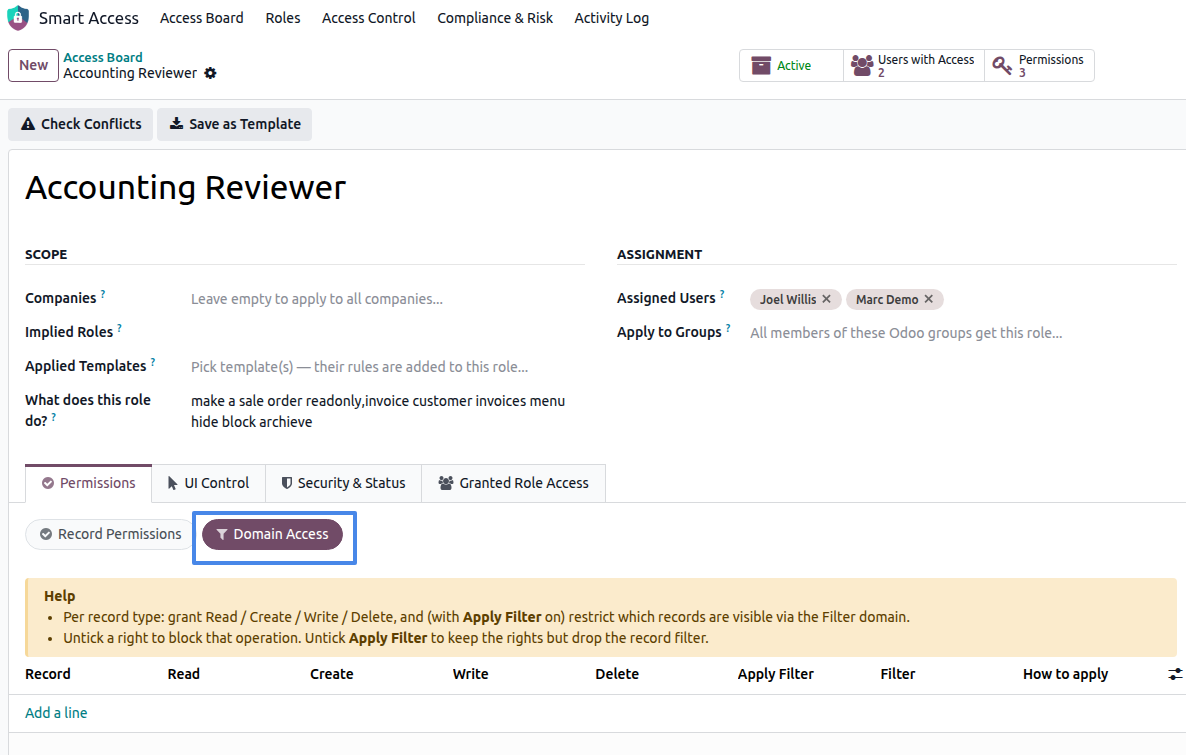
Controls which records of a selected record type the user can access or work with.
Record — Select the record type to which the access rule applies.
How to apply
Show only matching records — Users can see only the records that match the filter.
Hide matching records — Records that match the filter are hidden from the user.
Access Rights (Read / Create / Write / Delete) — Select the operations the user is allowed to perform on the selected record type.
Apply Filter — Enable this option to apply the filter to the selected operations. If disabled, only the Access Rights are applied.
Restrict View / Restrict Edit / Restrict Create / Restrict Delete — Choose which operations the filter should control. For example, you can allow a user to view all Sales Orders but restrict editing to only their own orders.
Filter — Define the condition that determines which records are affected using the visual filter editor.
UI Control
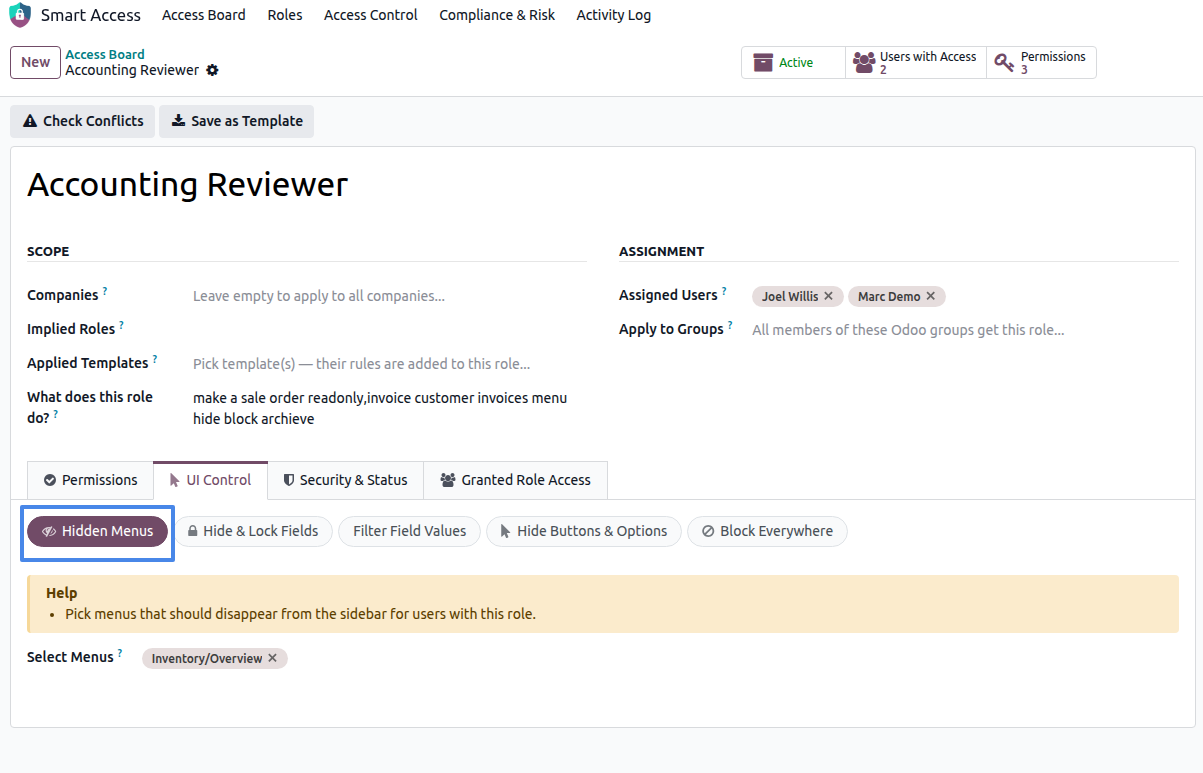
Hide & Lock Fields
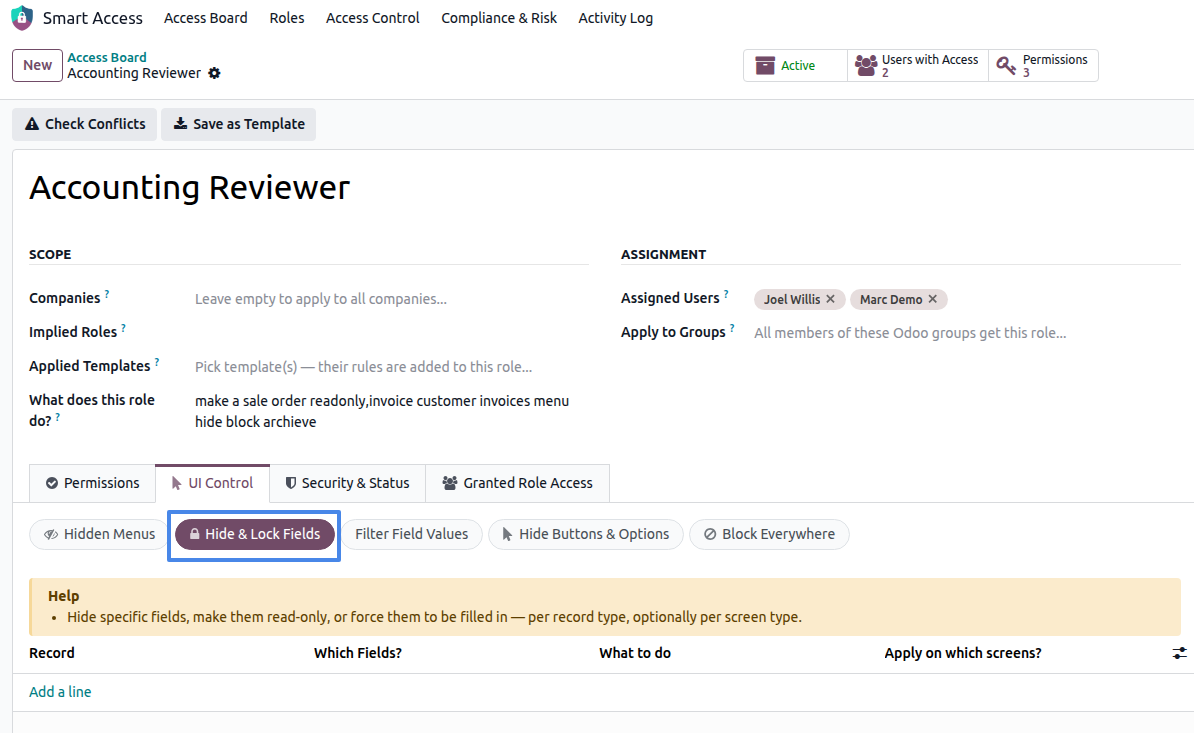
Record — Select the record type that contains the fields you want to control.
Which Fields? — Select one or more fields to which the rule should apply.
What to do
Hide field — Hides the selected field from the user.
Make read-only — Keeps the field visible but prevents the user from changing its value.
Make required — Requires the user to fill in the field before saving.
Remove open link (↗) — Removes the link that allows the user to open the related record.
Remove Create / Create & Edit — Removes the quick-create options from relational dropdown fields.
Apply on which screens? — Select where the restriction should apply, such as Form, List, or Kanban. Leave it empty to apply the restriction on all available screens. Only screens where the selected fields are available can be selected.
Filter Field Values
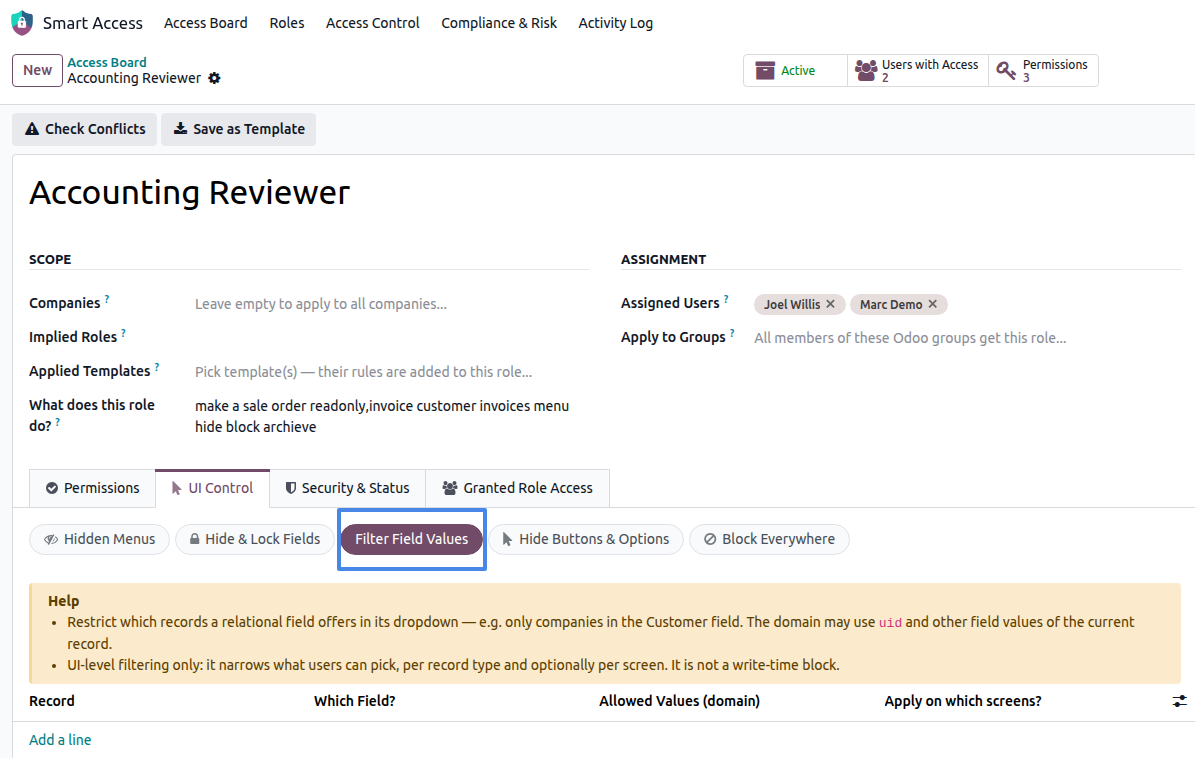
Controls which values a user can select in a dropdown field without restricting the records themselves.
Record — Select the record type that contains the field you want to control.
Which Field? — Select the relational field whose available values you want to limit. Only relational fields can be selected.
Allowed Values (domain) — Define the condition that determines which records are available in the dropdown for users with this role.
Apply on which screens? — Select where the restriction should apply, such as Form, List, or Kanban. Leave it empty to apply the restriction on all available screens.
Hide Buttons & Options
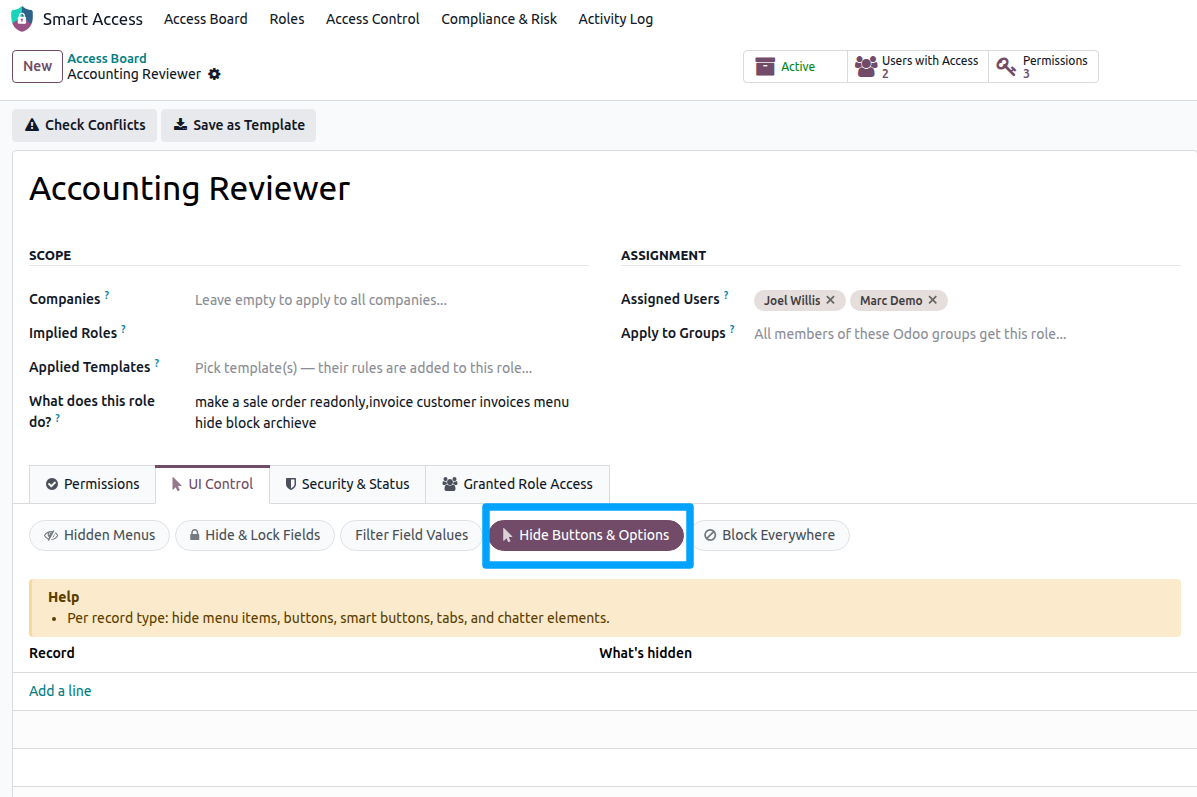
Controls which interface elements are available for a specific record type. Add one line per record type; the options are grouped into the following sections.
Data movement — Hide Export, Import, Duplicate, Add Properties, Insert in Spreadsheet, and the entire Print menu, or select individual reports and Actions-menu entries to hide.
Records and search — Hide Archive / Unarchive, the search bar, all filters and Group By options, the Favorites menu, or select individual filters and Group By entries to hide.
Chatter — Hide the entire chatter, or hide only Send Message, Log Note, Schedule Activity, Followers, or the chatter search.
Form layout — Hide selected buttons, all smart buttons, all header buttons, notebook tabs, the attachment preview, or kanban card links. You can also prevent users from opening records from a kanban card.
View types — Hide view layouts such as Kanban, Calendar, or Pivot from the view switcher, or hide one specific view.
Navbar & Systray — Hide Discuss, Activities, the company switcher, or other systray icons while the user is working on this record type’s screens.
Tip
The list view shows a read-only What’s hidden summary for each line, so you can review an entire role without opening every row.
Block Everywhere
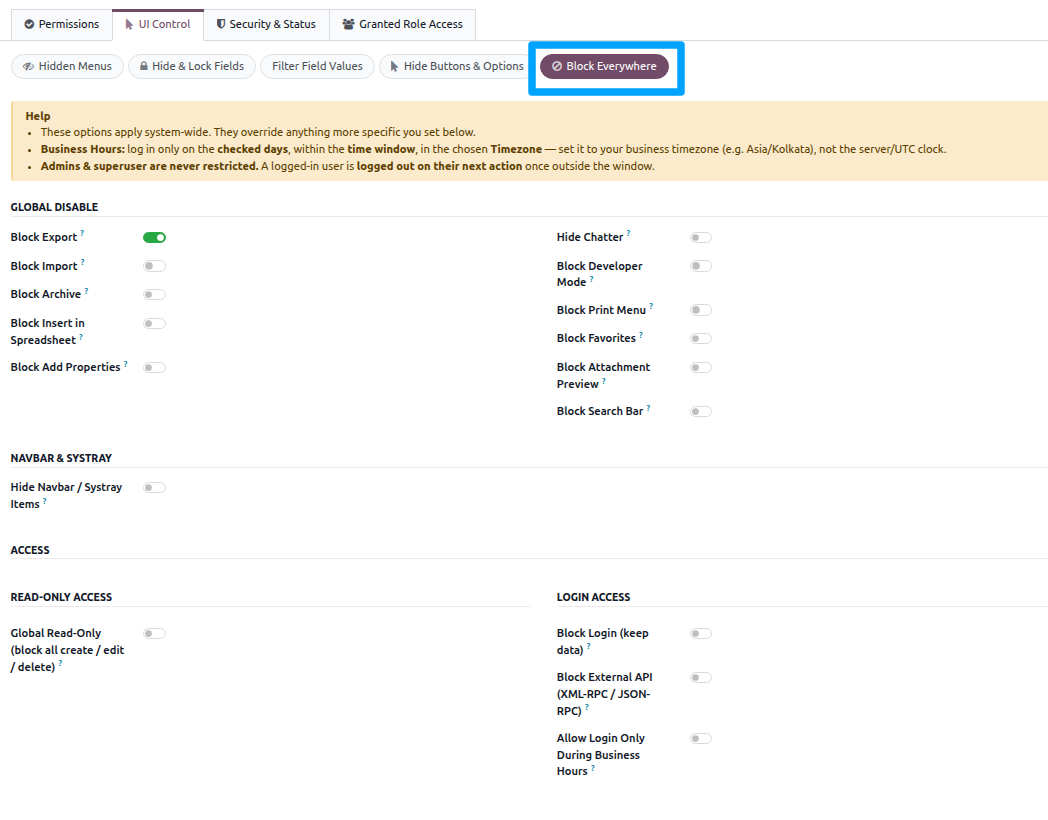
Contains restrictions that apply across the entire database instead of a single record type.
Global Disable — Block Export, Block Import, Block Archive, Block Insert in Spreadsheet, Block Add Properties, Block Print Menu, Block Favorites, Block Attachment Preview, Block Search Bar, Hide Chatter, and Block Developer Mode.
Navbar & Systray — Enable the master switch, then select the items to hide: Discuss, Activities, the company switcher, or other systray icons.
Read-Only Access — Enable Global Read-Only (block all create / edit / delete) to allow users to view records while preventing them from creating, editing, or deleting anything in Odoo.
Login Access
Block Login (keep data) — Prevents the user from logging in while keeping all of their data intact.
Block External API (XML-RPC / JSON-RPC) — Prevents access through XML-RPC and JSON-RPC while keeping normal web access available.
Allow Login Only During Business Hours — Allows login only on the selected days and during the selected hours, based on the configured timezone.
Important
Global Read-Only and Block Login cannot be applied to Administrators. Smart Access Manager prevents such a role from being saved.
Security & Status
Conditional Rules
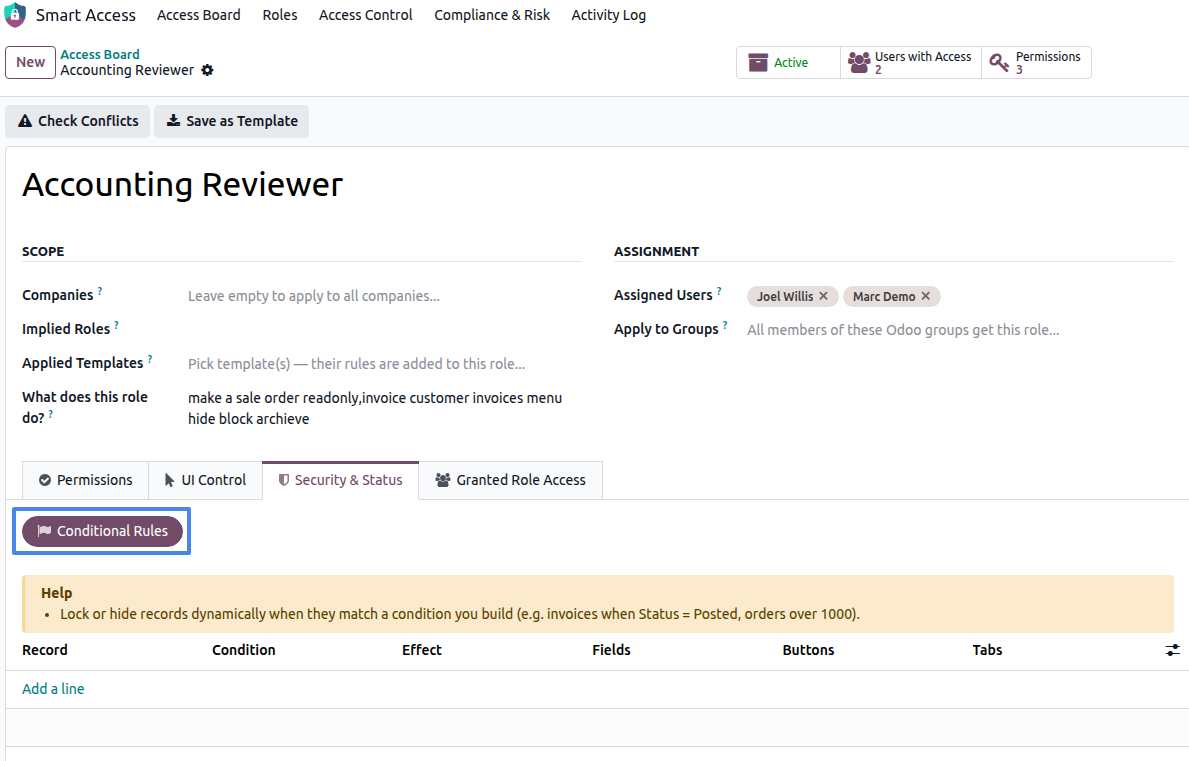
Restrictions that apply only when a record meets a specific condition.
Record — Select the record type to which the rule applies.
Condition — Define the condition that a record must meet for the restriction to apply. Use the domain editor to create the condition, such as Status = Posted or Total > 10,000.
Effect
Lock entire record (read-only) — Prevents any changes to the record.
Lock only specific fields — Prevents changes only to the selected fields.
Block deletion only — Prevents the user from deleting the record.
Hide fields / buttons / tabs — Hides the selected fields, buttons, or tabs from the user.
Fields / Buttons / Tabs — Select the specific fields, buttons, or tabs affected by the Lock only specific fields or Hide options.
Granted Role Access
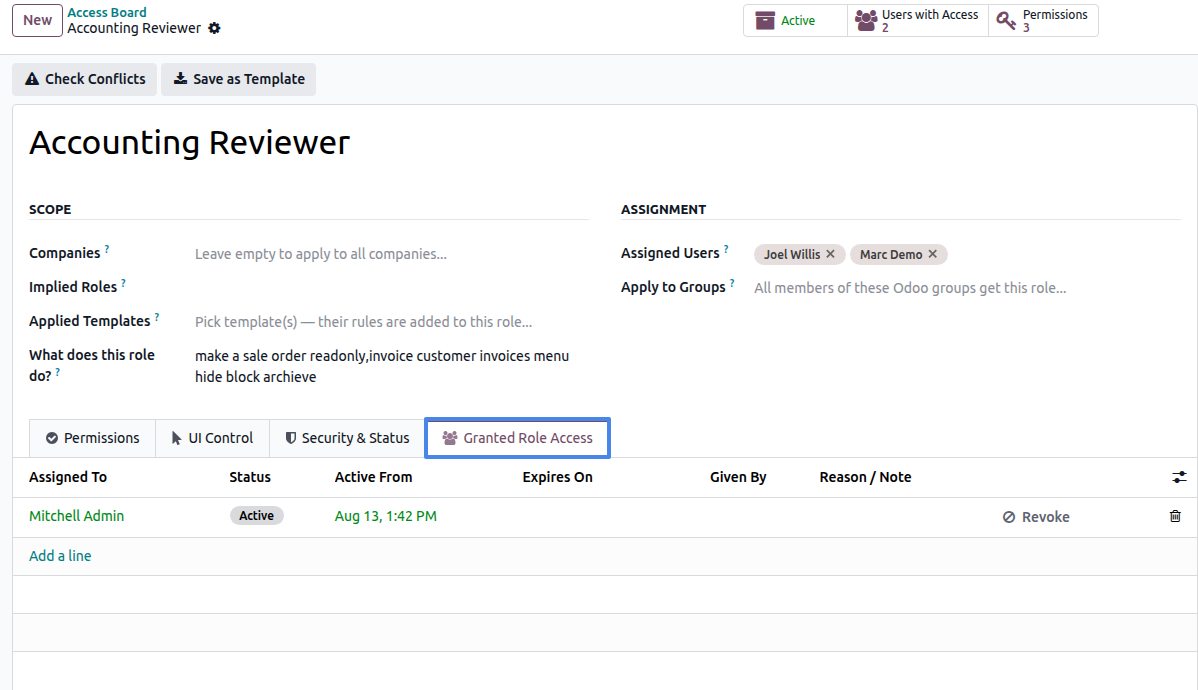
Lists all time-bound assignments of this role, including the assigned user, the validity period, the current status (Scheduled, Active, Expired, or Revoked), the user who handed over the access, and the reason for the assignment. Access can also be revoked directly from this list.
Managing a person’s access from the user form
Smart Access Manager adds additional access-management controls to . These controls are available to users with the Manager level and above.
Active Roles (smart button)
Shows the number of currently active time-bound role assignments for the user. Click it to view all role assignments, including active, expired, and revoked ones.
Revoke Access (header button — Kill Switch)
Immediately revokes all Smart Access roles assigned to the user, prevents the user from logging in again, and logs them out of all active sessions. A confirmation is required before access is revoked.
The user’s records, ownership, and history remain unchanged.
After access is revoked, an Access Revoked ribbon appears on the user form.
Restore Access (header button)
Restores the user’s ability to log in after access has been revoked. Their previous roles are not restored automatically; they must be assigned again explicitly.
Note
Roles are never assigned from the user form itself. Assign them from the role’s Assigned Users field, from the Access Board, or as a time-bound grant when the access should expire on its own.
Important
The Kill Switch cannot be used on Administrators or the superuser — Smart Access Manager refuses and explains why.
Permission conflict detection
Smart Access Manager checks for conflicts when different roles apply different restrictions to the same field or permission.
Field clash — Occurs when different roles apply different settings to the same field, such as one role hiding a field while another makes it read-only.
Access clash — Occurs when one role allows an operation while another role denies the same operation for the same record type.
A warning appears on the role form when a conflict is detected. Click Check Conflicts to view the complete list, including the roles involved and the resulting effective access.
Important
Conflicts are informational only and do not block access. They allow administrators to identify situations where one role intentionally overrides another. A conflict warning appears when saving a change that introduces a new conflict.
Save as Template
Use Save as Template to turn a role into a reusable template. Only the role’s rules are saved; users, groups, companies, and login restrictions are not included.
If you save the same role as a template again, the existing template is updated instead of creating a duplicate.
You can also select multiple roles from the Roles list and click Save as Template. Smart Access Manager combines their rules into a single template and avoids duplicate rules.
How several roles combine
A person can hold more than one role. This is what happens when they overlap:
Kind of rule |
Result when roles disagree |
|---|---|
Hide & Lock Fields |
The most restrictive wins — hidden beats read-only, read-only beats required. |
Record Permissions |
An operation is allowed if any role allows it. |
Domain Access — show only |
Filters are combined (the person sees records matching every one of them). |
Domain Access — hide |
All hide-filters apply together; a record hidden by any of them is hidden. |
Hidden menus, buttons, tabs, chatter, search, global blocks |
Hidden if any role hides it. |
See also