Export Delivery Orders to ShipStation
The connector pushes Odoo outbound Delivery Orders into ShipStation as new orders, ready for rate shipping, label printing, and fulfillment from the ShipStation dashboard.
Before exporting, configure a ShipStation Delivery Method with Export Order enabled — see Configure a ShipStation Delivery Method.
You can export orders in three ways: per delivery from the picking form, in bulk from the Operations wizard, or on schedule through the Auto Order Export scheduled action.
Per-Picking Export
If you only need to push a single delivery to ShipStation:
Go to .
Open the delivery order you want to export. It must be in Ready state and use a ShipStation delivery method with Export Order enabled.
Click Export order to ShipStation in the header (next to Validate).

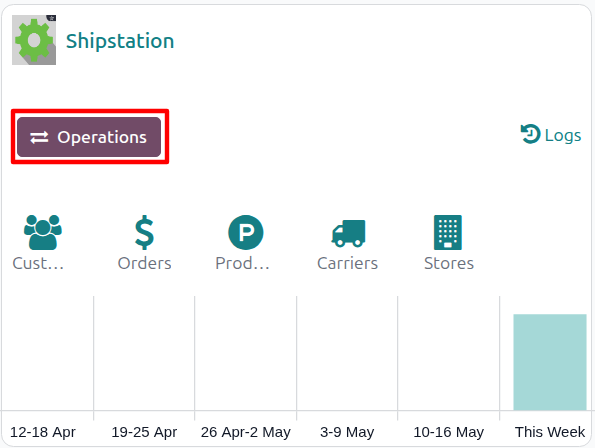
Method 1: Manual Order Export
Go to .
Click the Operations button on the target account’s kanban card.
Choose Export as the operation type, then from Shipstation Export Operation select Export Orders.
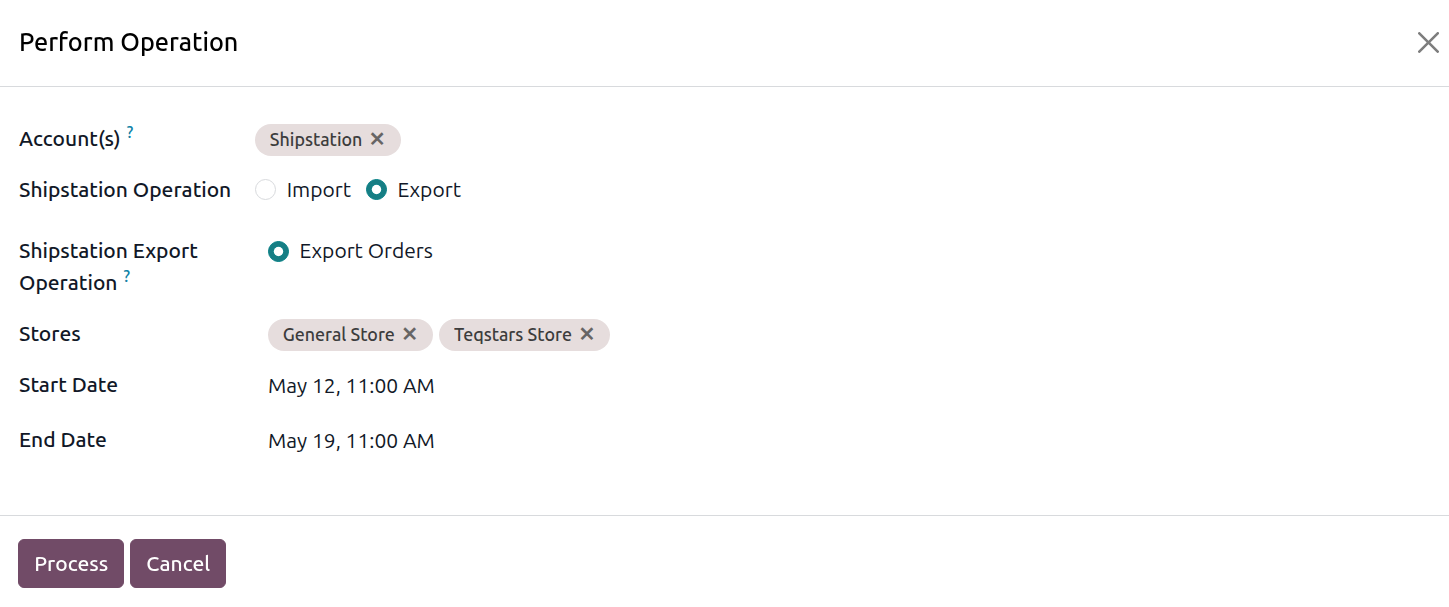
The wizard exposes the following options:
Account — the ShipStation account to run the operation on. Pre-filled from the kanban card you launched the wizard from.
Shipstation Operation — radio: Import or Export. Select Export for this flow.
Shipstation Export Operation — pick Export Orders.
Stores — restrict the export to one or more ShipStation stores. Leave empty to consider every store linked to the chosen accounts.
Start Date and End Date — restrict the export window to deliveries whose scheduled date falls between these two dates. Both are required when picking a date range.
Click Process.
The connector loops over eligible delivery orders (state Ready, Is Exported to ShipStation = No, Export Order = Yes, outgoing transfer type) and sends each one to ShipStation. The matching delivery order is then updated with the ShipStation Order ID and a chatter confirmation message.
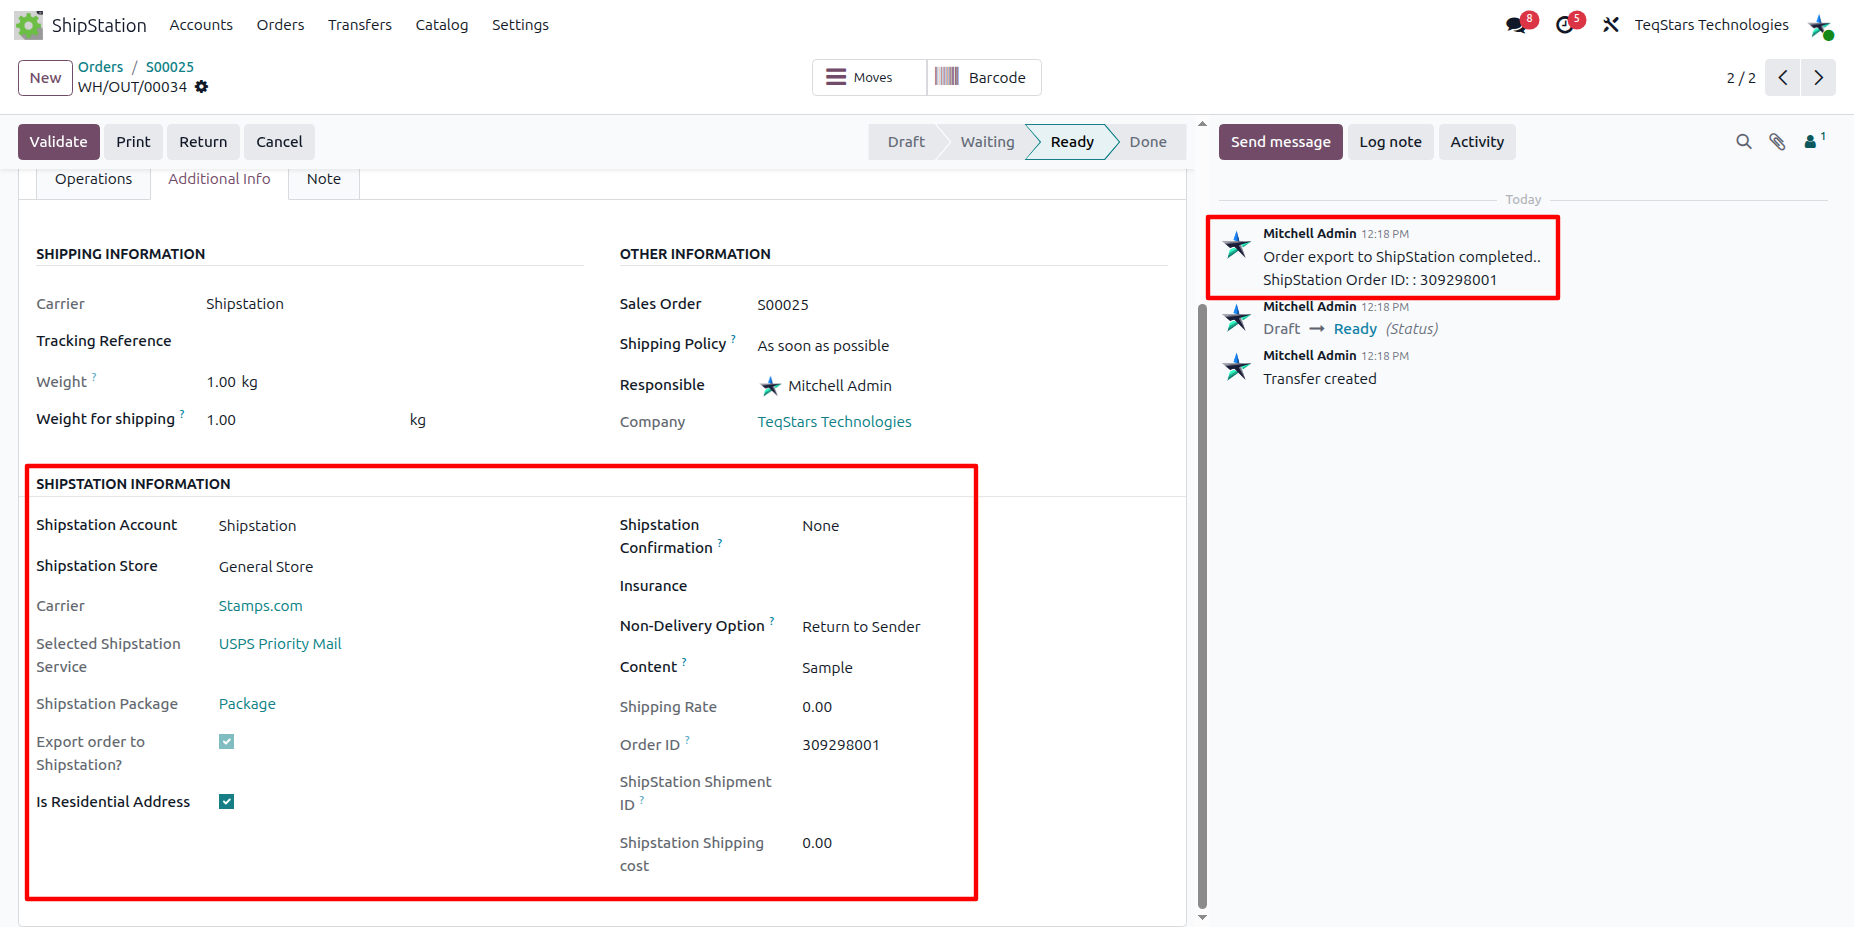
On the delivery order, a Shipstation Information group appears on the Additional Info tab whenever the picking is linked to a ShipStation account. After a successful export it exposes:
Left column:
Shipstation Account — the account the delivery was pushed to.
Shipstation Store — the store the delivery was pushed to.
Carrier — the ShipStation carrier resolved from the delivery method.
Service — the shipping service used for the export. Editable until the label is generated.
Package — the package template used for the export. Editable until the label is generated.
Export Order — the flag that made the delivery eligible for export. Inherited from the delivery method.
Residential Address — whether the destination is a residential address.
Right column:
Confirmation — delivery confirmation requested from the carrier.
Insurance Provider — insurance provider applied to the shipment.
International Non-Delivery Option — what the carrier should do if the parcel can’t be delivered.
Content Type — the customs content type for international shipments.
Shipping Rates — the rate quoted at the most recent rate lookup.
Shipstation Order ID — the identifier ShipStation issued for the order.
Shipstation Shipment ID — populated once the label is generated.
Shipstation Shipping Cost — the exact ShipStation-billed cost, written after the label is generated.
The chatter on the delivery also receives a confirmation message: “Order export to ShipStation completed. ShipStation Order ID: …”
Method 2: Automatic Order Export
Delivery export from Odoo to ShipStation can be automated using the Auto Order Export scheduled action so newly-validated deliveries are pushed to ShipStation without manual intervention.
Open , open the account record, and switch to the Automated Actions tab.
Toggle Auto Export Orders? to Yes.
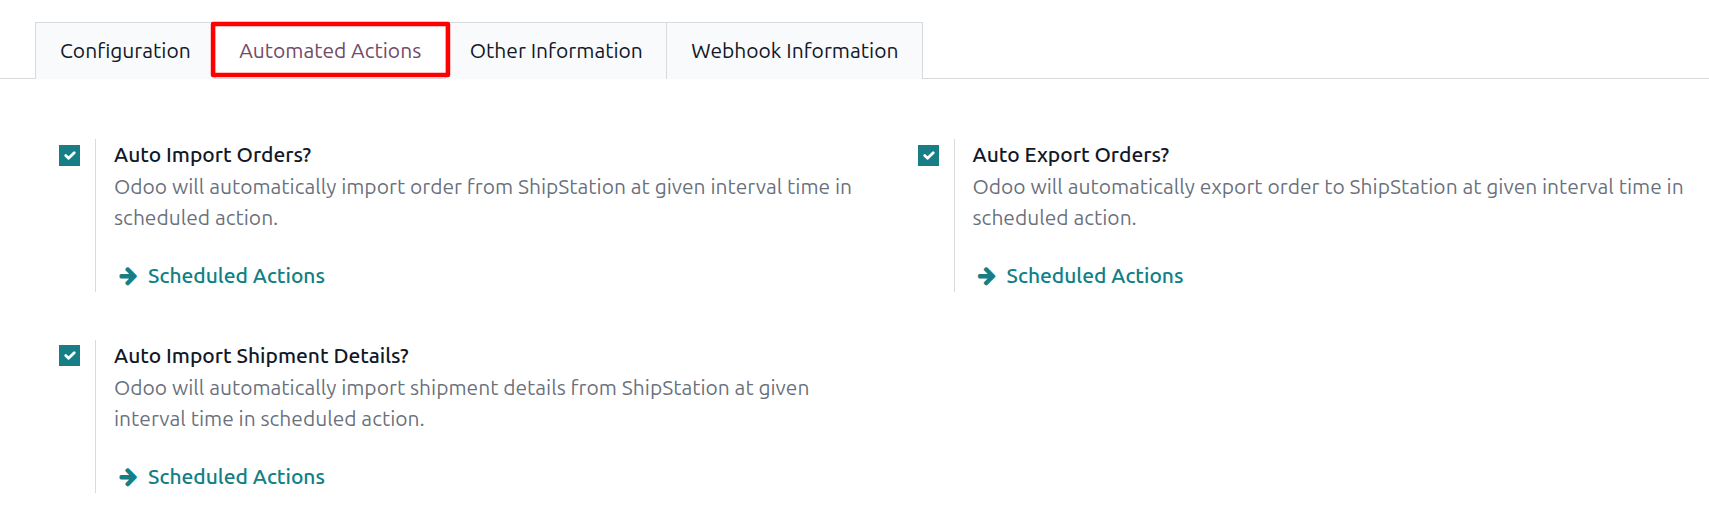
Click the Scheduled Actions link next to the toggle to configure the run interval (default 1 day), then enable the scheduled action itself.
Once active, Odoo runs Auto Order Export at the configured interval across every account whose Auto Export Orders? toggle is Yes.
Important
A delivery order is eligible for export only when all of the following are true: state Ready, Is Exported to ShipStation = No, Export Order = Yes, and operation type Delivery Orders (outgoing). The Export Order toggle is inherited from the chosen ShipStation delivery method, so configuring it once at delivery-method level suffices.
Deliveries whose Is Exported to ShipStation is already Yes are skipped on subsequent runs. To force a re-export, clear that flag and the ShipStation Order ID field on the delivery order — and cancel the original order in ShipStation first or you will pay for two labels.
Note
The export payload includes items, billing/shipping addresses, warehouse, store, dimensions (when Your Packaging), insurance options, and international fields when the destination country differs from the warehouse country.
The Odoo sale-order name is forwarded to ShipStation as a custom field so the original Odoo reference is visible on the ShipStation order.