Browser Login (OAuth) — claude.ai, ChatGPT
The Browser login path is the simplest connection type for AI tools that natively support the Model Context Protocol with OAuth 2.1 dynamic registration. The AI tool registers itself, opens an Odoo login window for the user, and stores its own credentials internally.
When to use this
Pick Browser login when your AI tool is one of:
claude.ai (web)
ChatGPT (Connectors / Custom GPT)
Claude Desktop (when you add a remote MCP server)
Any other MCP-compliant client that lets you paste a single MCP Server URL and triggers a browser-based login.
End-to-end workflow
Step 1 — (Admin) Run the wizard
Open and click Connect a New Tool.
On Step 1 — Pick auth type, click the Browser login (OAuth, auto-setup) card.
The wizard jumps straight to the Done step and displays the MCP Endpoint URL.
Click Finish.
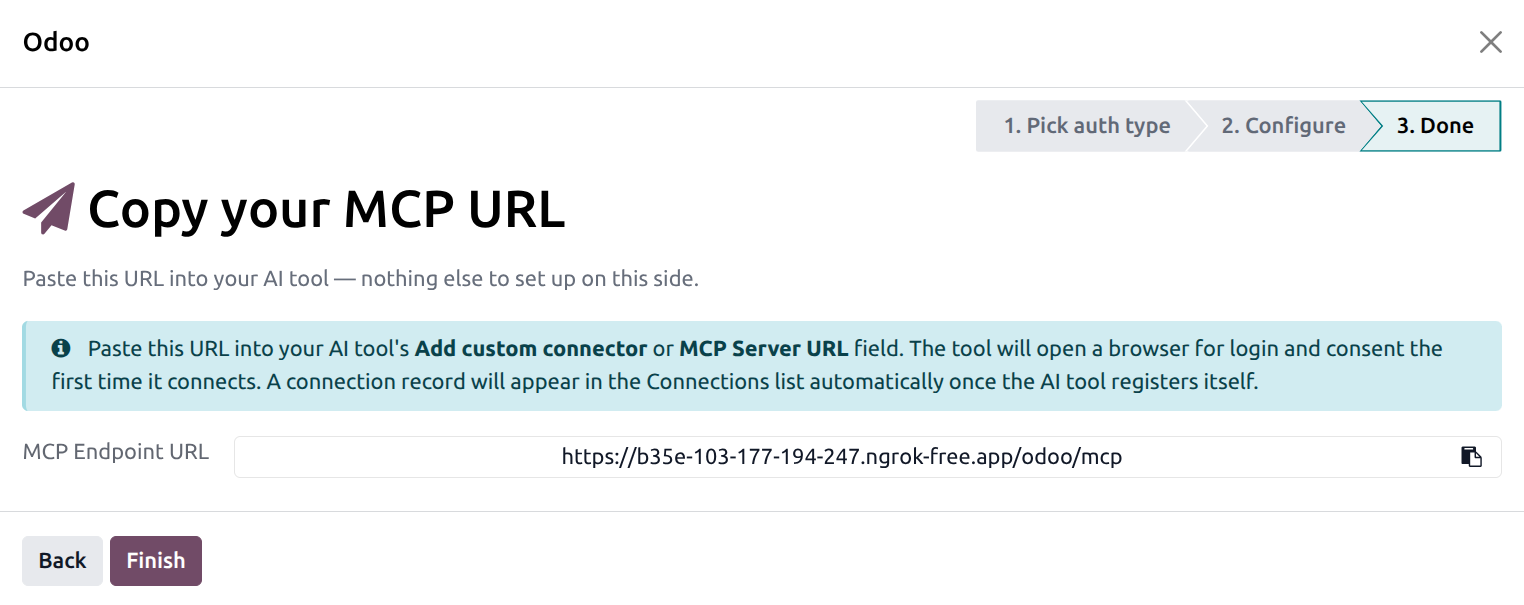
Note
At this point no connection record is created yet. The
record is created the first time an AI tool actually calls
/oauth/register against your endpoint.
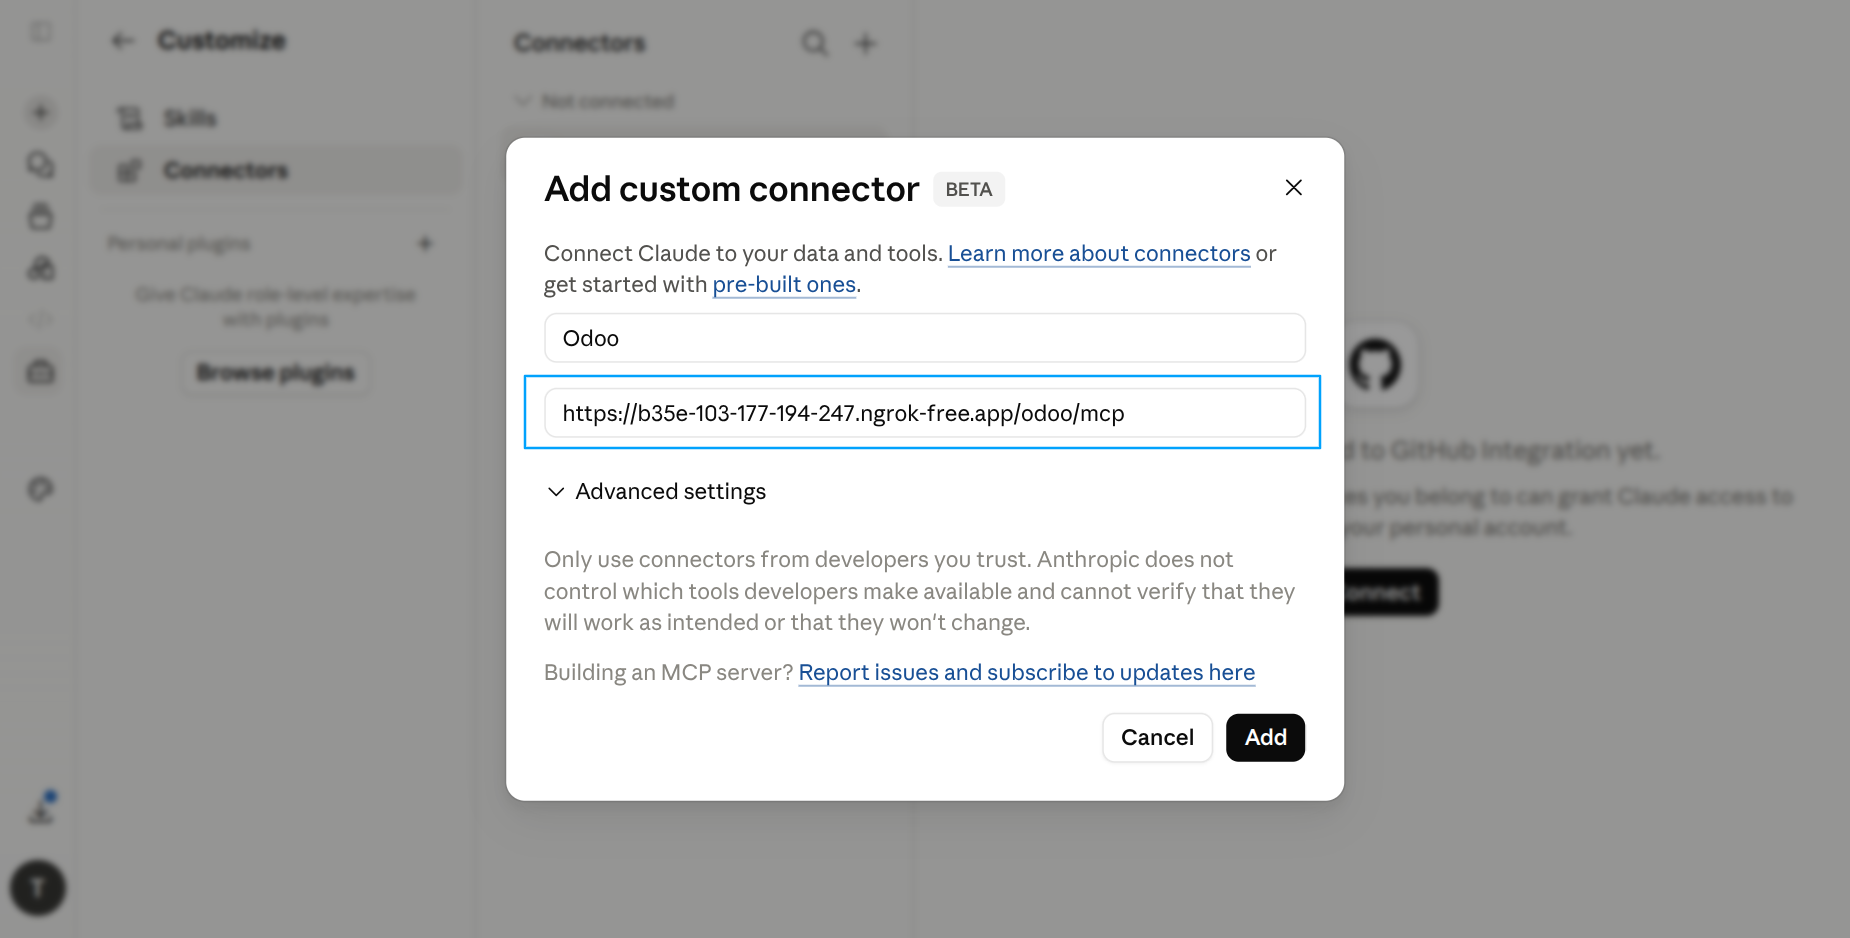
Step 2 — (End user) Paste the URL into the AI tool
In the AI tool’s interface, find the field labeled Add custom connector, MCP Server URL, Add MCP server, or similar, paste the URL, and confirm.
Step 3 — (End user) Log in via the browser
The AI tool opens a browser tab pointing at your Odoo. The OAuth Consent Screen asks for permission:
It shows the AI tool’s display name (e.g. claude.ai).
It lists the requested scope (typically Full Access (mcp:write)).
It shows your Odoo account name and the company it belongs to.
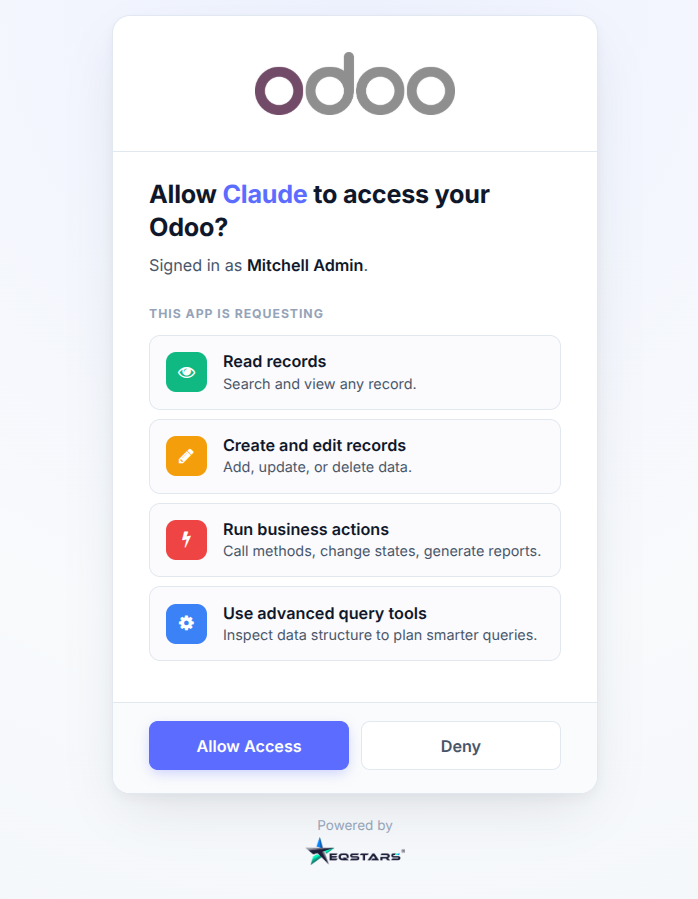
Click Allow. The browser closes, control returns to the AI tool, and the connection appears in with the status Connected.
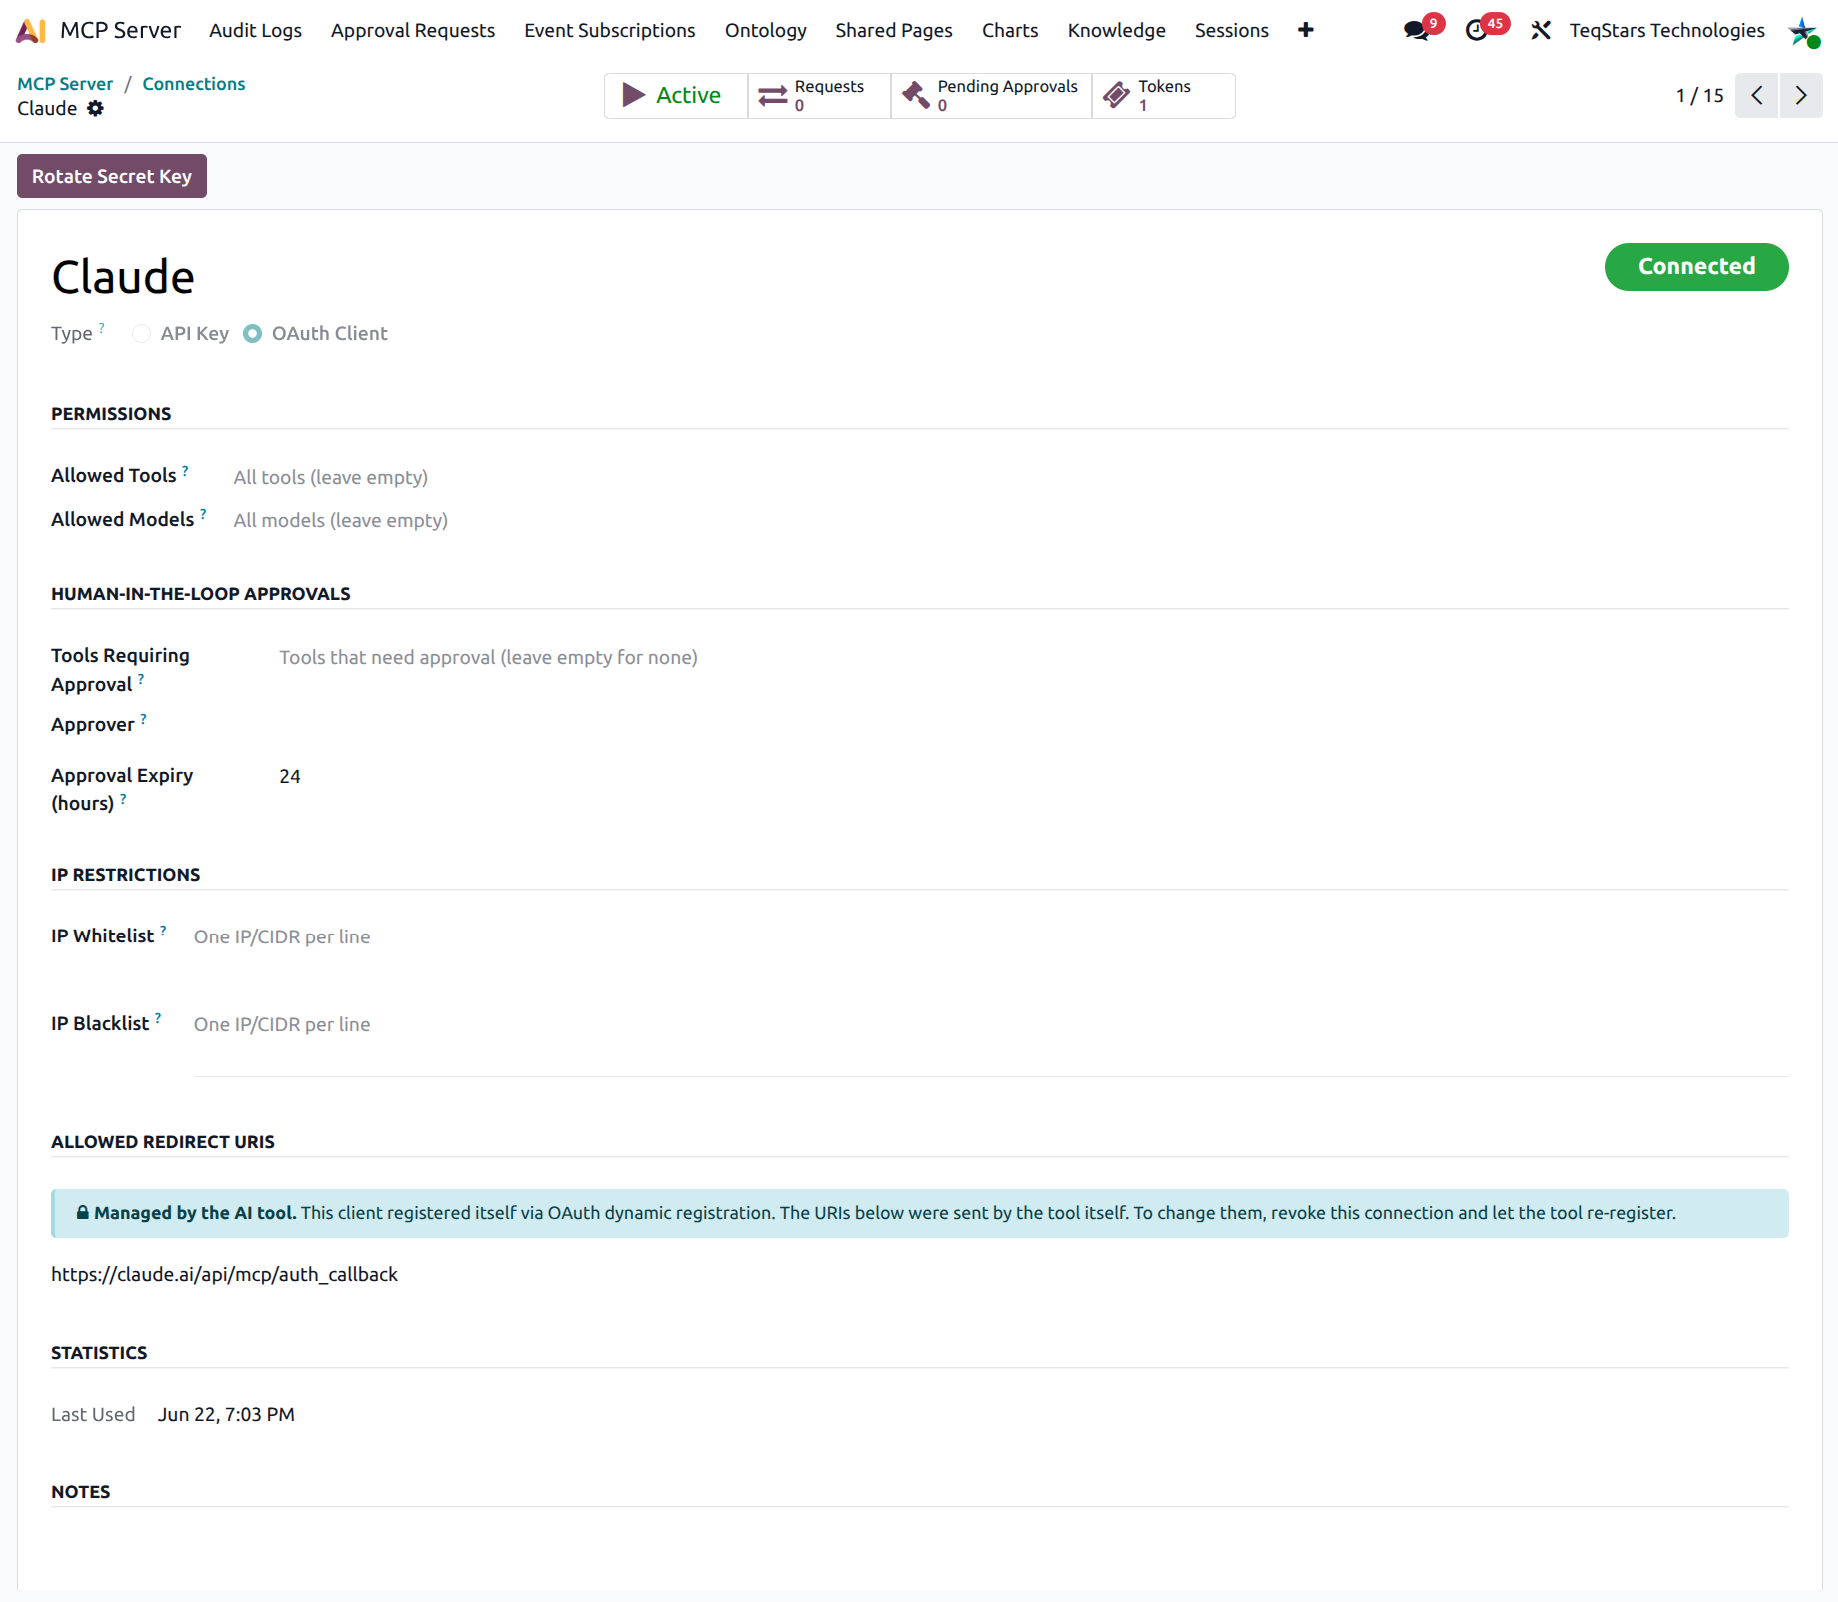
Step 4 — (Admin) Optional: tighten the connection
Once the connection is created, you can open it from the Connections list and:
Restrict it to a subset of tools (Permissions group).
Restrict it to a subset of Odoo models.
Require approval before specific high-risk tools execute.
Restrict it to a set of IP addresses (IP Restrictions group).
The end user does not have to do anything new — the next request honours the tightened policy automatically.
Tip
If you need to change a dynamic client’s redirect URIs, revoke the connection and let the AI tool re-register on next connect. Trying to edit them by hand will be rejected.
Disabling dynamic registration
If your organisation does not want AI tools to self-register, you can disable the feature globally:
Open .
Under Features, switch off Allow Dynamic Client Registration.
With dynamic registration off, every OAuth connection must be created by an admin through the wizard’s Custom OAuth path.