Campaigns Management
The connector centralizes your MailChimp campaigns inside Odoo’s Email Marketing app. You can import existing campaigns, build new ones with a MailChimp template, send or schedule them through MailChimp, and pull delivery reports back into Odoo, without leaving Odoo.
Import Campaigns from MailChimp
Go to .
Select your Account(s), set Operation Type to Email Marketing, choose Campaigns, and click Process.

Note
Choosing Campaigns also imports Templates, since every campaign references the template it was designed with.
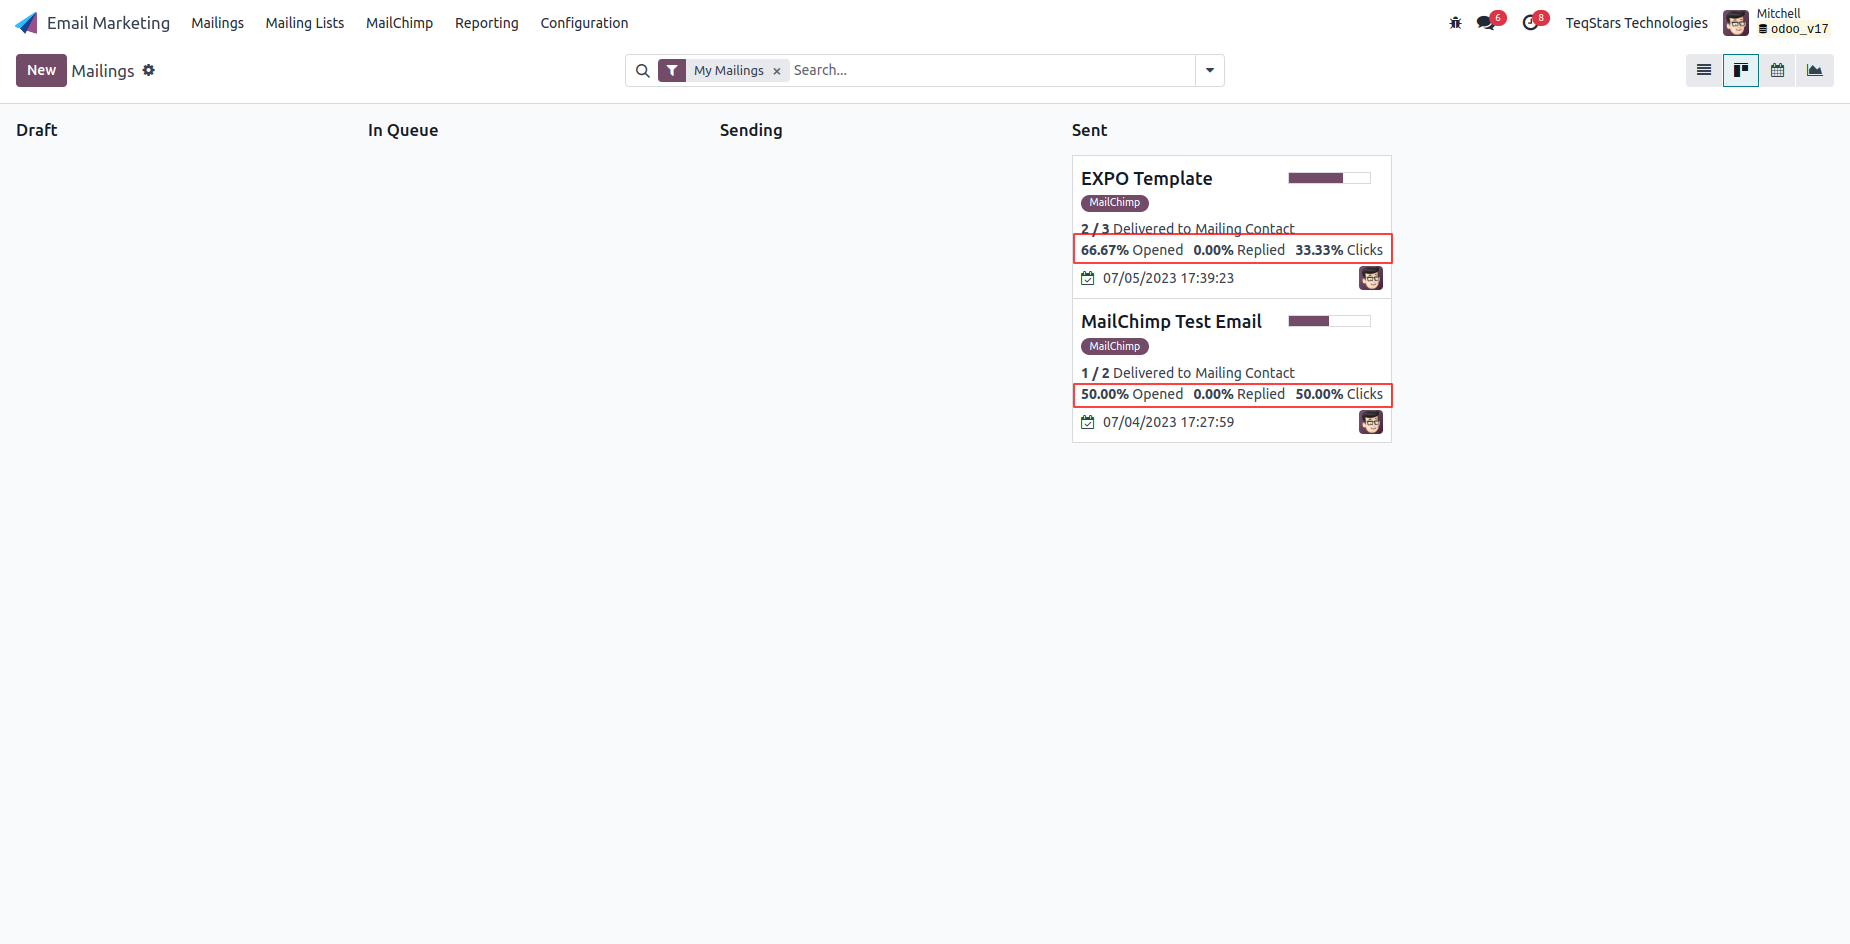
Imported campaigns appear as mailings (tagged MailChimp) in , each showing its sent, opened and clicked stats.
Tip
Use the MailChimp Campaign filter in the Mailings search bar to list only campaigns linked to MailChimp.
Build & Send a Campaign through MailChimp
Create a new mailing in and turn it into a MailChimp send:
Set the Subject.
Select a MailChimp Template: this routes the campaign through MailChimp and loads the template design.
Choose the Recipients mailing list (a MailChimp audience).
Optionally pick a MailChimp Segment to target part of the audience.
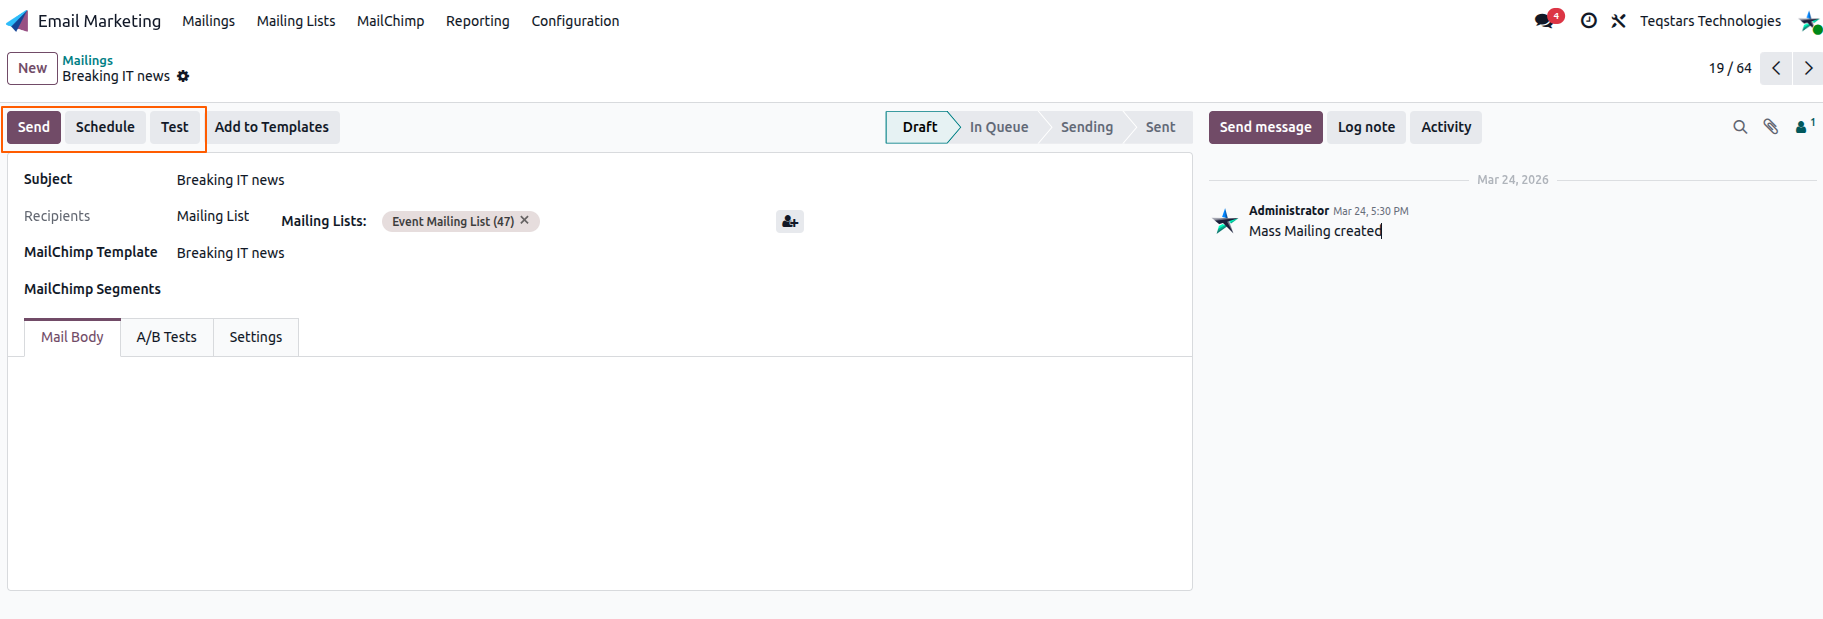
Then use the buttons at the top of the form:
Send: Export the campaign to MailChimp and send it immediately.
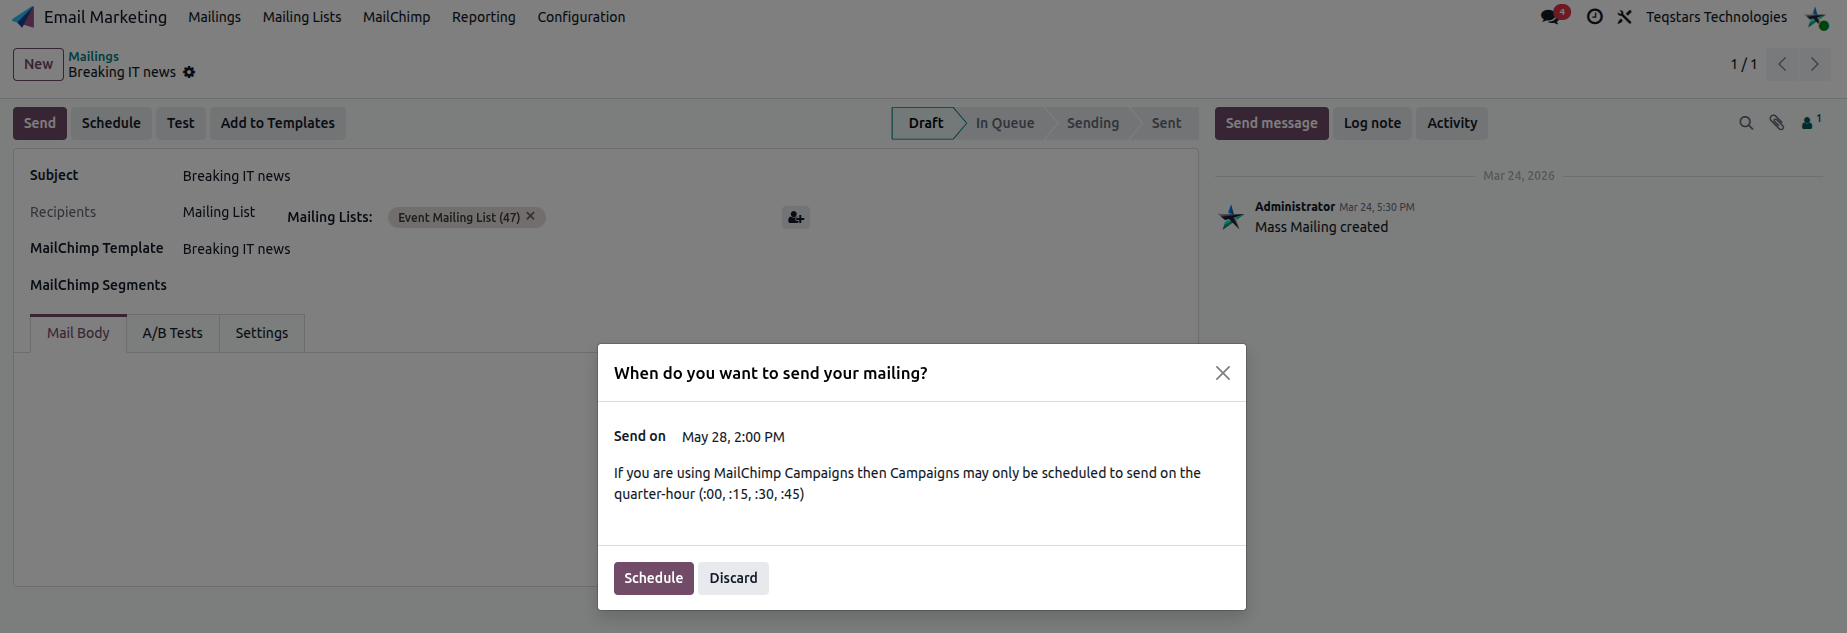
Schedule: Pick a date and time and MailChimp sends it automatically.
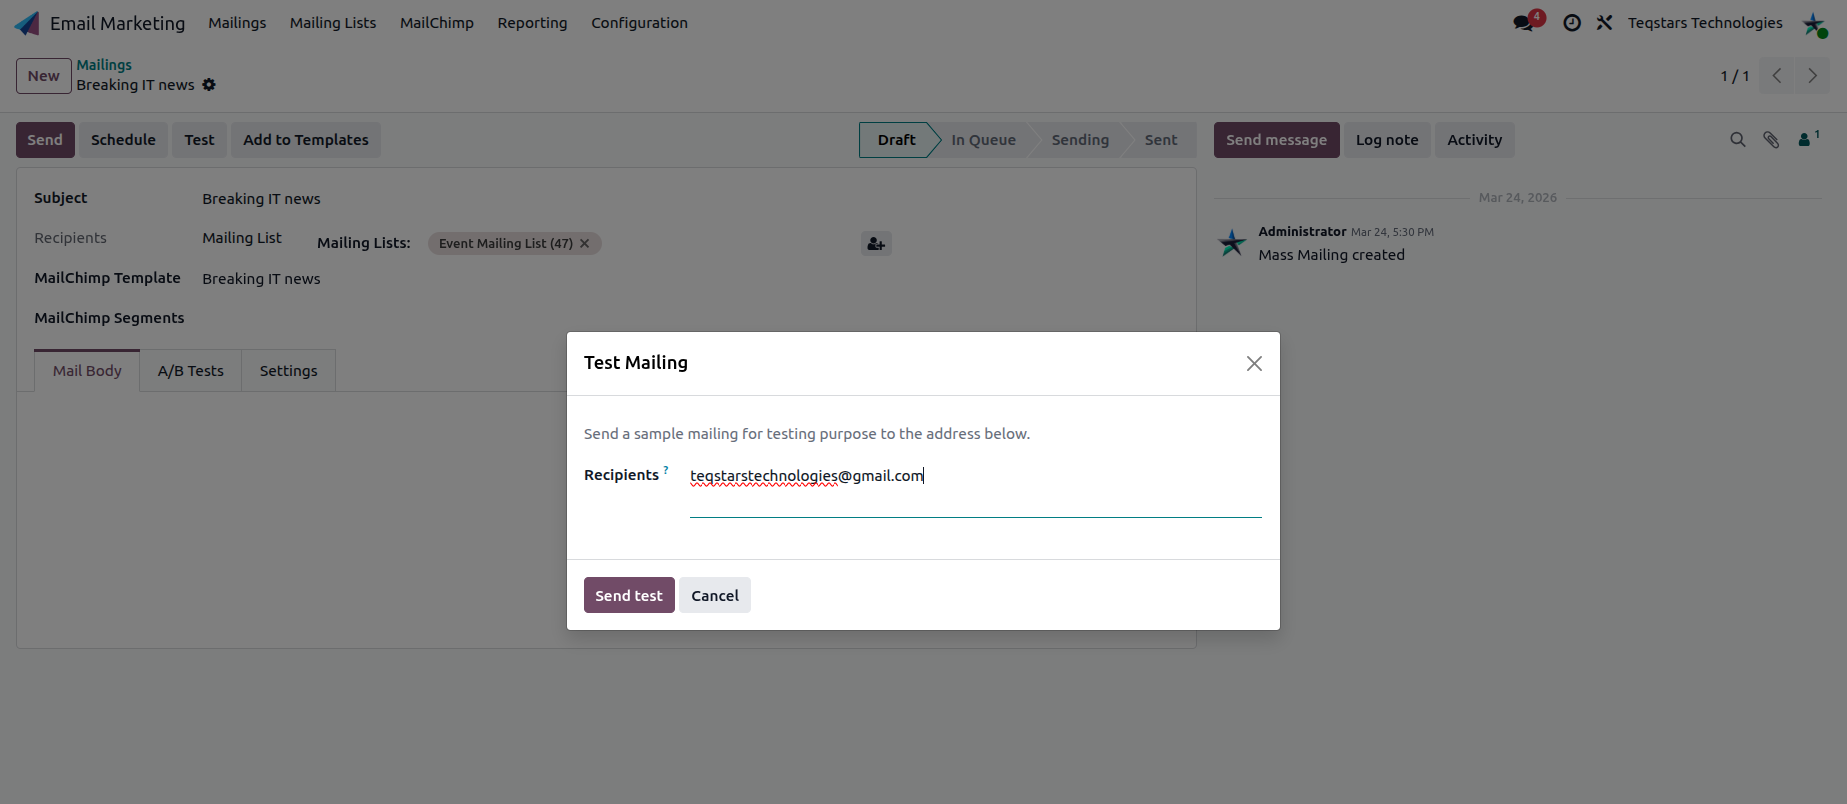
Test: Send a test email to check the subject, layout and formatting first.
Schedule a Campaign
Click Schedule, choose the date and time, and confirm. Odoo exports the campaign and schedules it in MailChimp for that moment.
Tip
Cancelling a scheduled mailing in Odoo also unschedules it in MailChimp, so the two stay consistent.
Send a Test Email
Click Test, enter one or more recipient addresses, and send. MailChimp delivers a test copy so you can review the design before the real send.
Campaign Reports & KPIs
After a campaign is sent, the connector imports its activity from MailChimp and shows the key performance indicators at the top of the mailing. Click Fetch Report from MailChimp to refresh these numbers with the latest data whenever you need.
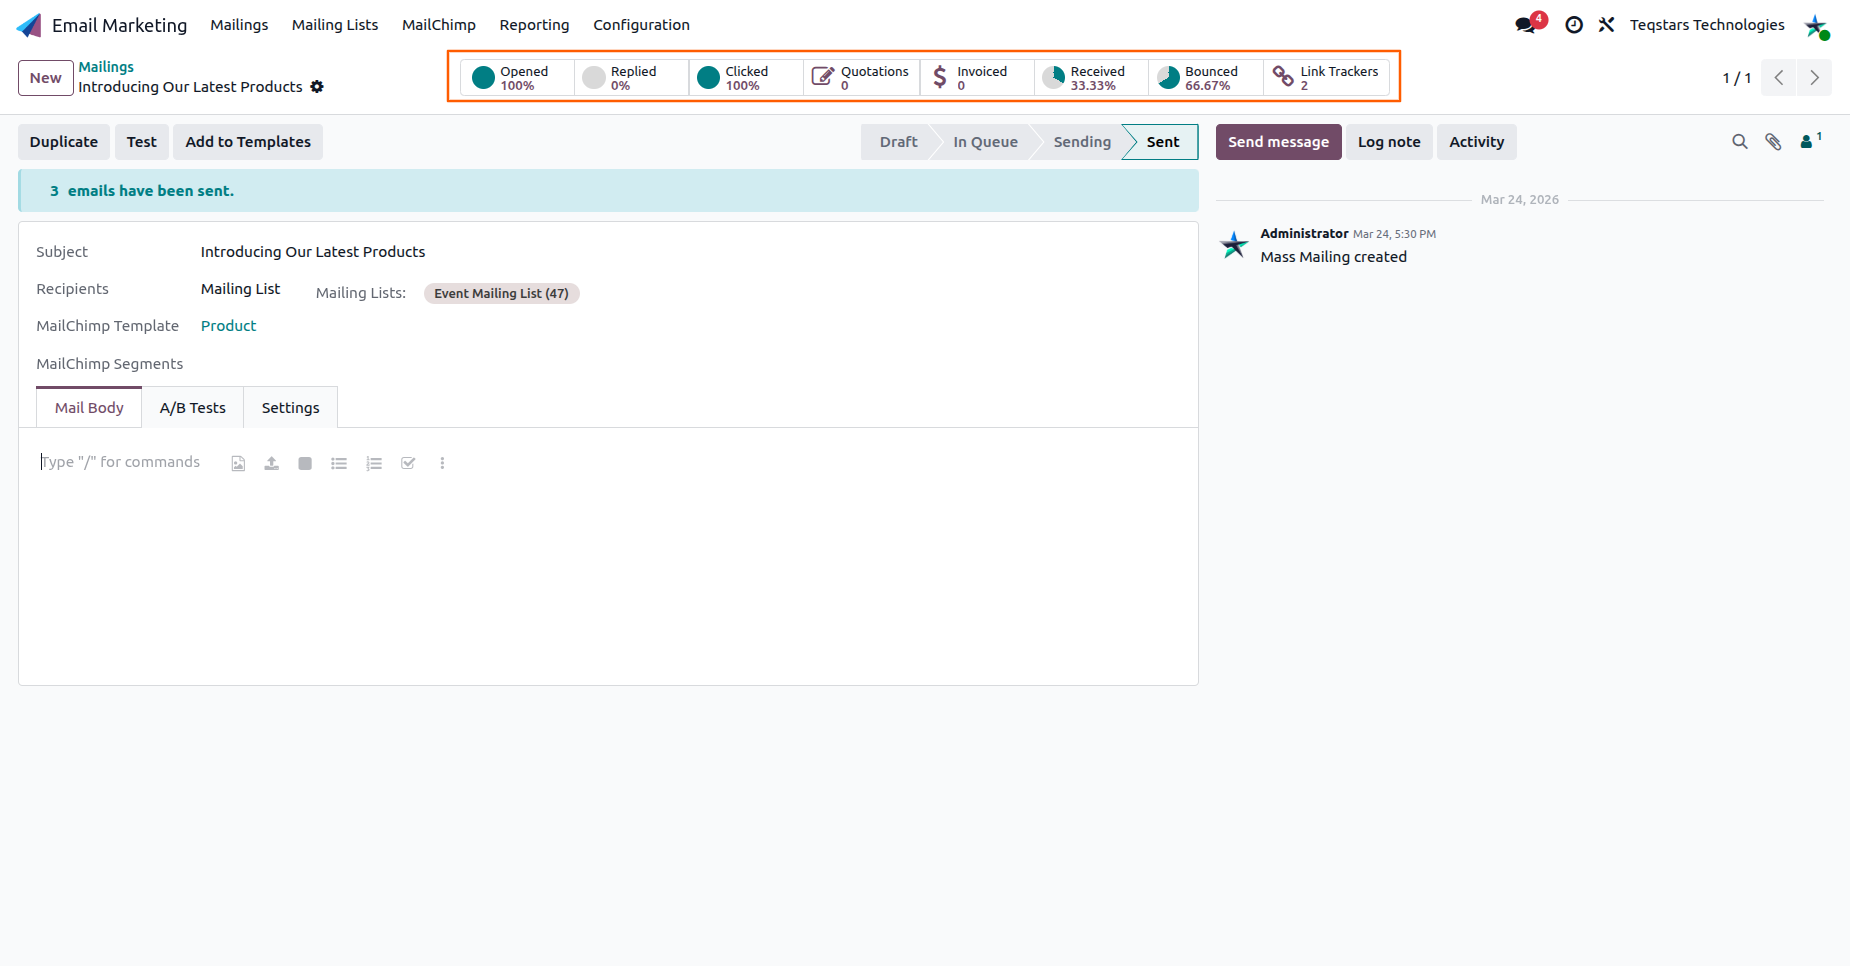
The main metrics are:
Sent: Number of emails successfully sent.
Opened: Percentage of recipients who opened the email.
Clicked: Percentage of recipients who clicked any link.
Received: Percentage of emails delivered to inboxes.
Bounced: Emails that could not be delivered.
Link Trackers: Each tracked link and its click count (via the Link Trackers smart button), so you can see which links recipients clicked.
Tip
The campaign form also shows a Queue smart button when background jobs are still fetching the report (for example right after a large send). It disappears once the queue is empty. See Job Queue and Logs.
Campaign Report Duration
The Campaign Report setting on the account controls how long Odoo keeps fetching reports (opens, clicks, bounces) after a campaign is sent, 5 days by default, and extendable to values like 30, 60 or 300 days for long-running sends. The Fetch Campaigns Reports From MailChimp scheduled action does the importing. See MailChimp Account Configuration.