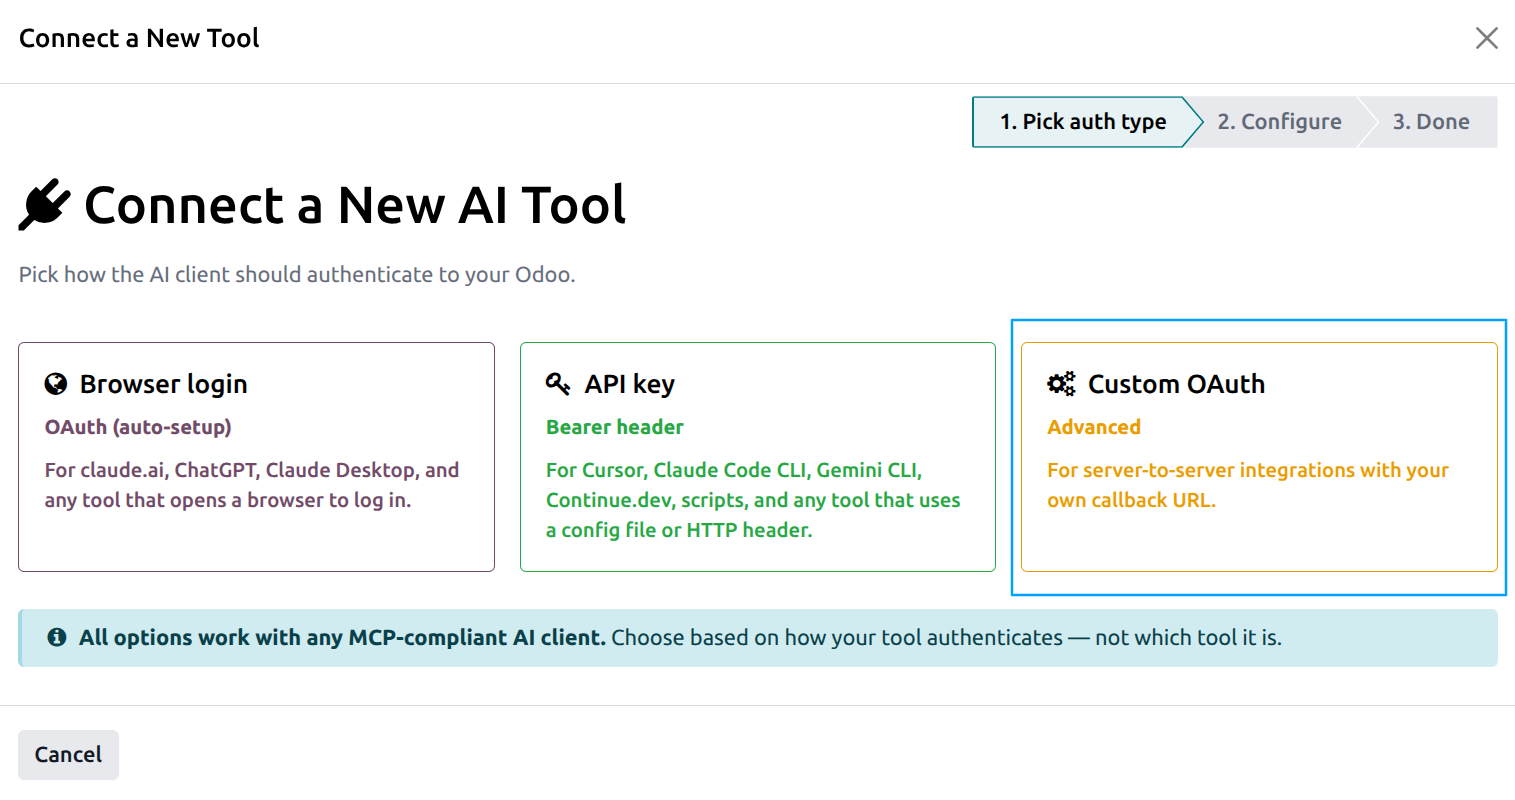
Custom OAuth Connections
Use a Custom OAuth connection when you are building a server-to-server integration with your own registered callback URL. Typical examples include:
A custom internal application (e.g. an in-house chatbot, a Power Automate / n8n flow, a Slack bot).
A third-party platform that needs an OAuth client your team controls.
Any case where the AI client cannot use Browser login / dynamic registration but still supports OAuth 2.1.
Step 1 — Pick Custom OAuth in the wizard
Open .
Click Connect a New Tool.
On Step 1, click the Custom OAuth (advanced) card.
Step 2 — Configure the client
Fill in:
MCP Endpoint URL — read-only, with a copy-to-clipboard widget. You’ll paste this into your application’s MCP server configuration when applicable.
OAuth Client Name — a friendly label, e.g. Acme Internal CRM.
Client Type
Confidential (has client_secret) — for backend integrations that can safely store a secret. The standard choice.
Public (PKCE-only, no secret) — for single-page apps or mobile apps that cannot store a secret. PKCE (RFC 7636) replaces the secret.
Allowed Redirect URIs — one redirect URI per line. Odoo will only redirect the user back to one of these URIs. The AI app or service tells you what to enter here.
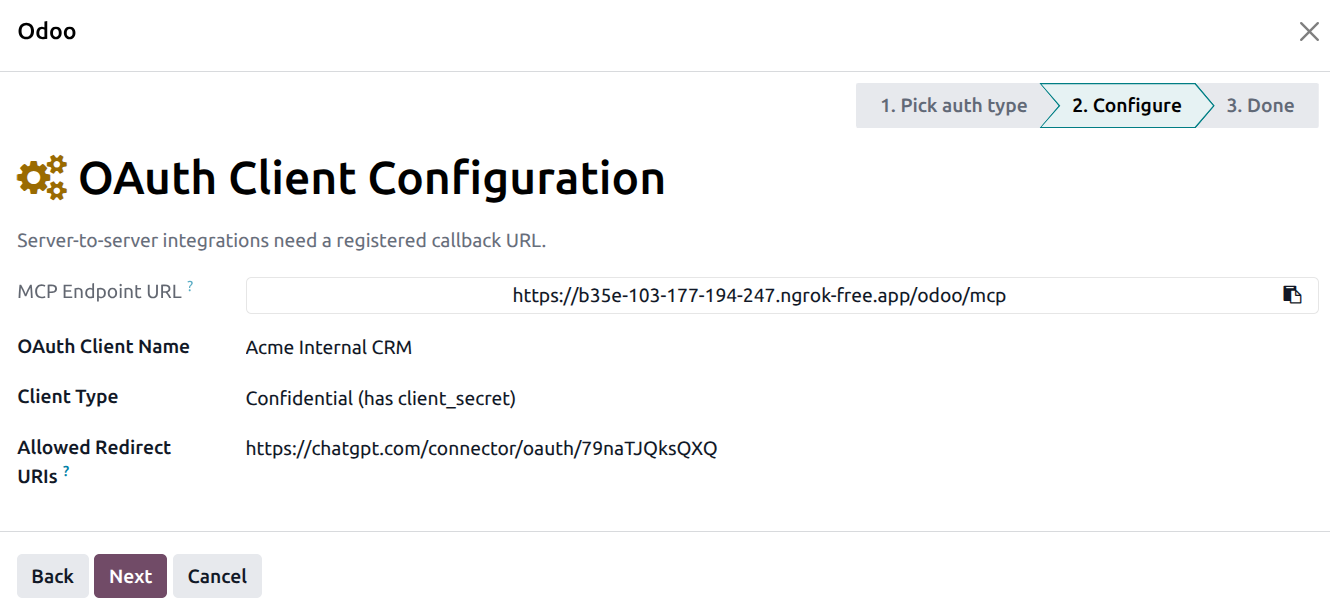
Click Next.
Step 3 — Review and copy the credentials
The Done step displays:
The MCP Endpoint URL.
The Client ID — copy this into your application’s OAuth client configuration.
The Client Secret (Confidential clients only) — also shown with a copy widget.
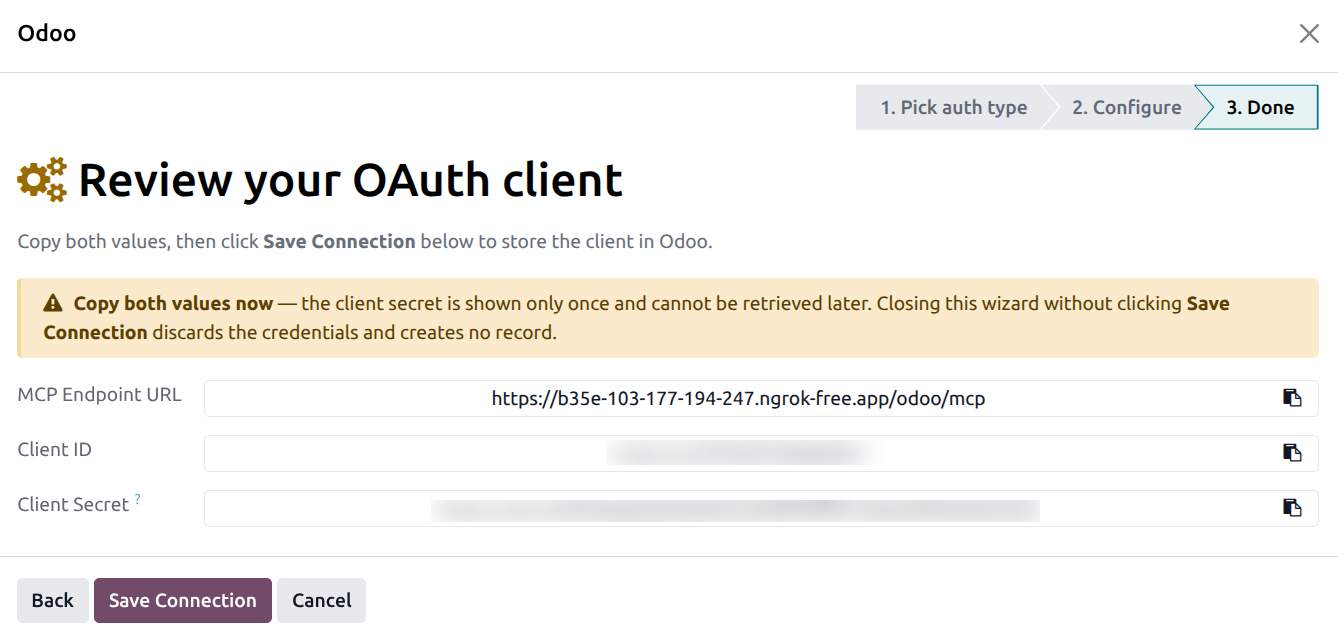
Warning
Both the Client Secret and the Client ID are shown exactly once on this screen. Copy both before clicking Save Connection. If you missed the secret, you can rotate it later from the Connection form, but the value you missed is gone.
Click Save Connection. The wizard creates the permanent client record and returns to the Connections list.
Tip
Token lifetimes (access token, refresh token, refresh grace window) are tuned in .
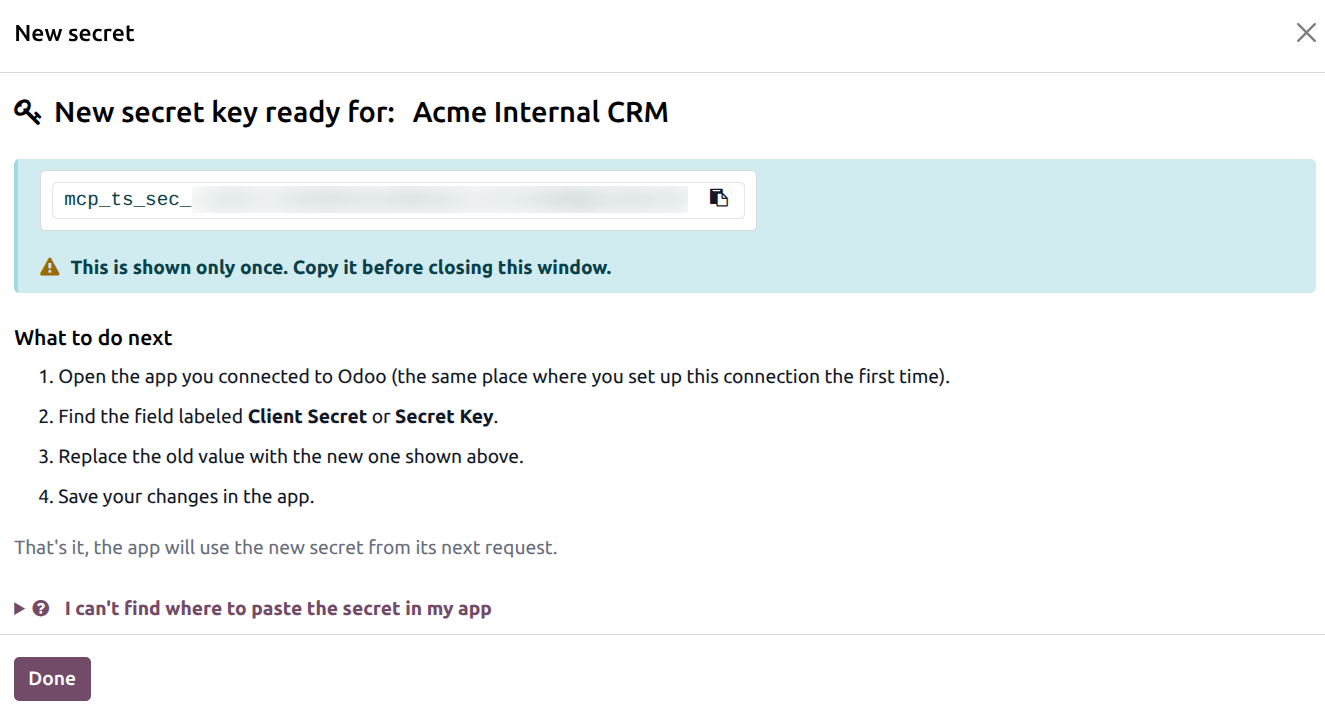
Rotating the client secret
A confidential OAuth client has a Rotate Secret Key button in the header of the Connection form. Clicking it:
Asks for confirmation (the current secret stops working immediately).
Generates a brand-new secret.
Opens a popup with the new secret and a “What to do next” step-by-step instruction set for non-technical admins.
See Rotate, Revoke, and Reactivate for the full lifecycle (rotation, revocation, re-activation).