MailChimp Account Configuration
Once the account is connected, its Settings tab controls how data is synchronized between Odoo and MailChimp. Open the account from .
The account form has one Settings tab and these actions at the top: Quick Setup, Confirm, Reset to Draft and Fetch Stores.
Tip
New to the connector? The Quick Setup wizard walks you through most of these settings in a few clicks.
Member Options
The Settings tab controls how members and contacts flow between the two systems.
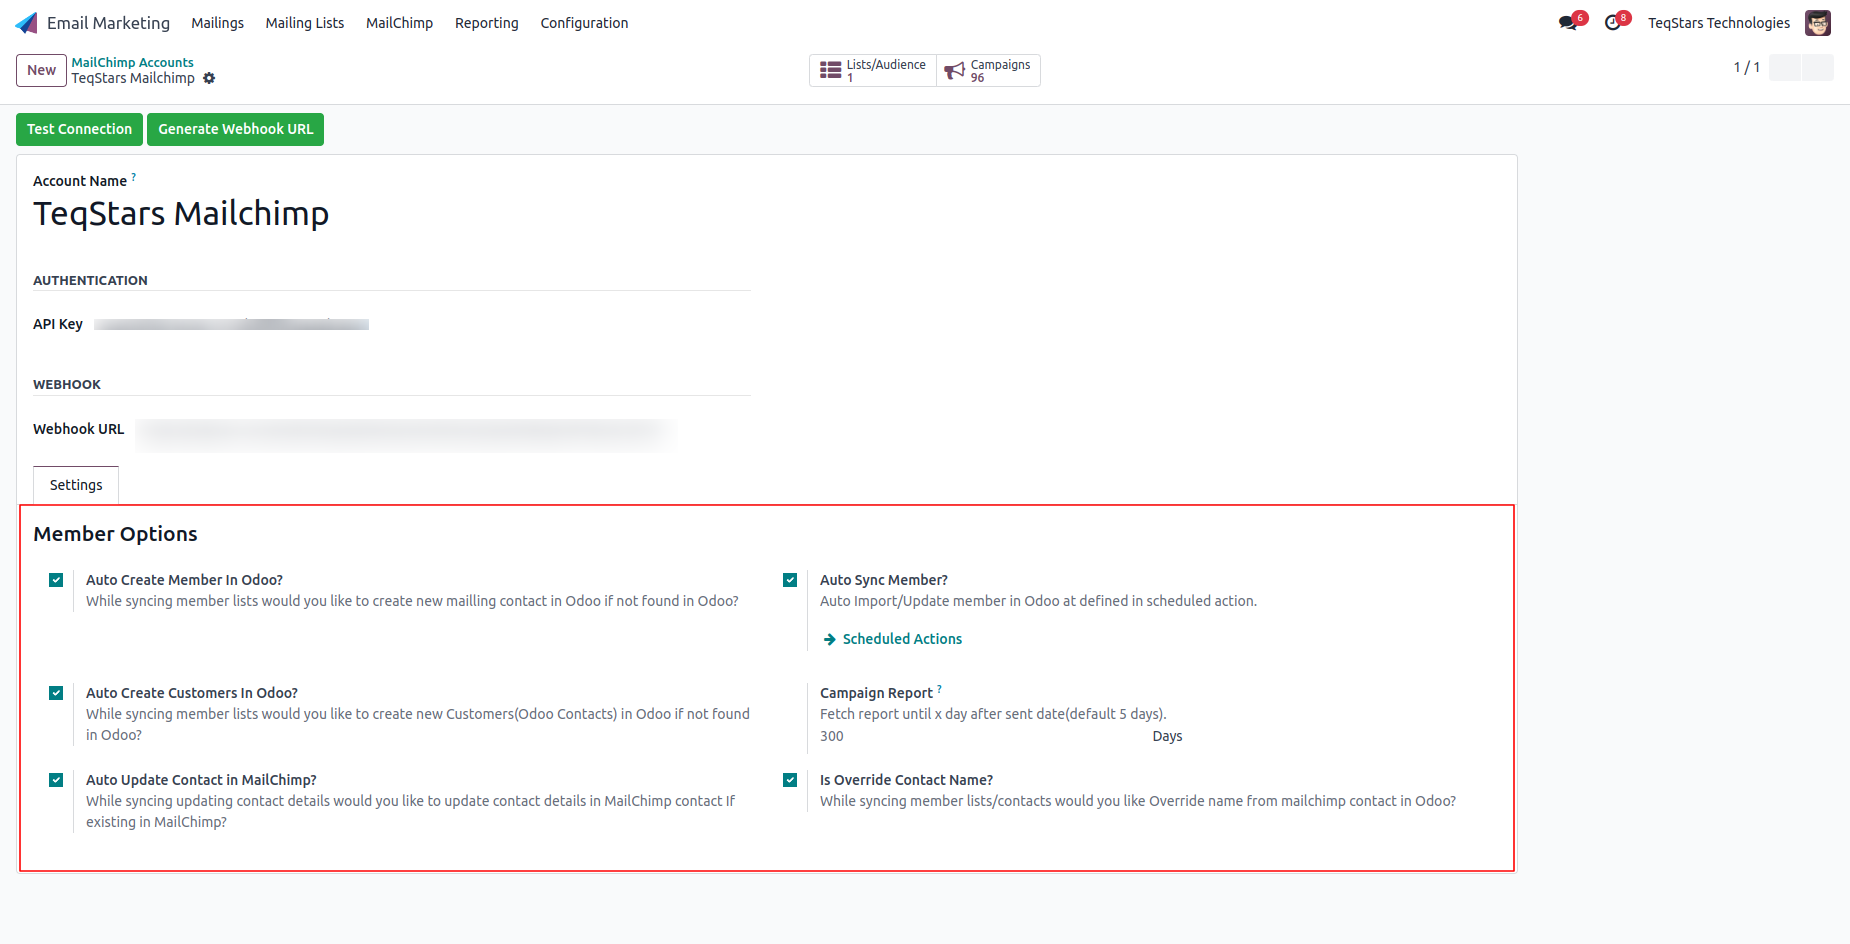
Auto Create Member In Odoo?: When a new subscriber is added in MailChimp, Odoo automatically creates a matching mailing contact, so your audience stays in step with Odoo without any manual work. (Enabled by default.)
Auto Create Customers In Odoo?: Odoo also creates a Customer record for each new subscriber if one does not already exist. Useful when you want to use MailChimp audiences not just for campaigns but also for CRM, sales and ecommerce. Visible only when Auto Create Member is enabled.
Auto Sync Member?: Lets the scheduled action refresh members between Odoo and MailChimp on its own, so you do not have to run the sync by hand.
Auto Update Contact in MailChimp?: When an Odoo mailing contact changes (name, email or mapped fields), the update is pushed back to MailChimp automatically. This avoids mismatched data and keeps both systems aligned.
Is Override Contact Name?: If a subscriber’s name in Odoo differs from the one in MailChimp, this decides whether Odoo replaces the MailChimp name during sync.
Campaign Report: How long Odoo keeps pulling reports (opens, clicks, bounces) from MailChimp after a campaign is sent. Default is 5 days, extendable to values like 30, 60 or 300 days for long-running sends.
Note
A contact’s address is only exported or updated when the full address (street, city, state, ZIP and country) is filled in. Incomplete addresses are skipped.
Tip
Keep Auto Create Customers In Odoo? off if you only use MailChimp for newsletters. Turn it on when you want subscribers to become CRM/sales contacts too.
Import MailChimp Data
Bring existing MailChimp data into Odoo from the Operations button on the account dashboard, or .
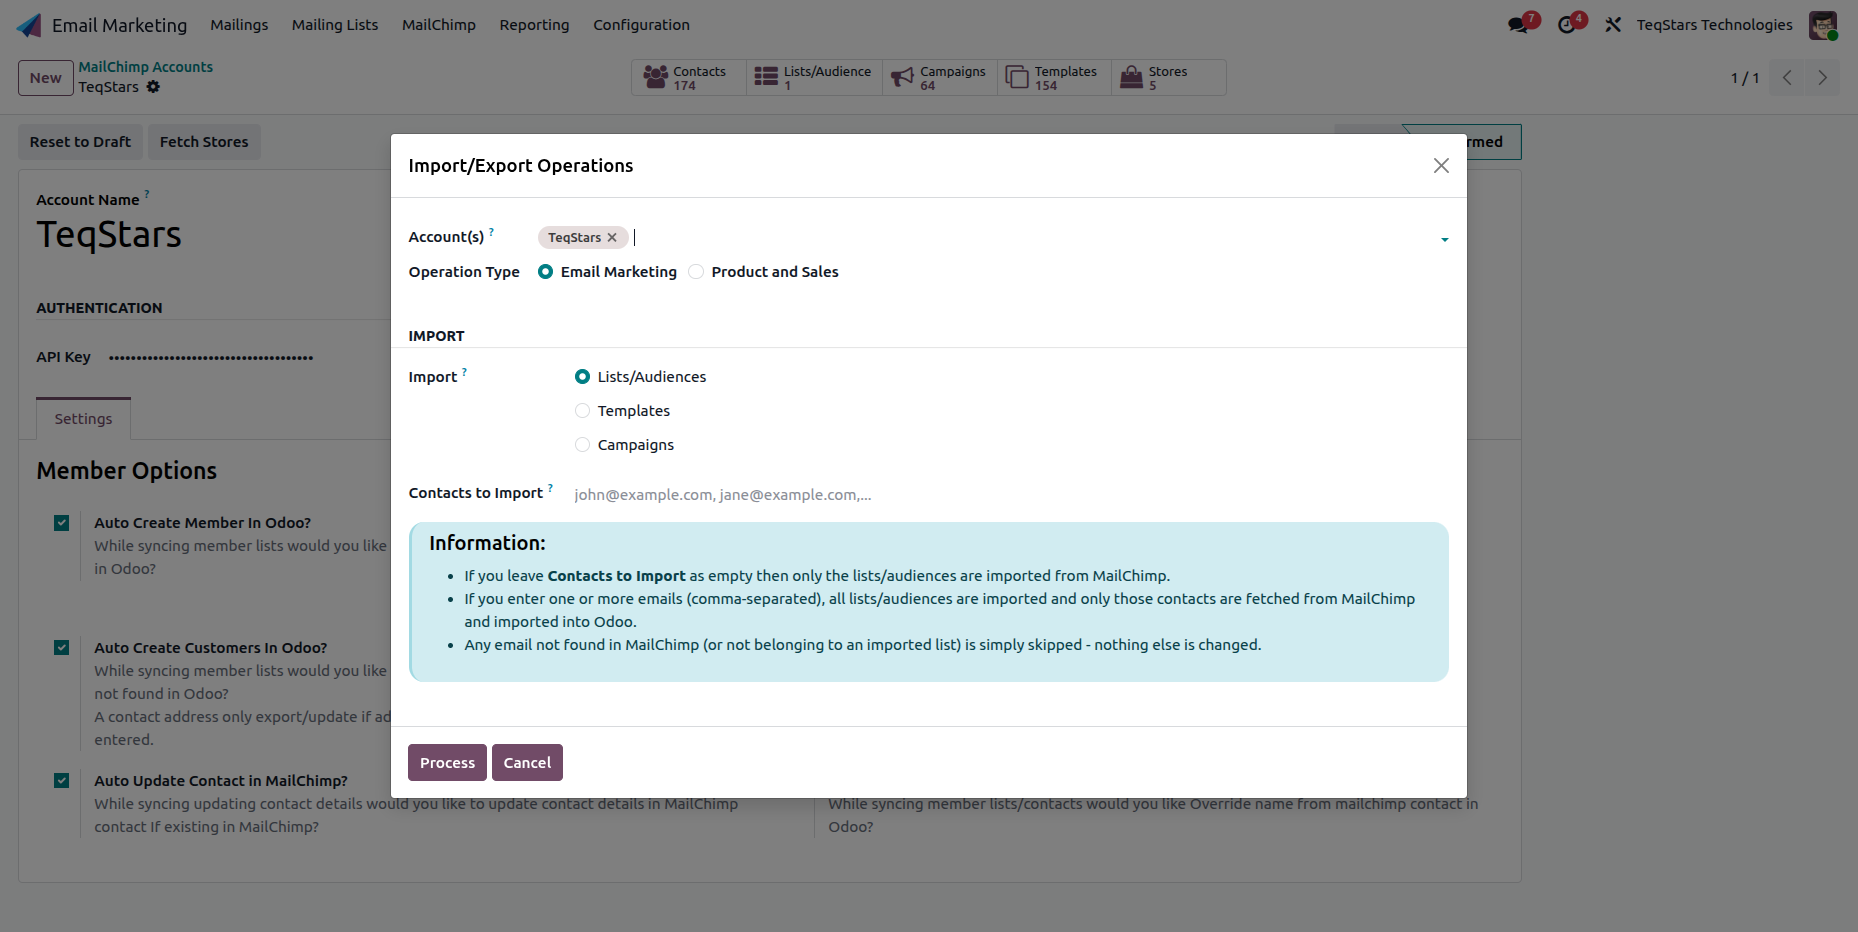
Select the Account(s).
Choose the Operation Type:
Email Marketing: Lists/Audiences, Templates, Campaigns.
Product and Sales: Mailchimp store products and orders (see Ecommerce Management).
Choose what to import, then click Process.
Note
Selecting Campaigns automatically selects Templates as well, because a campaign references the template it was built with.
Scheduled Actions
The connector ships with scheduled actions that keep data in sync and process the job queue. Open them from (developer mode) or from the Scheduled Actions link on the account.
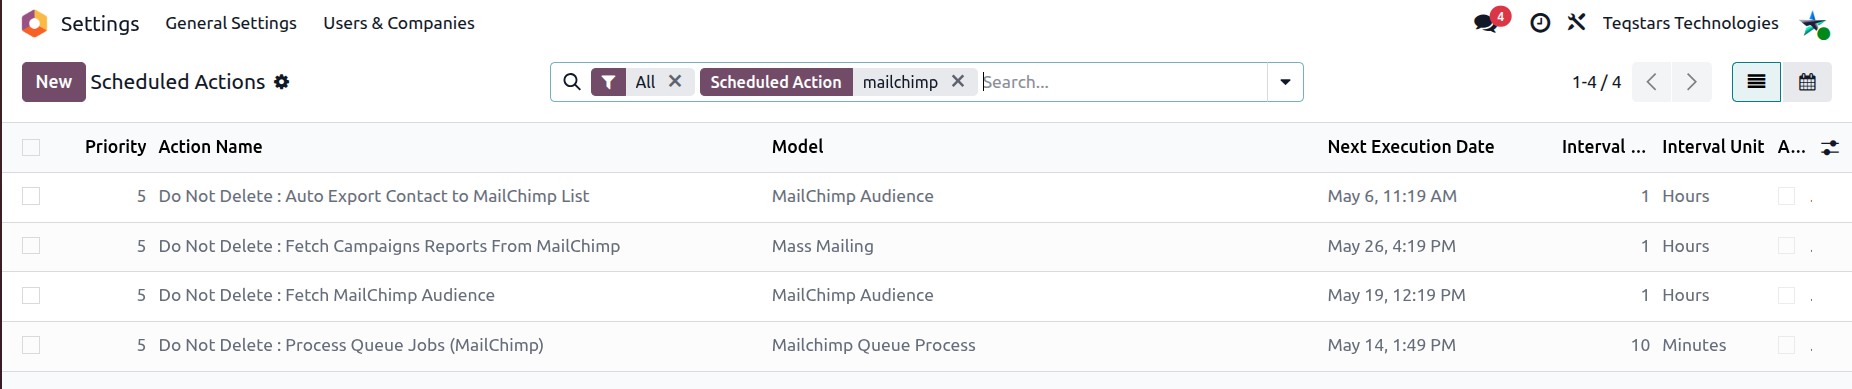
Scheduled Action |
Purpose |
Default Interval |
|---|---|---|
Fetch MailChimp Audience |
Import/update audience members |
Every 1 hour |
Fetch Campaigns Reports From MailChimp |
Import opens/clicks/bounces for campaigns |
Every 1 hour |
Auto Export Contact to MailChimp List |
Push matching Odoo contacts to MailChimp |
Every 1 hour |
Export Sale Order Mailchimp |
Export confirmed Odoo sale orders to stores |
Every 1 day |
Process Queue Jobs (MailChimp) |
Process queued jobs (members, reports, products) |
Every 10 minutes |
Note
Large audiences, reports and catalogs are fetched into a background Job Queue and processed in small groups. This stops large imports from failing, and records appear in Odoo gradually as the queue is processed. See Job Queue and Logs.
Warning
Do not delete these scheduled actions. If one is removed, re-upgrade the module to restore it.