Configure Sendcloud Connector
The Sendcloud shipping connector provides a seamless integration between your Odoo system and Europe’s leading shipping service aggregator. Once configured, users can fetch real-time shipping rates, automatically generate labels, and manage end-to-end tracking for domestic and international shipments directly within their database.
Setup in Sendcloud
This section provides a complete step-by-step guide to prepare your Sendcloud account for the Odoo integration.
Let’s begin with the account setup.
Account Setup & API Credentials
Before configuring the app in Odoo, you must have an active Sendcloud account with generated API credentials.
Create an Account: Sign up or log in to your Sendcloud account.
Get Credentials: Generate your integration keys by following the official Sendcloud API Documentation.
Note
During the signup process, Sendcloud will require either a VAT or an EORI number. Once your account is fully set up, remember to activate the specific shipping carriers you intend to use with Odoo.
Important
You can use this integration with a free Sendcloud plan, provided you have a bank account linked (Sendcloud requires a payment method to process shipments). However, if you wish to use advanced features like Sendcloud Shipping Rules or custom carrier contracts, a paid Sendcloud subscription is required.
See also
Address Configuration
Once logged into the Sendcloud account, navigate to the left-hand sidebar, click on , and then select . Here, fill in the field for your Warehouse address.
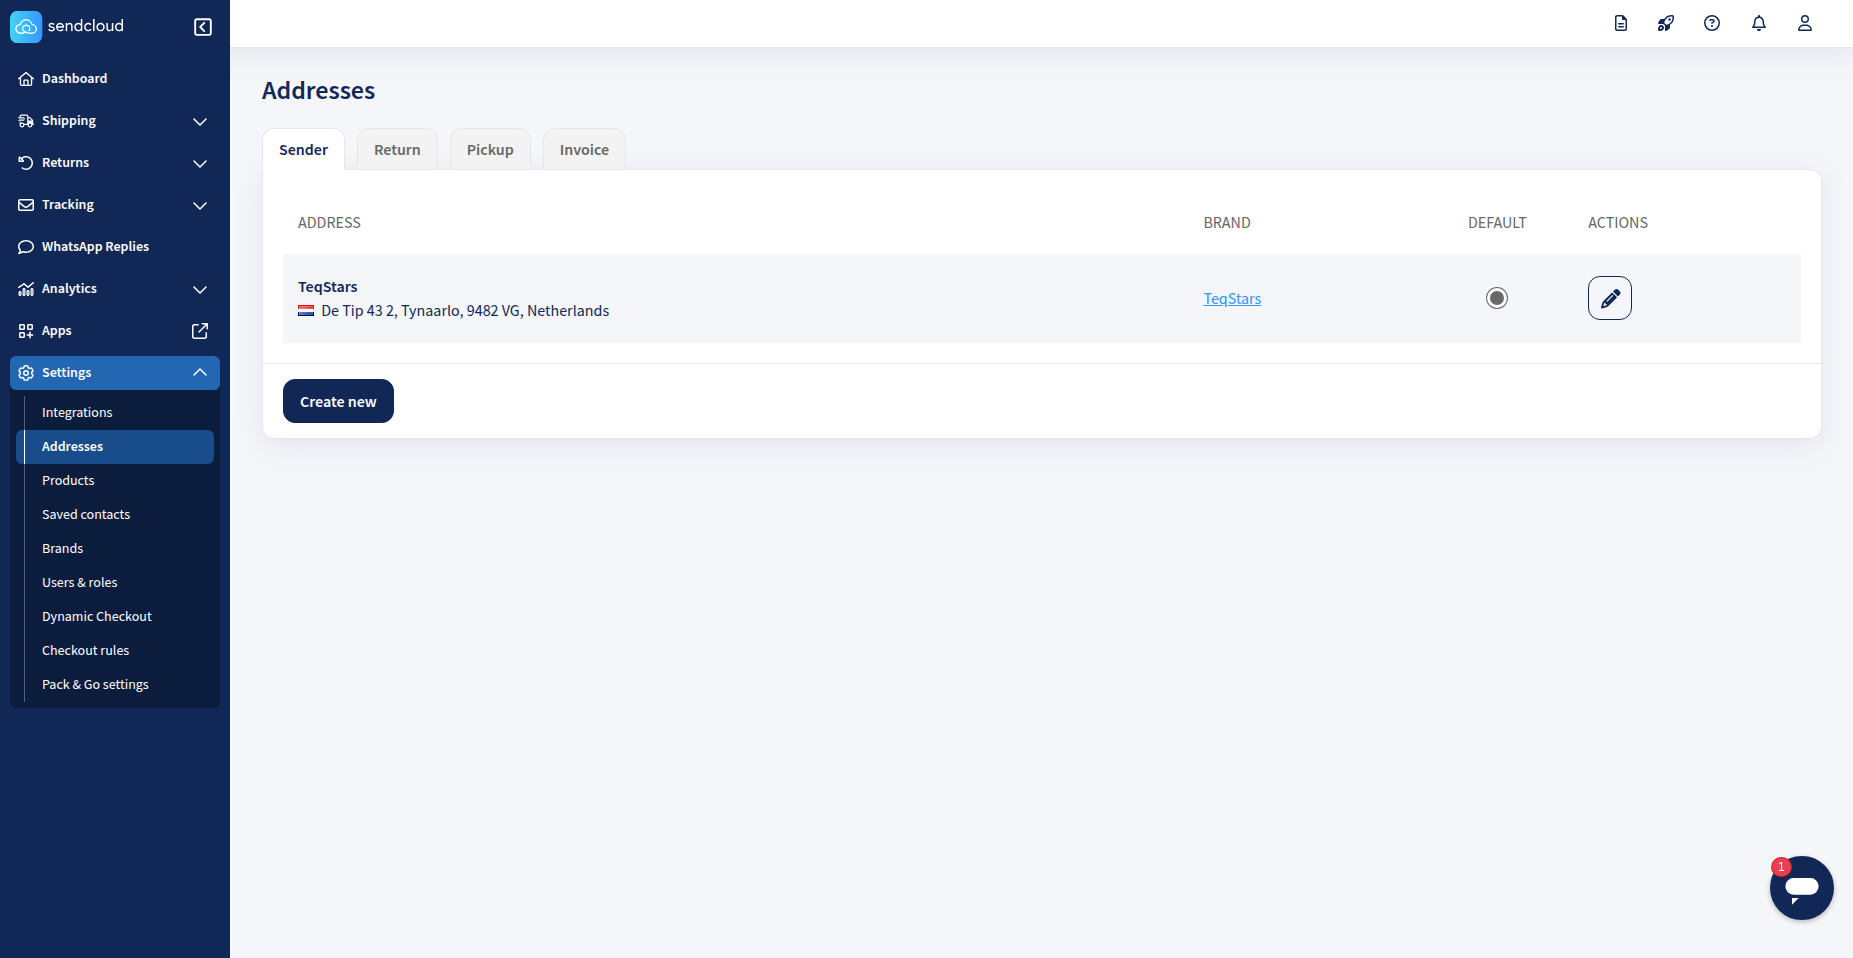
If you plan to process returns through Sendcloud, you must configure a specific Return Address. Navigate to and select the Return tab to create or edit your address.
While filling out the address form, locate the Address Name (optional) field under the Miscellaneous section. Enter the exact name of your Odoo warehouse here.
Warning
The name entered in the Sendcloud address form must be an identical, character-for-character match to your warehouse name in Odoo, or the sync will fail.
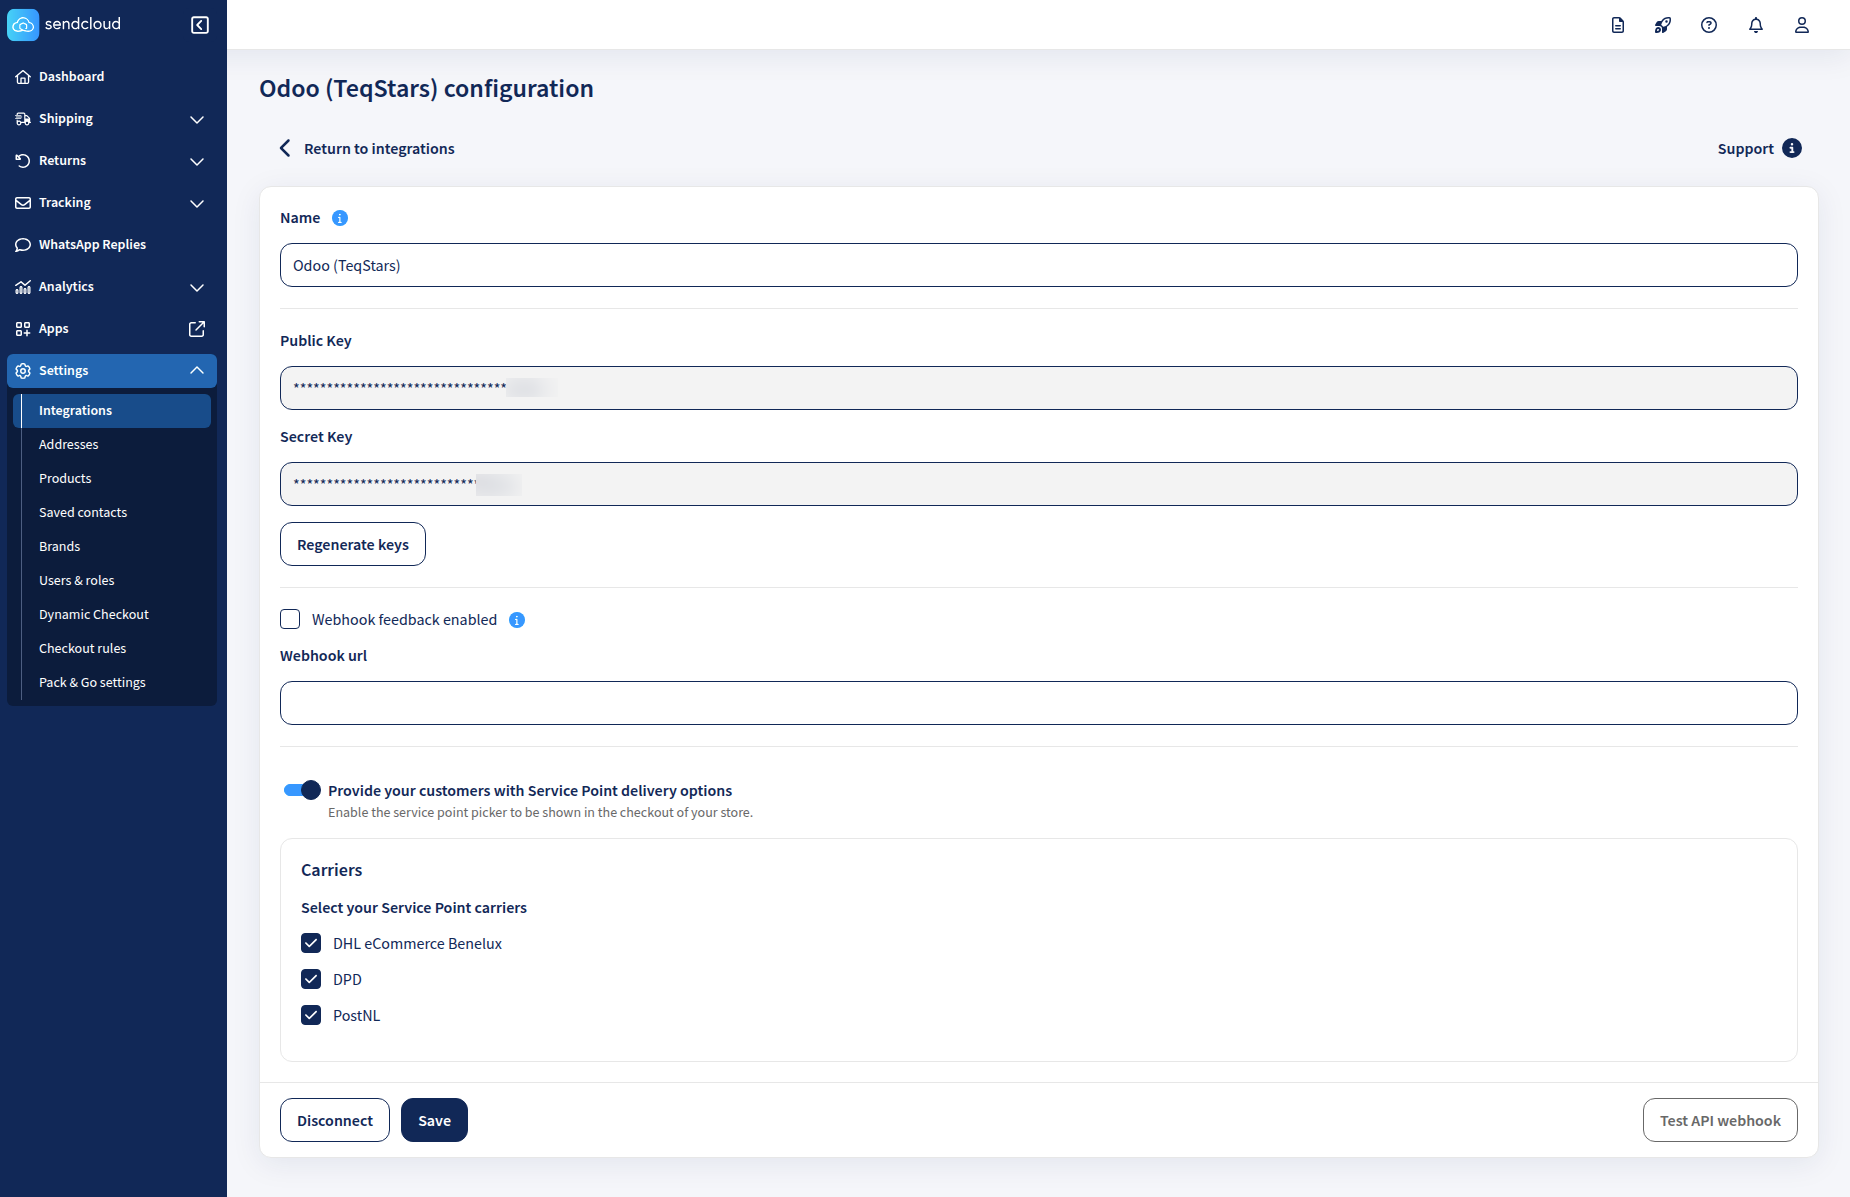
Generate Sendcloud credentials
To connect your Odoo database, you must generate and copy your API credentials from Sendcloud.
In your Sendcloud account, navigate to the left-hand sidebar and select .
Locate your integration (such as the Sendcloud API or custom app) and click Connect or Configure.
On the configuration page, enter a recognizable name in the Name field (e.g.,
Odoo (TeqStars)).Your Public Key and Secret Key are displayed right below the name. Copy both of these keys, as you will need to paste them into Odoo.
(Optional) If you plan to use pickup locations, toggle on Provide your customers with Service Point delivery options and check the boxes next to your desired carriers (e.g., DPD, PostNL).
Click the Save button at the bottom of the page.
Setup in Odoo
This document provides a complete step-by-step guide to configure and use the Sendcloud connector in Odoo.
Let’s begin with the configurations.
Configure Shipping partner
To configure shipping partner in Odoo, navigate to and click on New.
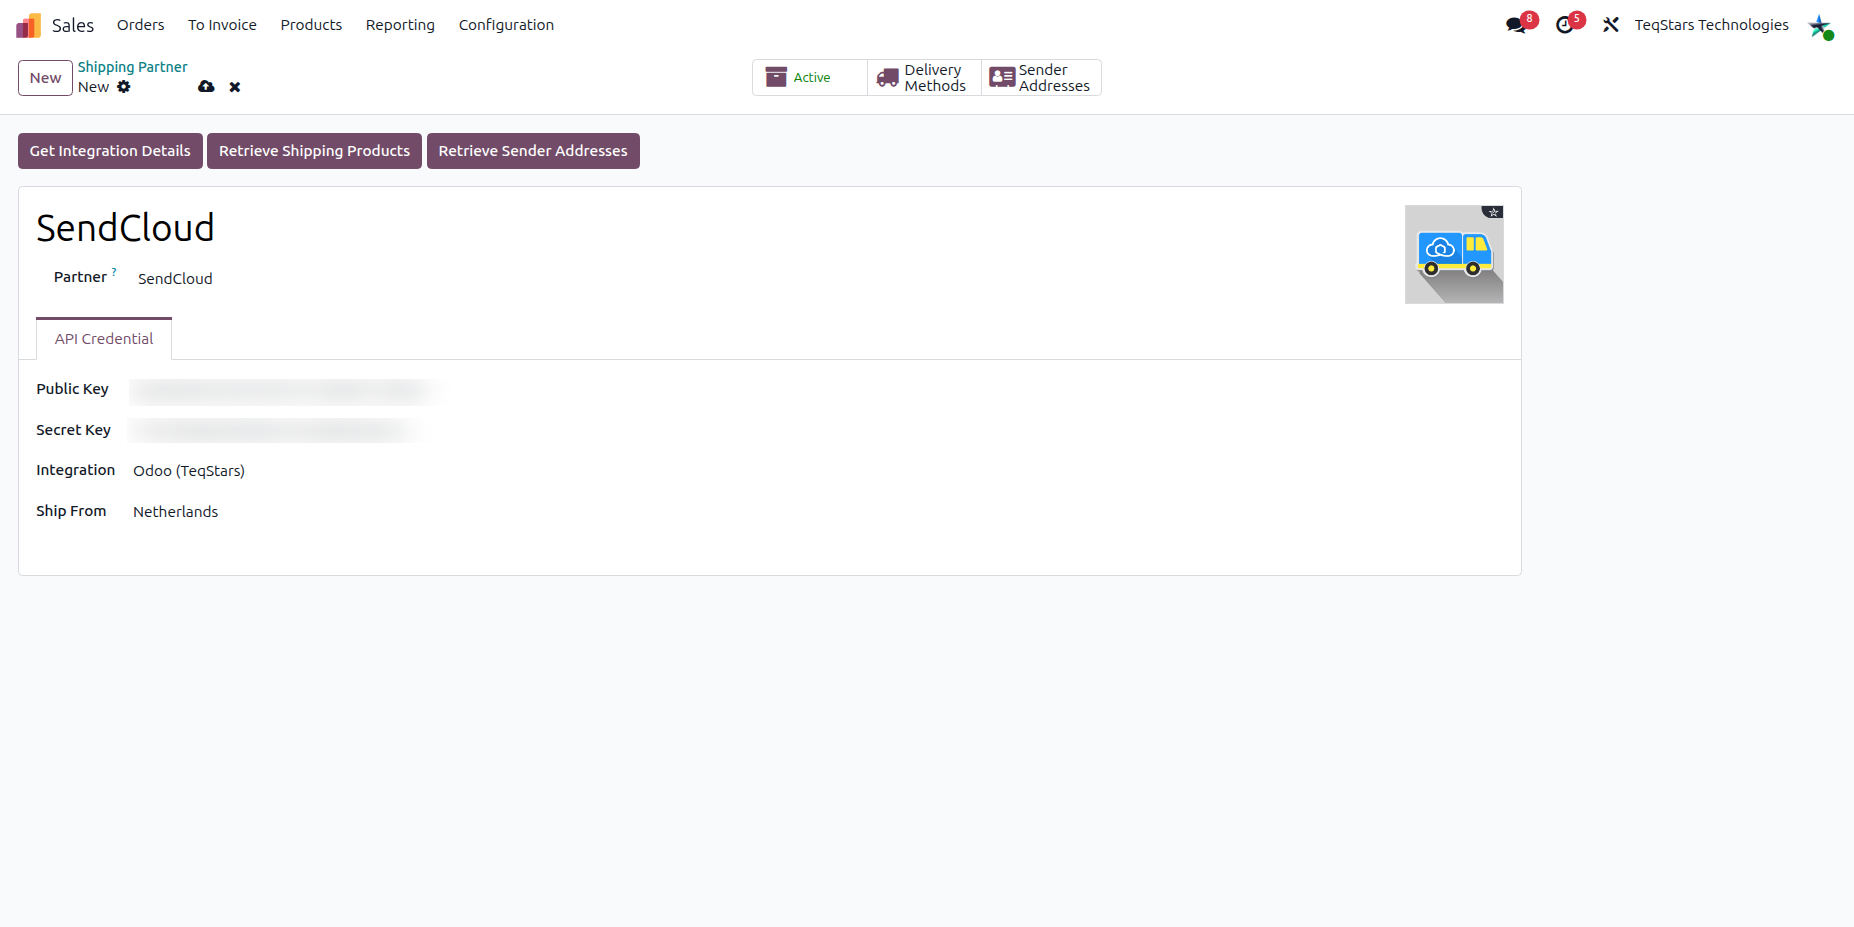
Fill in the required fields to connect your account:
Name: Provide a clear, recognizable name for your account (e.g.,
Sendcloud).Partner: Choose sendcloud.
Public Key: Enter your sendcloud account public key.
Secret Key: Enter your sendcloud account secret key.
Once the keys are entered, click the Get Integration Details button to fetch your connected setups from Sendcloud.
Integration: Select the specific Sendcloud integration you configured for Odoo.
Ship From: Select the country from which the shipment will be dispatched.
Now click on Retrieve shipping products and Retrieve sender address buttons for get products and sender address from sendcloud.
Click the Sender Address button to view sender addresses.
Tip
You can verify that your addresses synced correctly by clicking the Sender Address smart button at the top of the form.
Configure Delivery Method
Now click on Delivery Methods and click on New or navigate to and click on New.
Tip
Delivery Methods can also be accessed by going to .
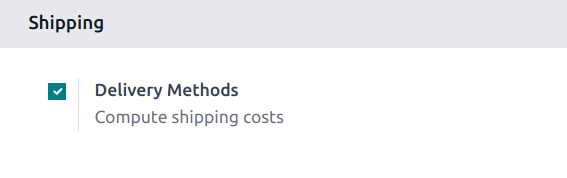
Note
If the Delivery Methods option is not available from the Configuration drop-down menu, verify whether the feature is enabled by following these steps:
Go to .
Scroll to the Shipping section and enable the Delivery Methods feature by checking the corresponding checkbox.
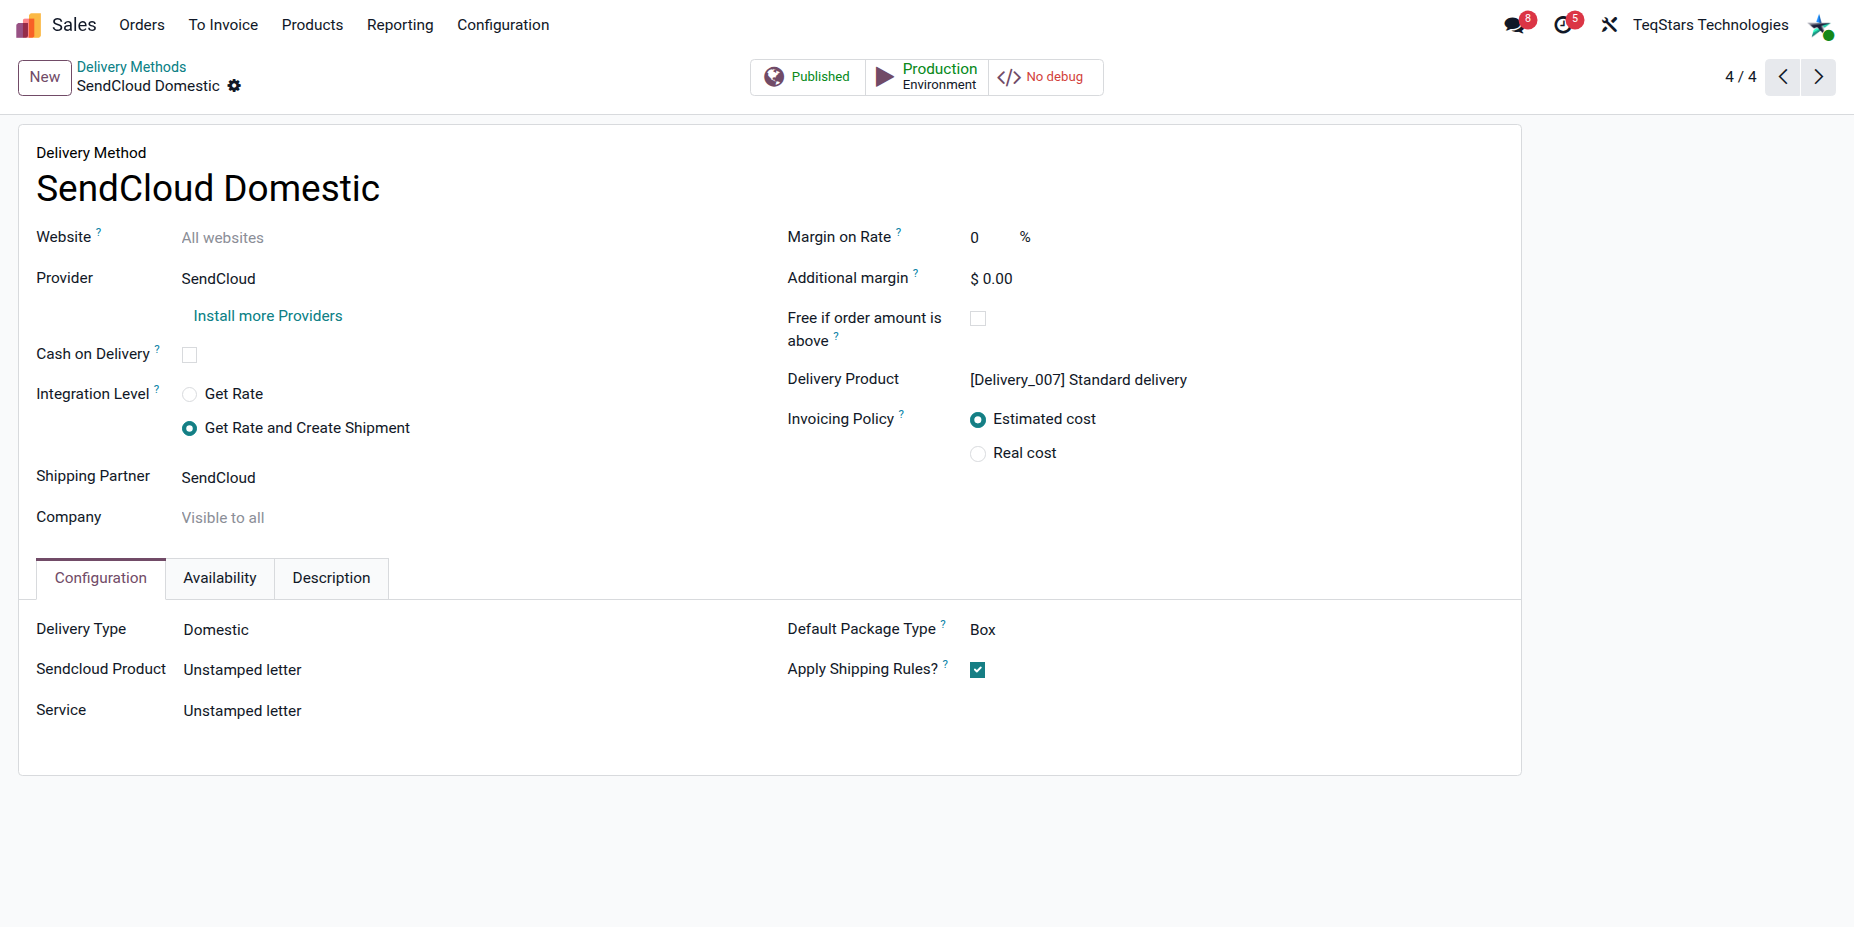
Delivery Method: Choose meaningful name for delivery method (e.g. Sendcloud Domestic or Sendcloud International).
Provider: Choose sendcloud.
Shipping Partner: Select shipping partner which you configure.
Delivery Type: Specify whether the delivery method is for Domestic or International shipments.
Sendcloud Product: : Choose shipping product. Refer shipping products
Service: You can specify a service, which will be used when sending the shipment to SendCloud. If no service is specified, the system will automatically select a service within the appropriate weight range based on the order weight when sending the shipment data to SendCloud.
Default Package Type: Set the default package type for shipments. If no package type is chosen in the delivery order, this one will be applied automatically.
Apply Shipping Rule: Enable this to apply configured shipping rules before generating the label and announcing the parcel.
Use Delivery Method In Sale Order
Your sales team can easily fetch live Sendcloud shipping rates directly on Quotations.
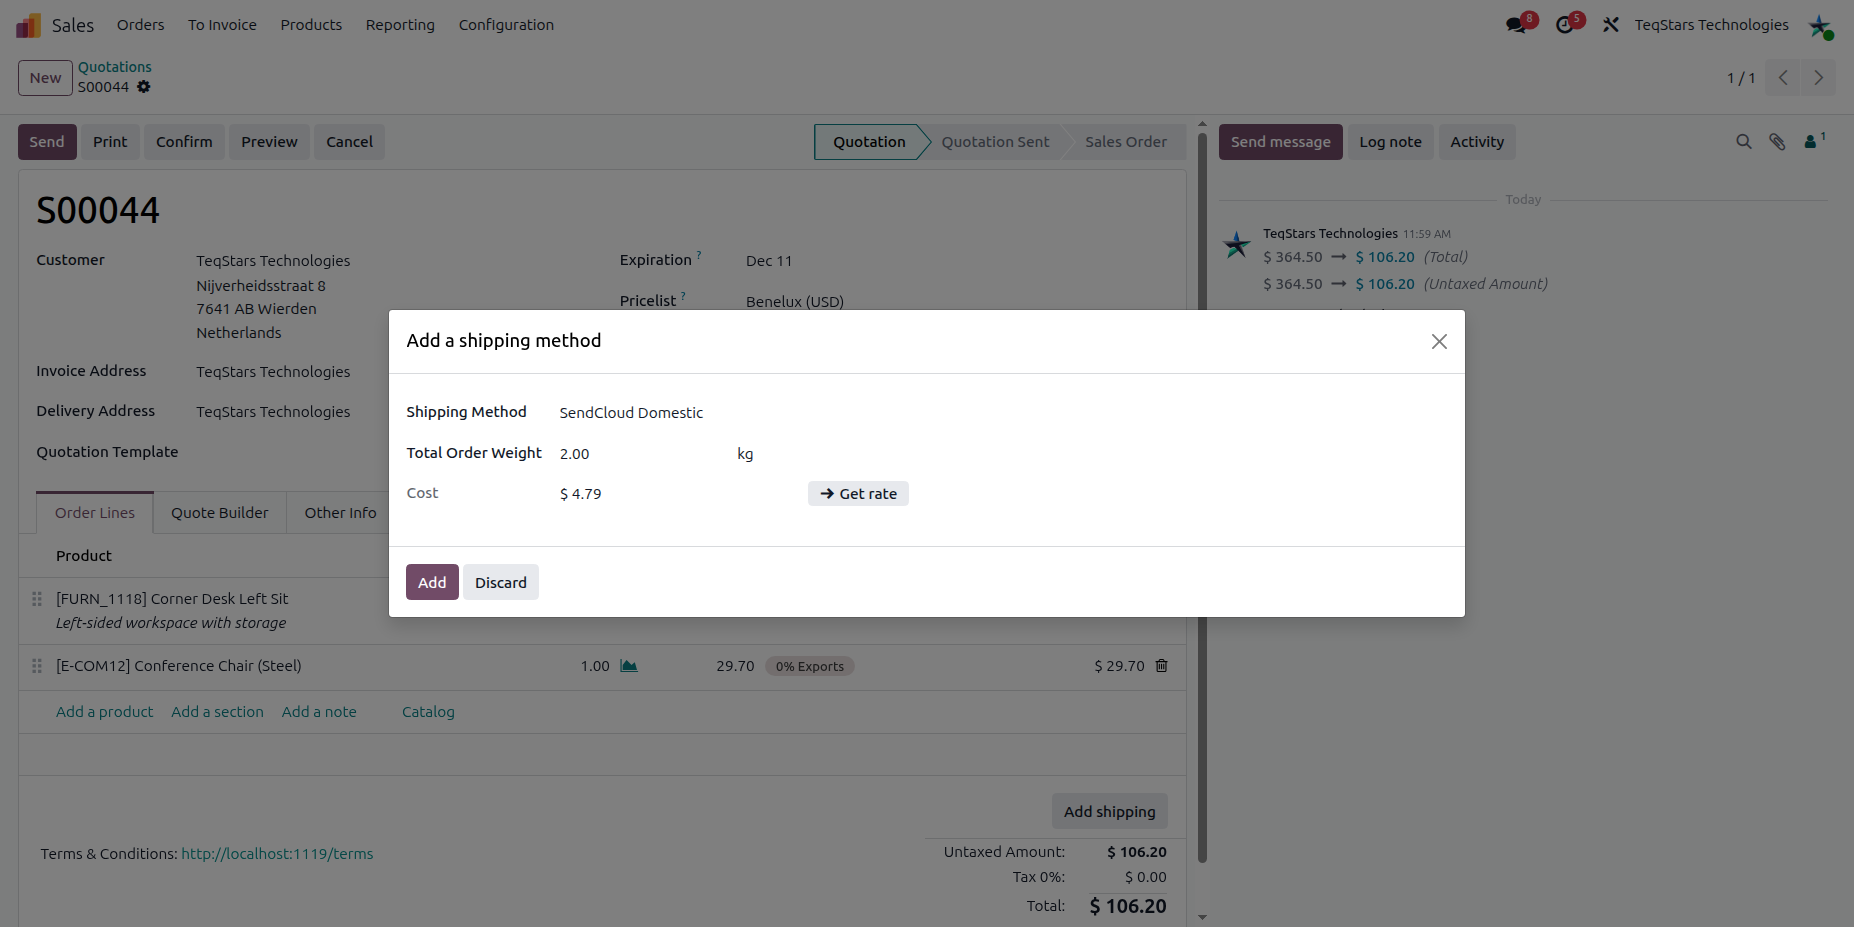
Click the Add Shipping button on the Sale Order.
Shipping Method: Choose the shipping method which you configure for sendcloud.
Total order weight: Odoo automatically calculates the order weight based on the selected products, but you can enter a weight manually if needed.
Get Rate: Click this button to fetch the shipping rate from SendCloud based on the selected delivery method and order details.
Click the Add button to insert the shipping charge as a line item on the sale order.
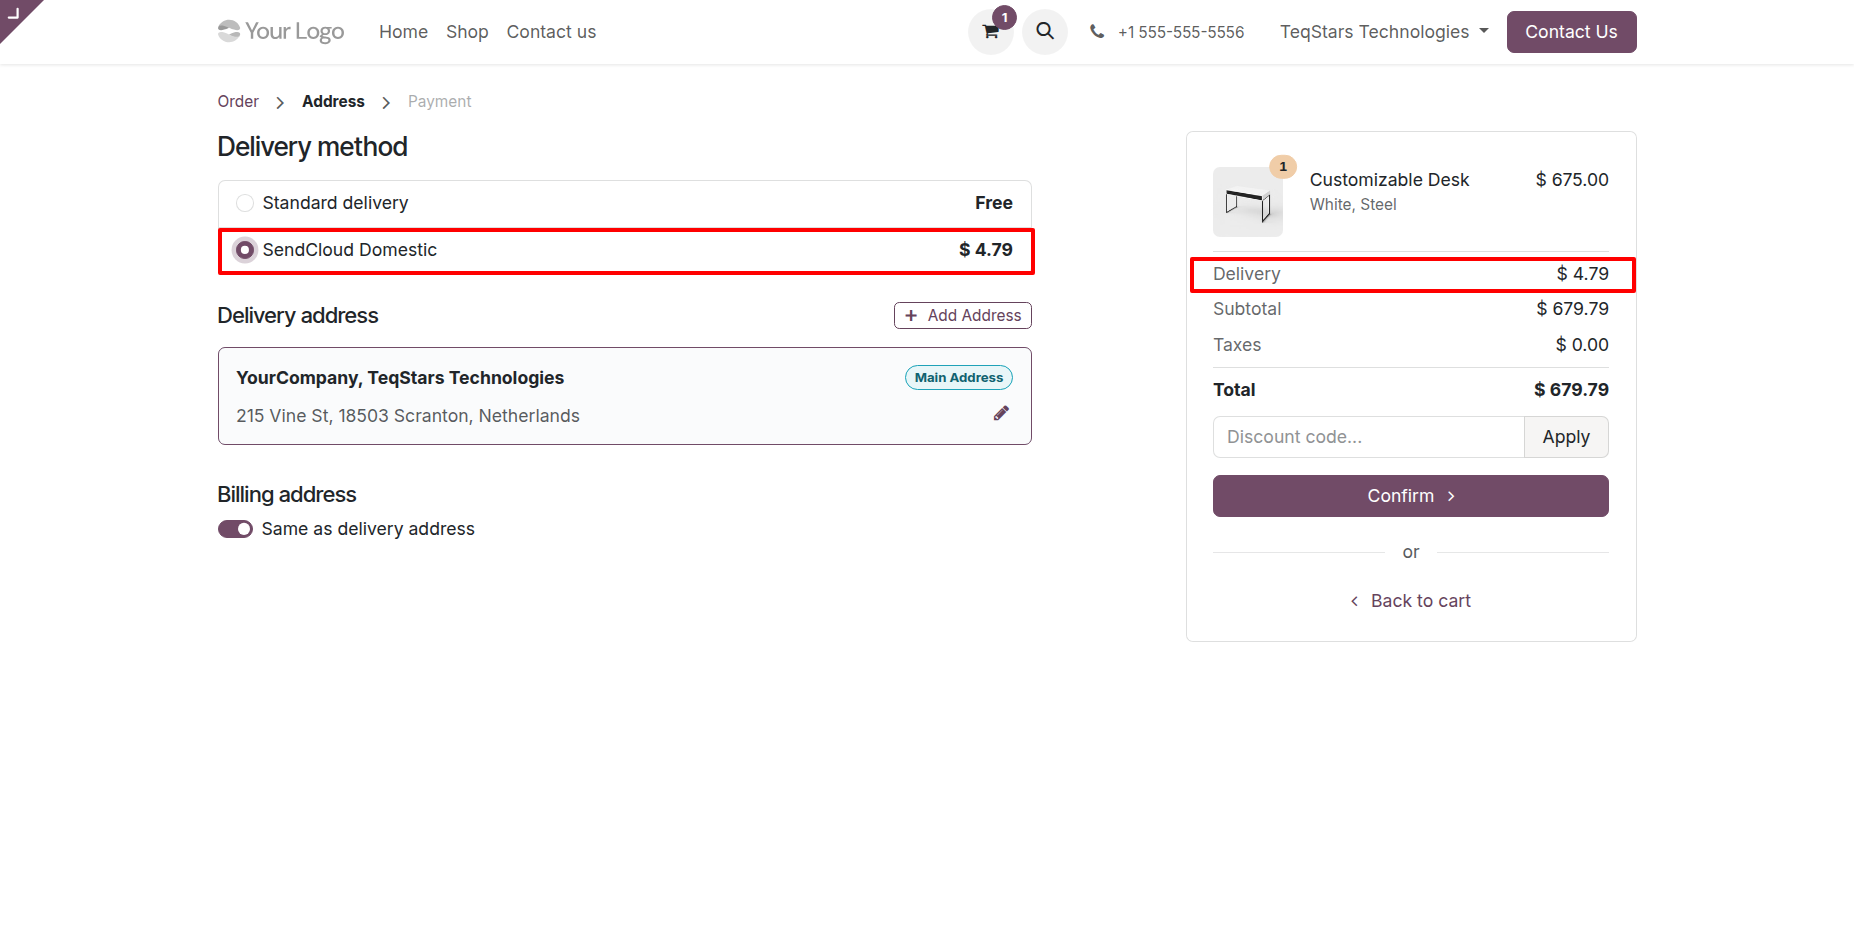
Use Delivery Method In Website Order
If you use Odoo eCommerce, customers can select these configured Sendcloud delivery methods directly during checkout.
Configure Delivery Order
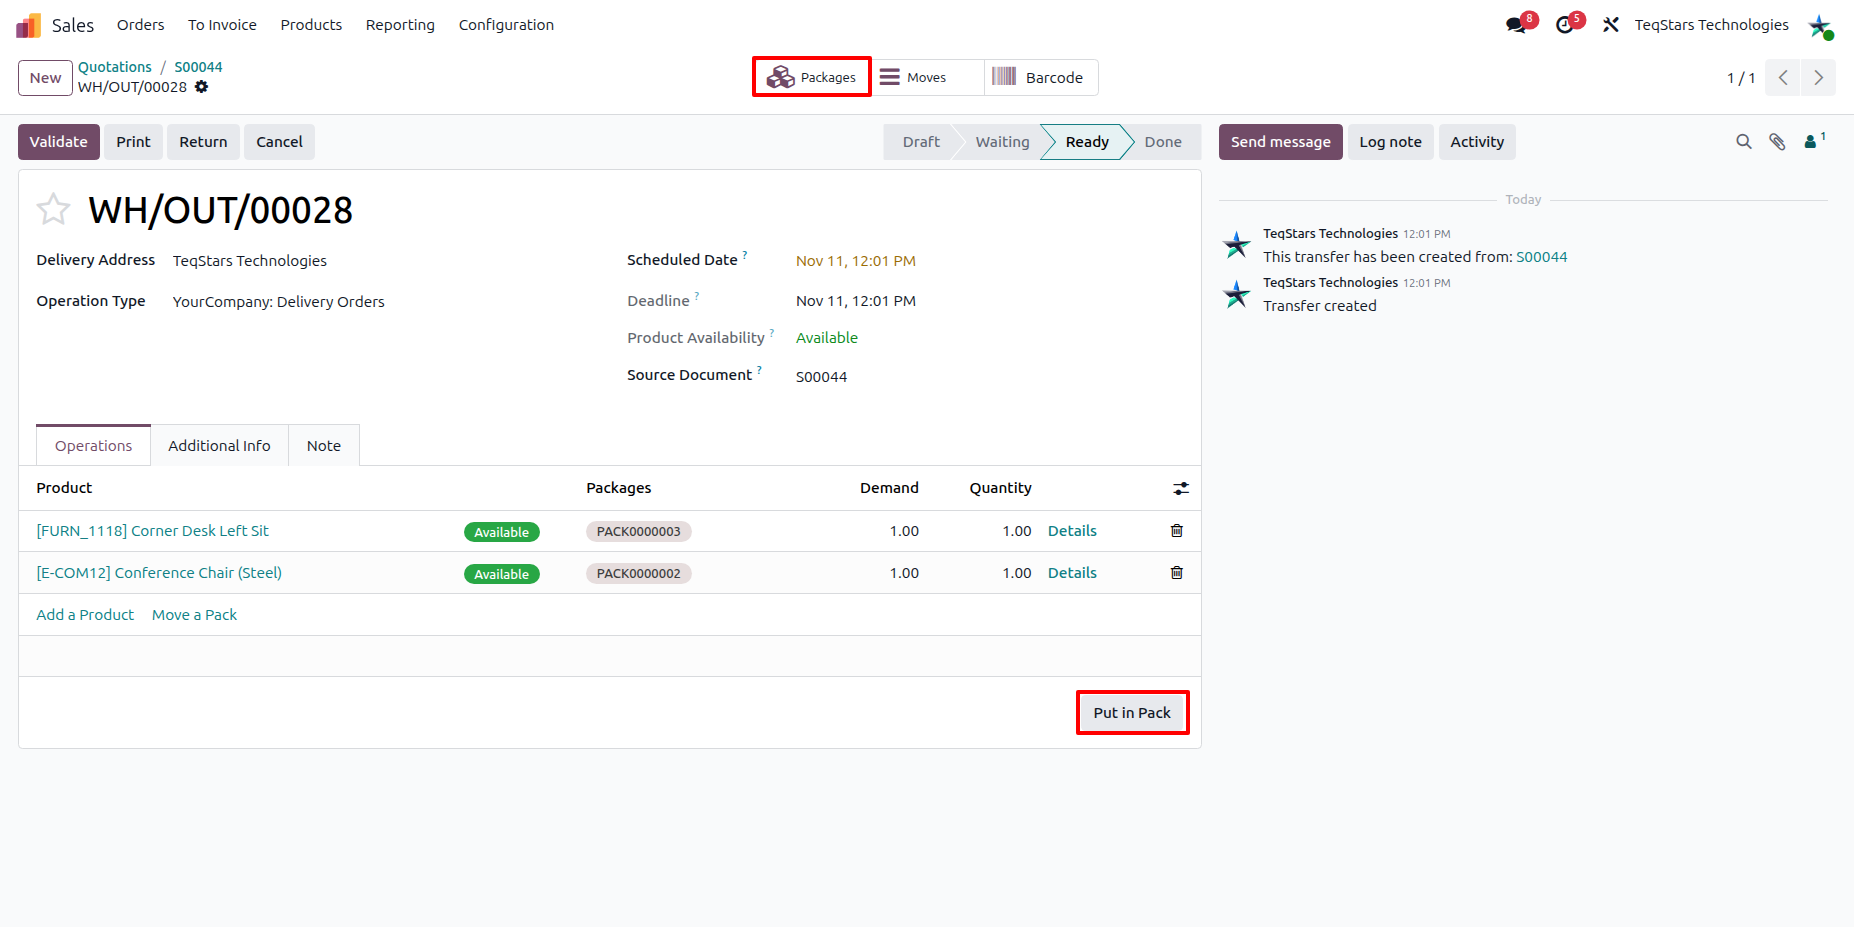
Once an order is confirmed, proceed to the Inventory app to process the shipment.
If you are shipping a large order in multiple boxes, use the Put in Pack operation to organize the products. This ensures Sendcloud generates a distinct shipping label for each physical package.
Carrier: Choose the shipping method which you configure for sendcloud.
Ship From(Sendcloud): Choose sender address.
Pickup / Service Points
Sendcloud’s Service Point delivery allows customers to have their packages delivered to a convenient pickup location (such as a local shop or parcel locker) rather than a private residential address.
To enable this feature for a specific delivery method, open the shipping method form. In the SendCloud Configuration tab, navigate to the options section and enable the setting to use Sendcloud Service Points/Locations.
Note
Website & Backend Support: When enabled, customers can select their preferred pickup location during the online checkout process on your eCommerce website.
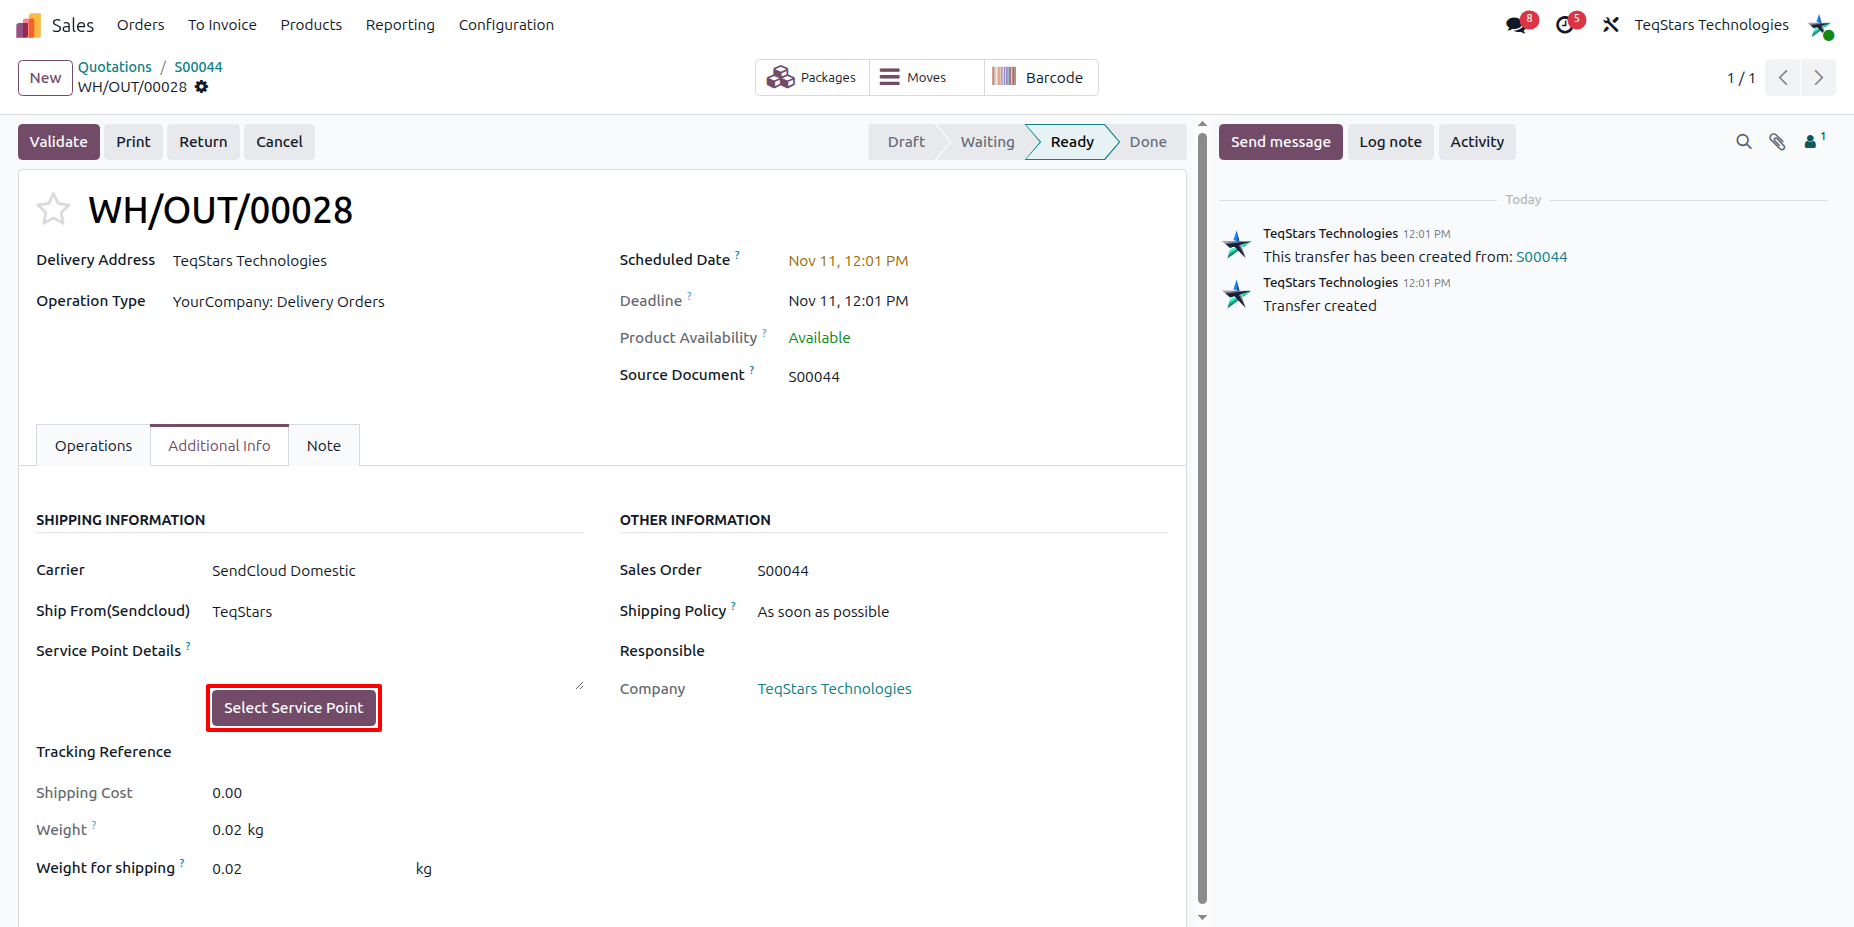
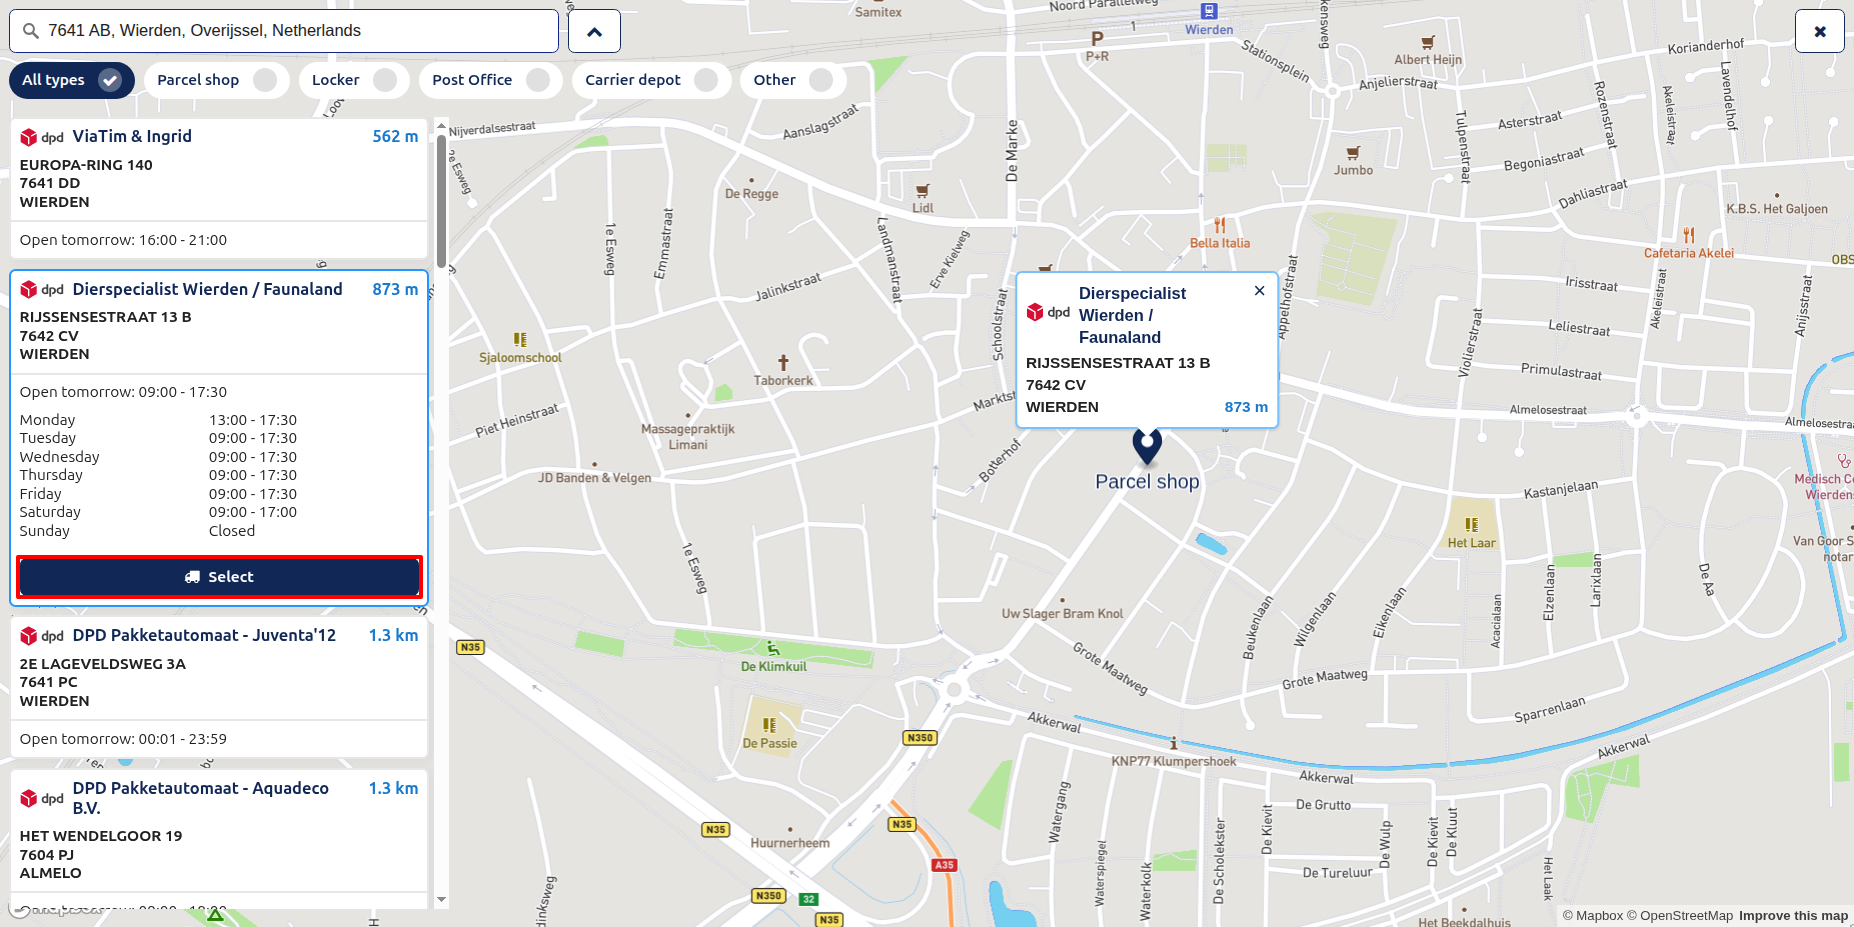
Additionally, your internal team can manually select or update a service point directly from the backend. Simply open the Delivery Order, go to the Additional Info tab, and click the Select Service Point button.Click the Select Service Point button to open a window where you can search and choose the correct pickup location for the customer.
Click on Validate button to ship order.
Required Shipping Information
To successfully generate Sendcloud shipping labels, the following data must be filled out completely in Odoo. Missing or incorrect data here is the most common cause of label generation errors. - Customer Information: The customer record must include a complete physical shipping address, a valid Email, and a Phone or Mobile number. The Sendcloud API will reject shipments missing this contact data. - Product Weight: Navigate to the product form’s Inventory tab and verify the weight field is greater than zero. Sendcloud requires accurate weights to generate correct labels. - Warehouse Address: Your Odoo warehouse address (and name) must exactly match the Sender and Return addresses you previously configured in your Sendcloud dashboard.
Tracking and shipping information in delivery order.
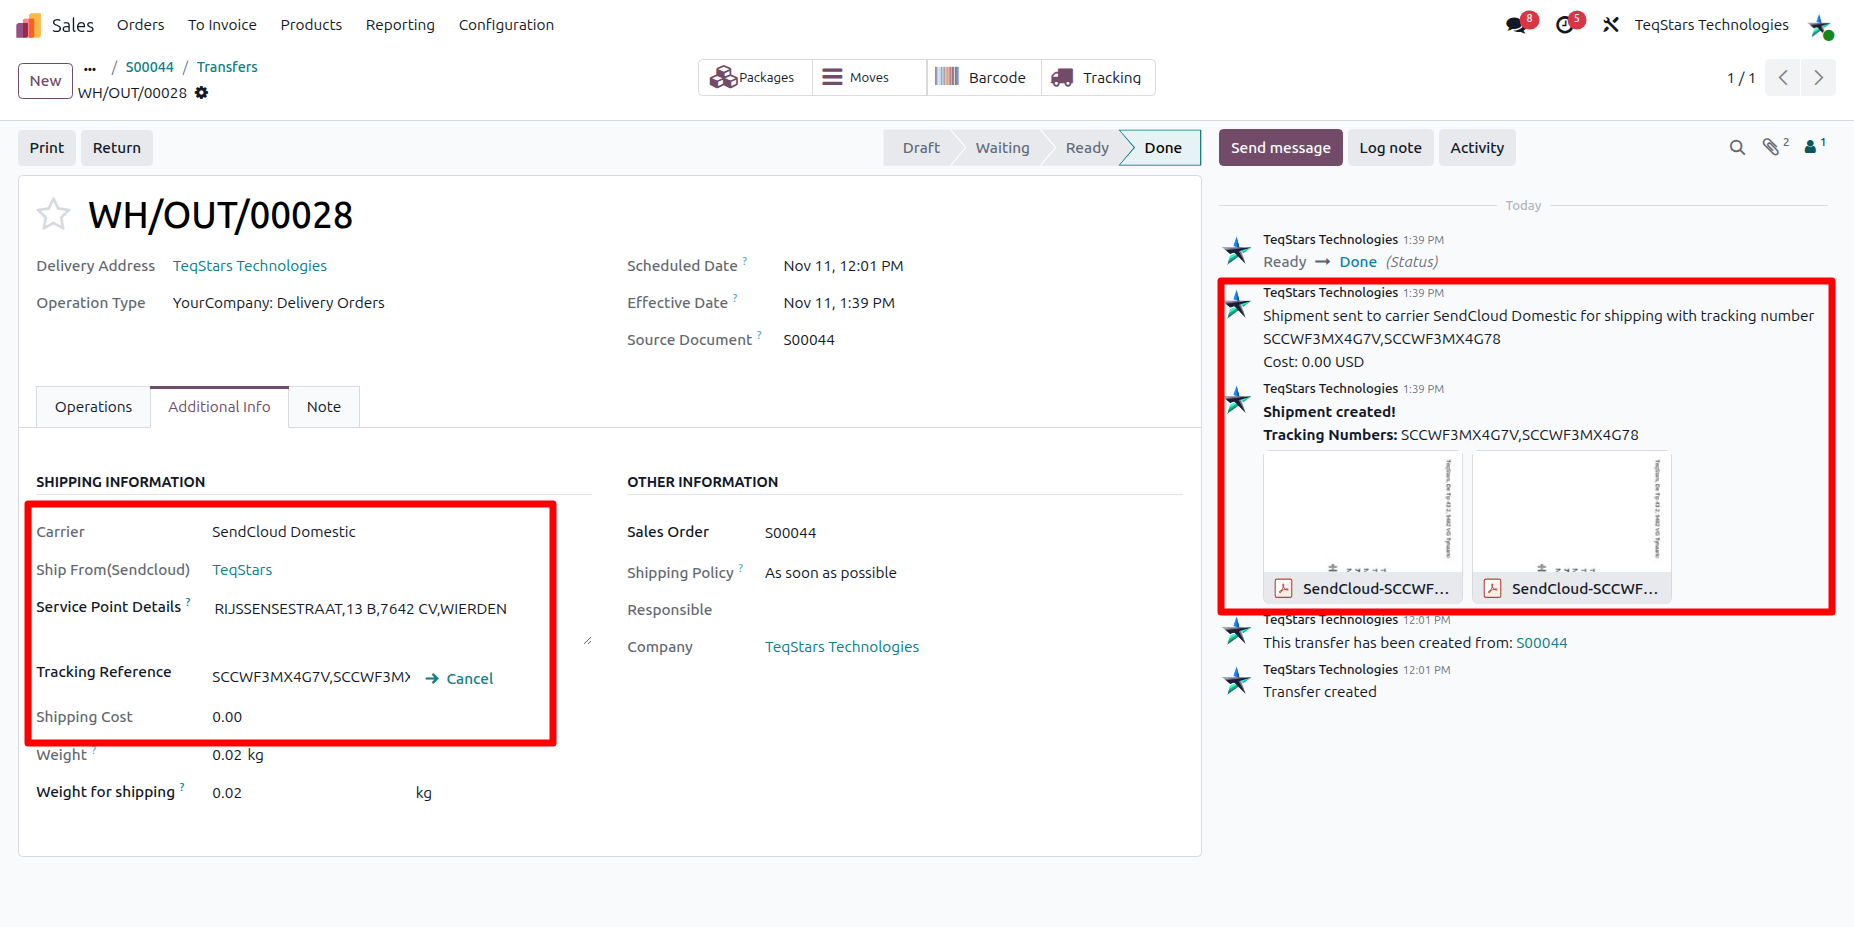
- After validation:
Sendcloud automatically generates shipping documents, which appear in the chatter. This includes:
Shipping Label(s): Generated automatically based on the number of parcels in the order.
Tracking Number: A live tracking reference is assigned to the delivery order so customers can follow their shipment.
Customs Documents: Automatically generated and attached if required by the destination country.
Important
If your Sendcloud connector is configured to handle returns, please note that Sendcloud automatically bills your account the moment a return label is generated in Odoo.
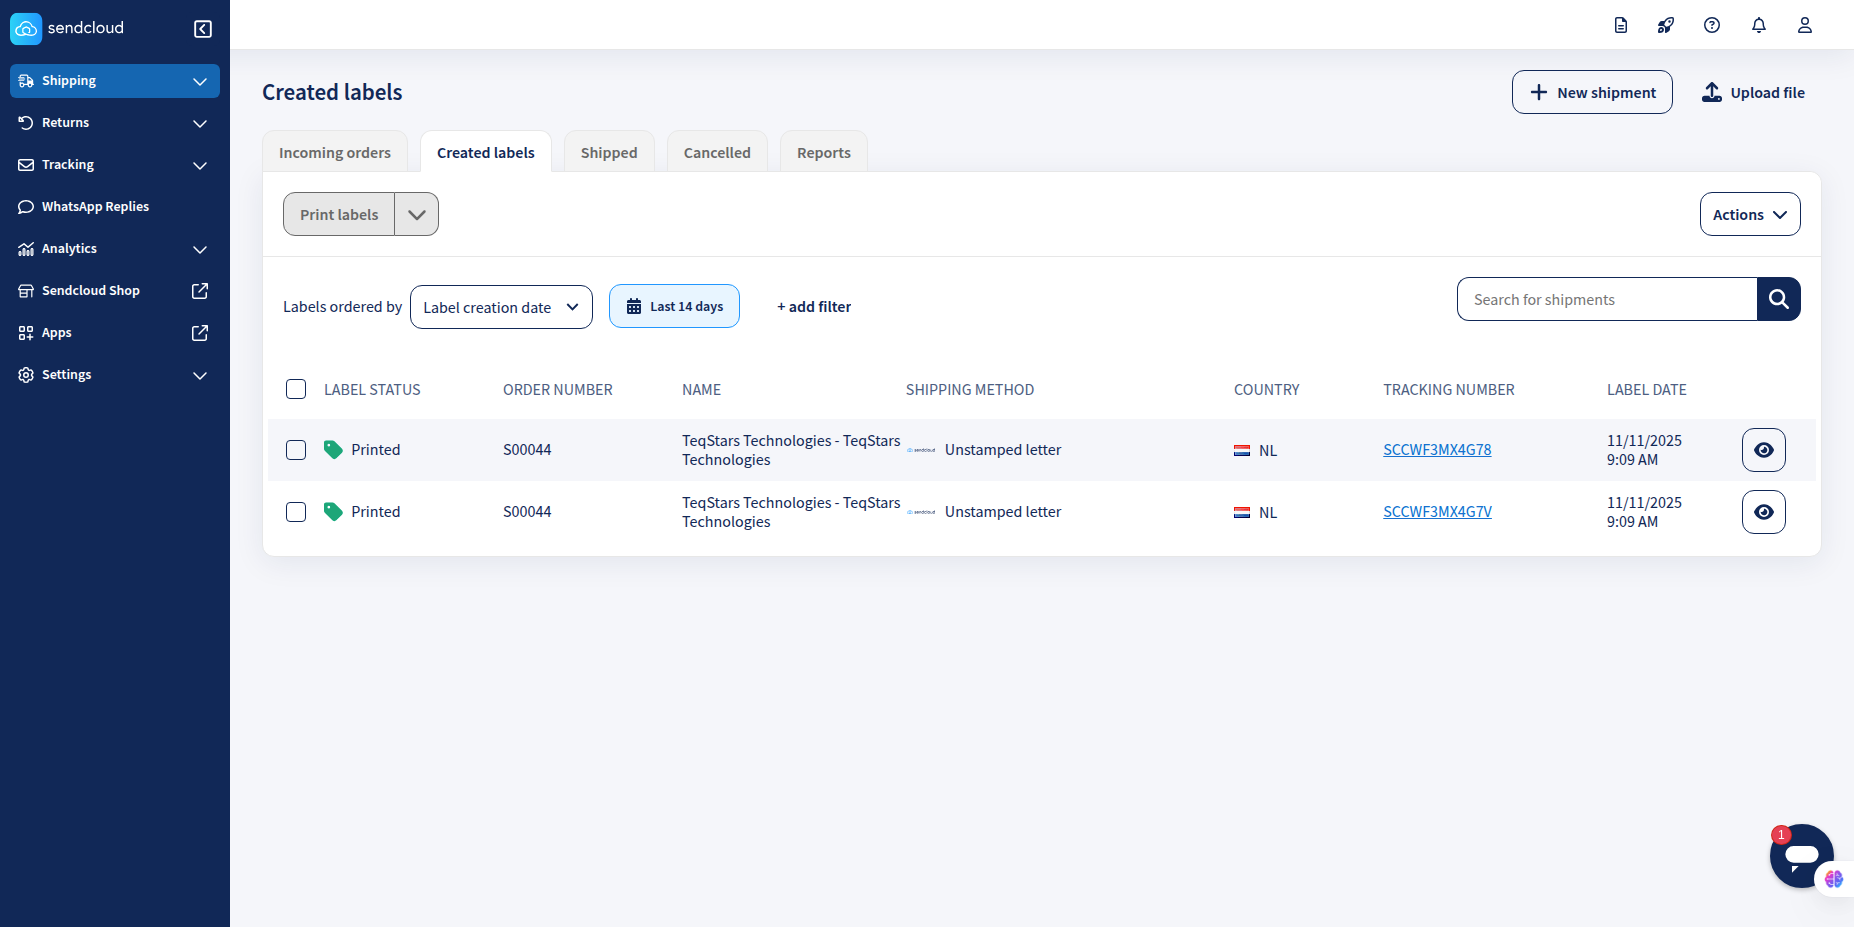
View shipments in SendCloud.
Shipments processed in Odoo are instantly synced to your Sendcloud account. You can log into your Sendcloud dashboard to view the generated labels and manage the parcels.
Realtime Tracking
When you click on Tracking, it will show the detailed status, location, and updates for the shipment, allowing you to stay informed on its progress in real-time.