Webhook Configuration
Webhooks let MailChimp notify Odoo instantly when something changes in an audience, such as a new subscriber, a profile update or an unsubscribe. Instead of waiting for the scheduled sync, contact states in Odoo update in real time.
The connector makes this a one-click operation. From the audience form, Odoo creates the webhook in both systems and wires up every relevant event for you. Webhooks live per audience, so repeat the enable step for each audience you want to keep in real-time sync.
Enable the Webhook
Open the audience from .
Go to the Webhook Configuration tab.
Click Enable Webhook and confirm.
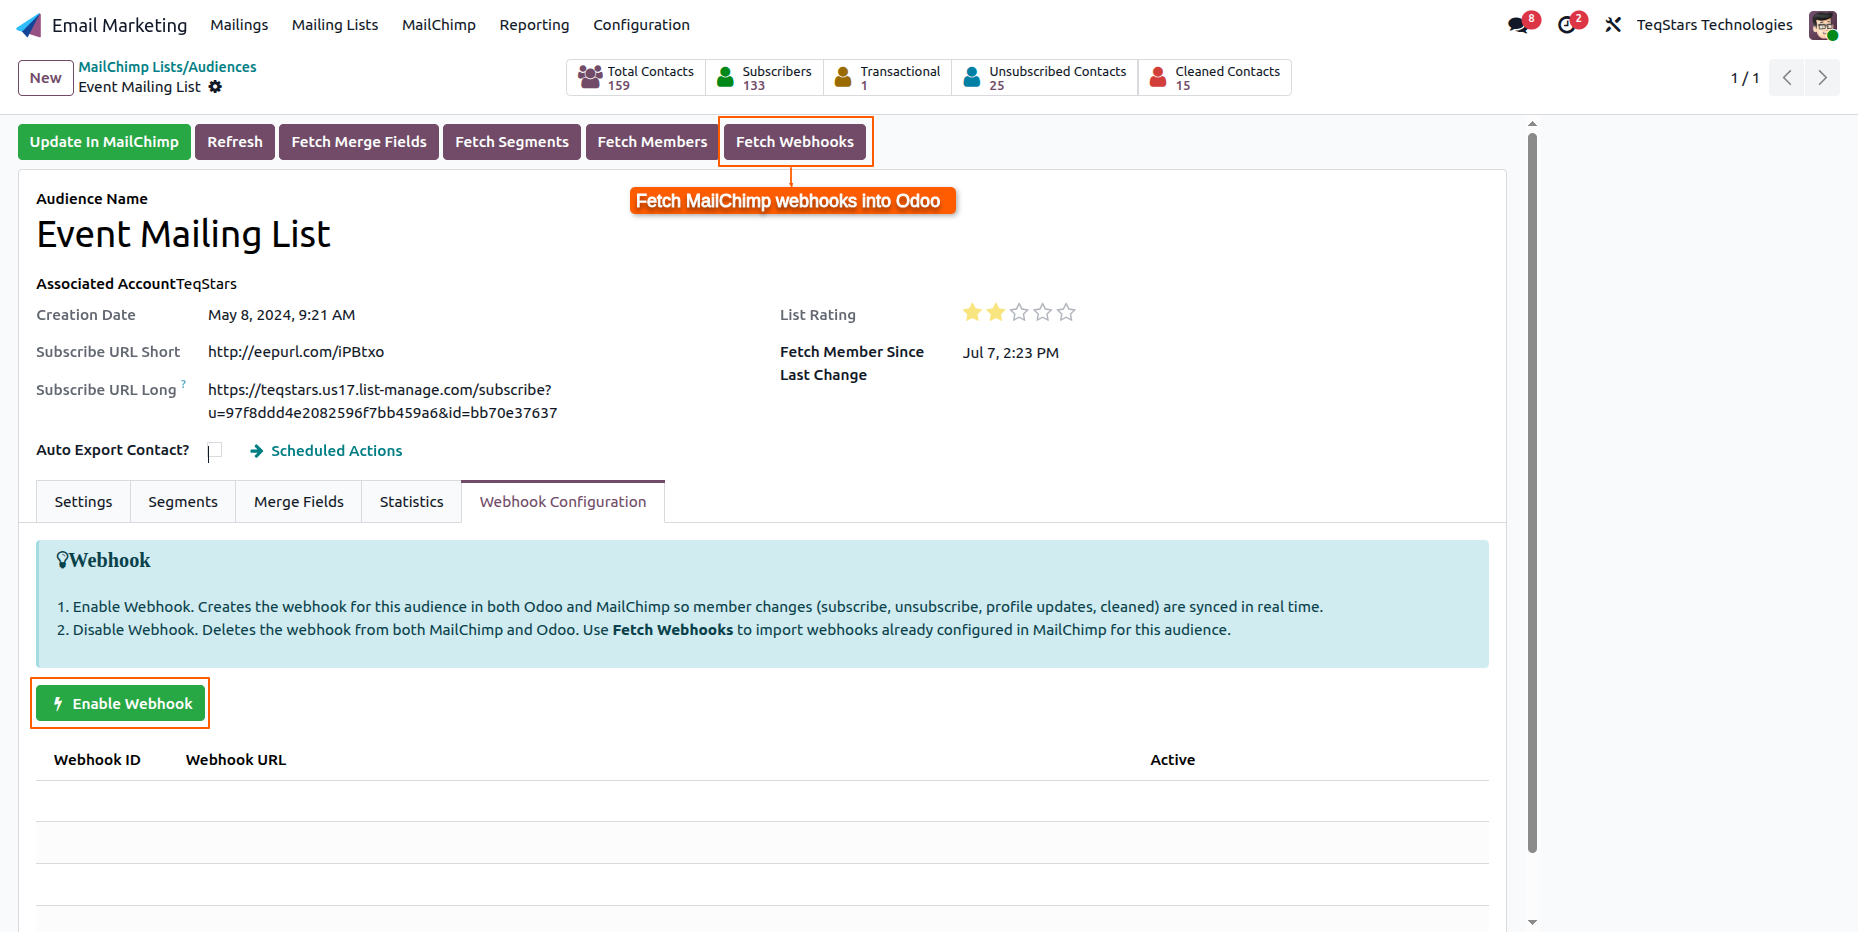
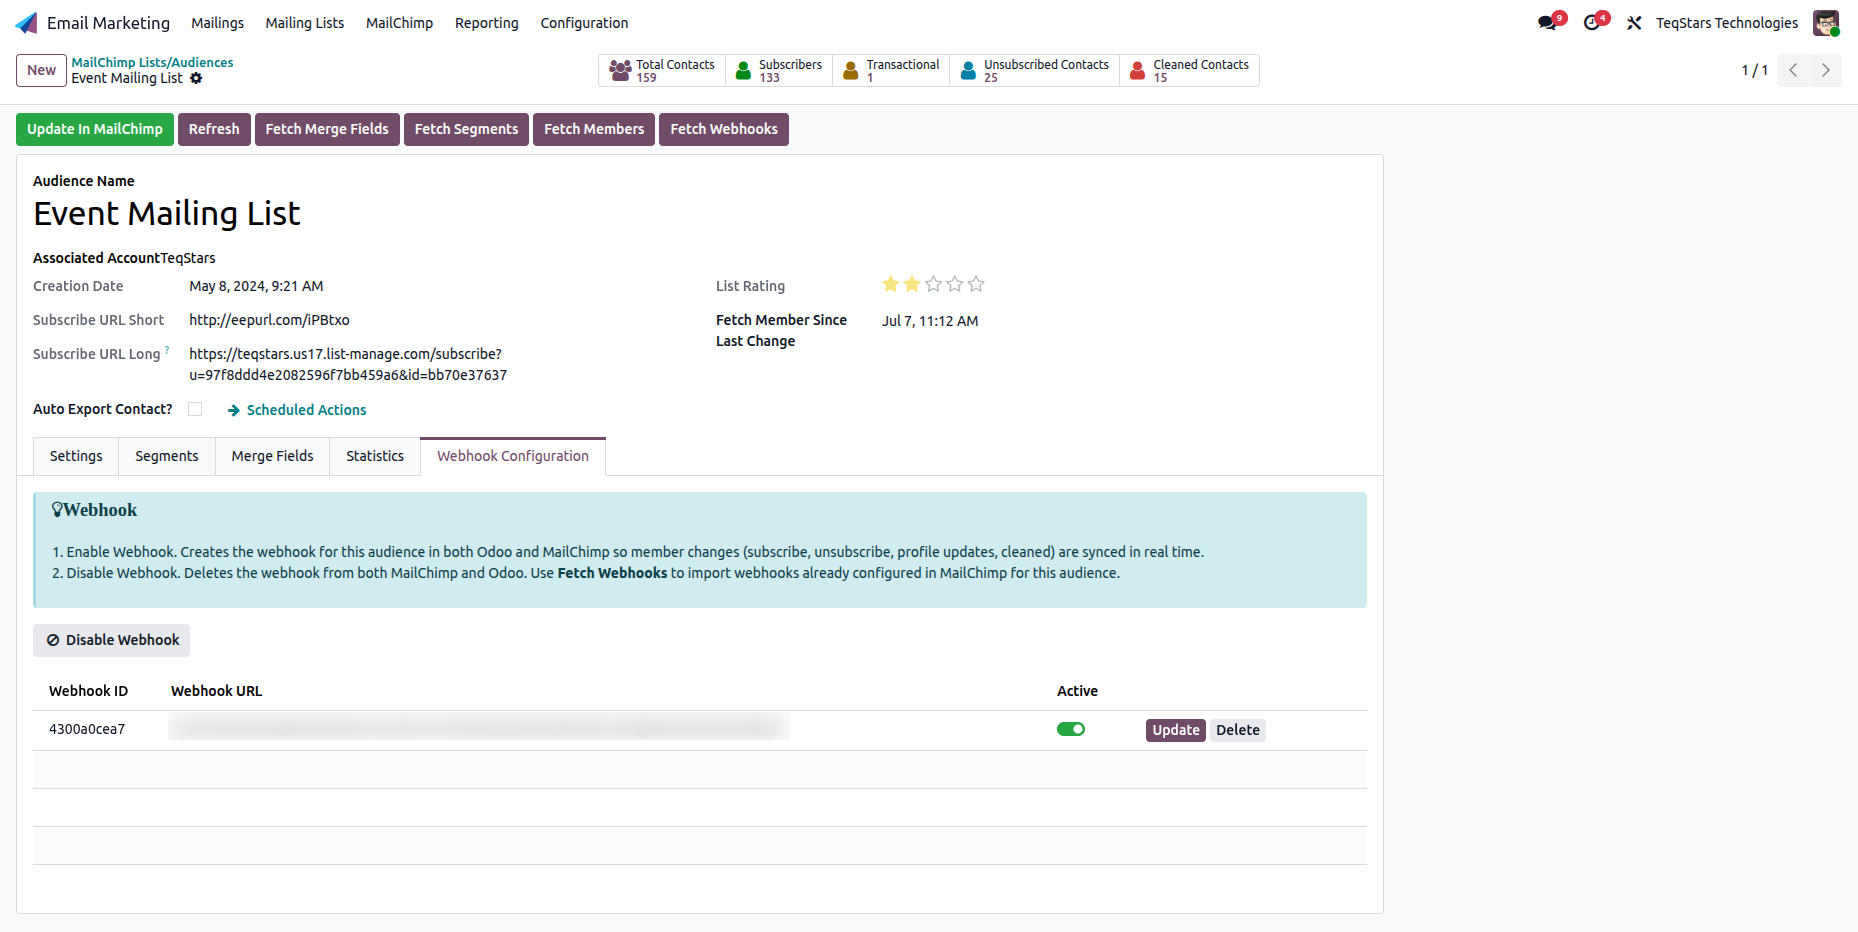
Odoo creates the webhook in MailChimp, sets up a secure URL for MailChimp to send events to, and lists it in the table with an Active toggle. Once the webhook is enabled, Disable Webhook becomes visible so you can turn it off later.
Warning
Webhooks require a public HTTPS URL. Make sure your Odoo instance is reachable over HTTPS, otherwise MailChimp cannot deliver events.
Managing Webhooks
Disable Webhook: Removes the webhook from both MailChimp and Odoo. Use this to turn off real-time sync for the audience.
Fetch Webhooks: Brings existing MailChimp webhooks into Odoo so you can see what is already configured for this audience.
Update / Delete: Per-row actions to refresh or remove an individual webhook. Deleting a webhook here removes it from both MailChimp and Odoo.
Choose Which Events and Sources to Track
Open a webhook row to review the events and sources it listens for.
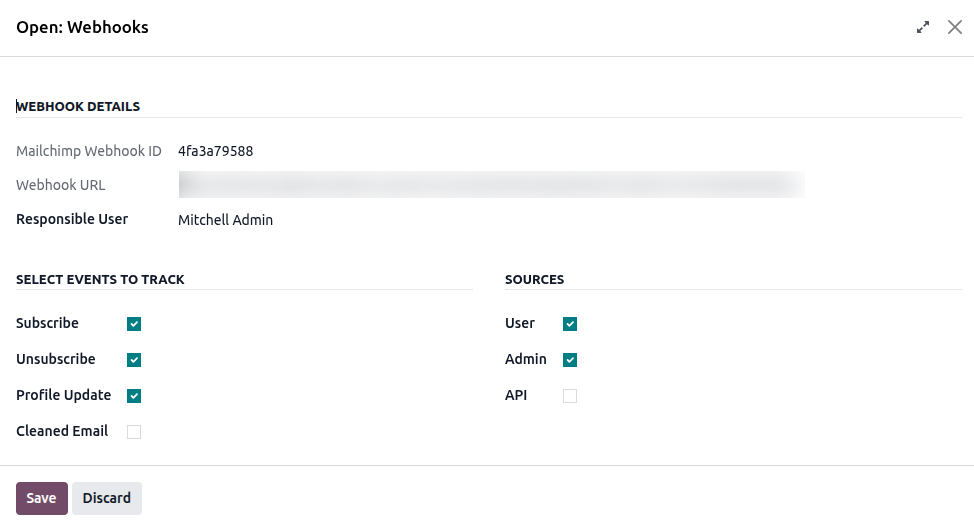
Select Events to Track
Subscribe, Unsubscribe, Profile Update: On by default. These are the everyday member changes you almost always want in real time.
Cleaned Email: Off by default. Turn it on to also receive events when MailChimp marks an email as blacklist/undeliverable.
Sources
User (by a contact) and Admin (by an account admin): On by default. Covers changes made by subscribers themselves and by anyone with access to your MailChimp account.
API (via the API): Off by default.
Tip
Leave API off unless you have a specific reason to turn it on. When on, MailChimp also notifies Odoo about changes that Odoo itself just made through the API, which is redundant and can cause an update echo.
Note
A webhook fires only when a change matches both a selected event and a selected source. MailChimp requires at least one source, otherwise the webhook would never trigger.
What Each Event Does in Odoo
When a subscriber changes in MailChimp, the webhook keeps Odoo current instantly:
MailChimp Event |
Effect in Odoo |
|---|---|
Subscribe |
Creates or updates the contact and marks it subscribed. |
Unsubscribe |
Marks the contact opted-out of that audience. |
Profile update |
Updates the contact’s name and email. |
Cleaned address |
Adds the email to the Odoo blacklist and opts it out. |
Note
Deleting a contact is handled by the webhook, not a separate event you select. MailChimp has no delete update type. When a contact is permanently deleted in MailChimp, the webhook still fires, and (if it is active) the connector removes that contact from Odoo as well.
Tip
Webhooks complement the scheduled sync. They keep Odoo current between cron runs, and the Fetch MailChimp Audience scheduled action acts as a safety net if an event is ever missed (see MailChimp Account Configuration).