
Connect a QuickBooks Account in Odoo
The QuickBooks connection holds your credentials, the link to your QuickBooks company, and every synchronization setting. Create it at and click New.
Note
The QuickBooks menu and the OAuth credential fields are restricted to users with the Billing Administrator access right. Other users can read the connection, but cannot create or edit one.
Choose the environment
The Environment stat button at the top of the form toggles between Sandbox and Production.
Sandbox — Intuit’s test environment. Use it with the Development keys and a Sandbox company to try the connector without touching live books.
Production — your real QuickBooks company. Use it with the Production keys.
Warning
Switching the environment resets the connection to Draft. The two environments use different keys and different companies, so you must enter the matching credentials and authorize again after switching.
Enter the OAuth credentials
Give the connection a meaningful Name (e.g.
Quickbook).In the OAuth Credentials section, paste the Client ID and Client Secret from your Intuit app (see Generate QuickBooks Credentials).
Copy the Redirect URI with the clipboard icon and register it in the Intuit Developer Portal, if you have not already.
In a multi-company database, check that Company points at the right company. Each company gets its own connection.
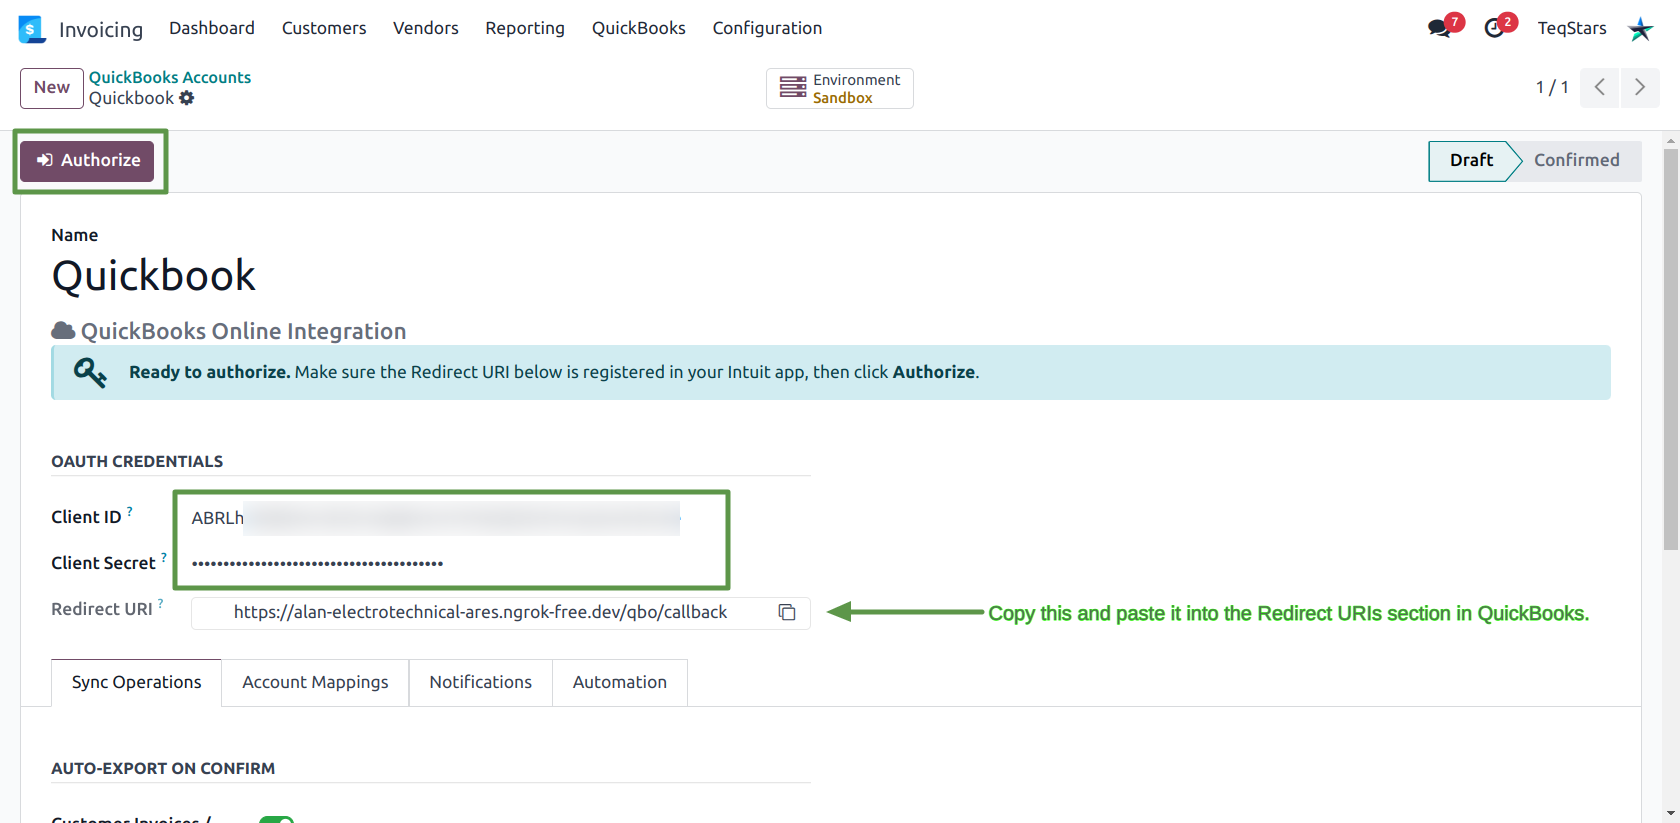
Authorize the connection
Click Authorize. Odoo opens Intuit’s consent screen in a new tab.
Sign in with your Intuit account, select the QuickBooks company to connect, and click Next.
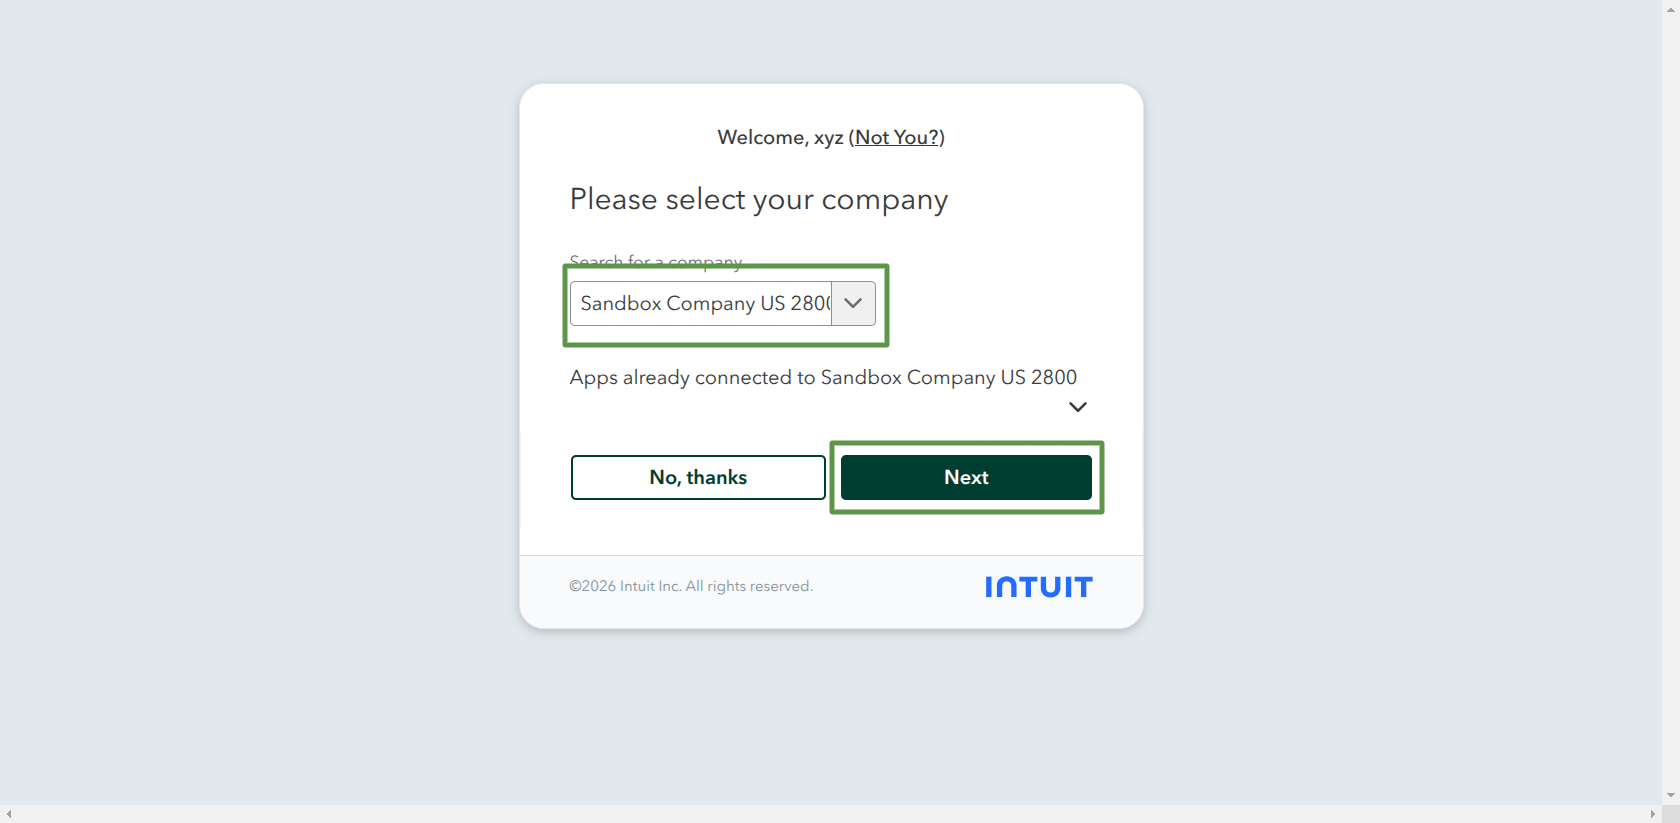
Approve the request. Intuit redirects the browser back to Odoo, which stores the access token, the refresh token and the Realm ID (your QuickBooks Company ID), then reopens the connection.
Note
Odoo protects the authorization round-trip with a one-time state token. If the value coming back from Intuit does not match, the callback is rejected — start the Authorize step again rather than reusing an old link.
Confirm the connection
Authorization alone does not enable syncing. Click Confirm Connection — Odoo calls the QuickBooks CompanyInfo endpoint to prove the credentials really work against the selected realm.
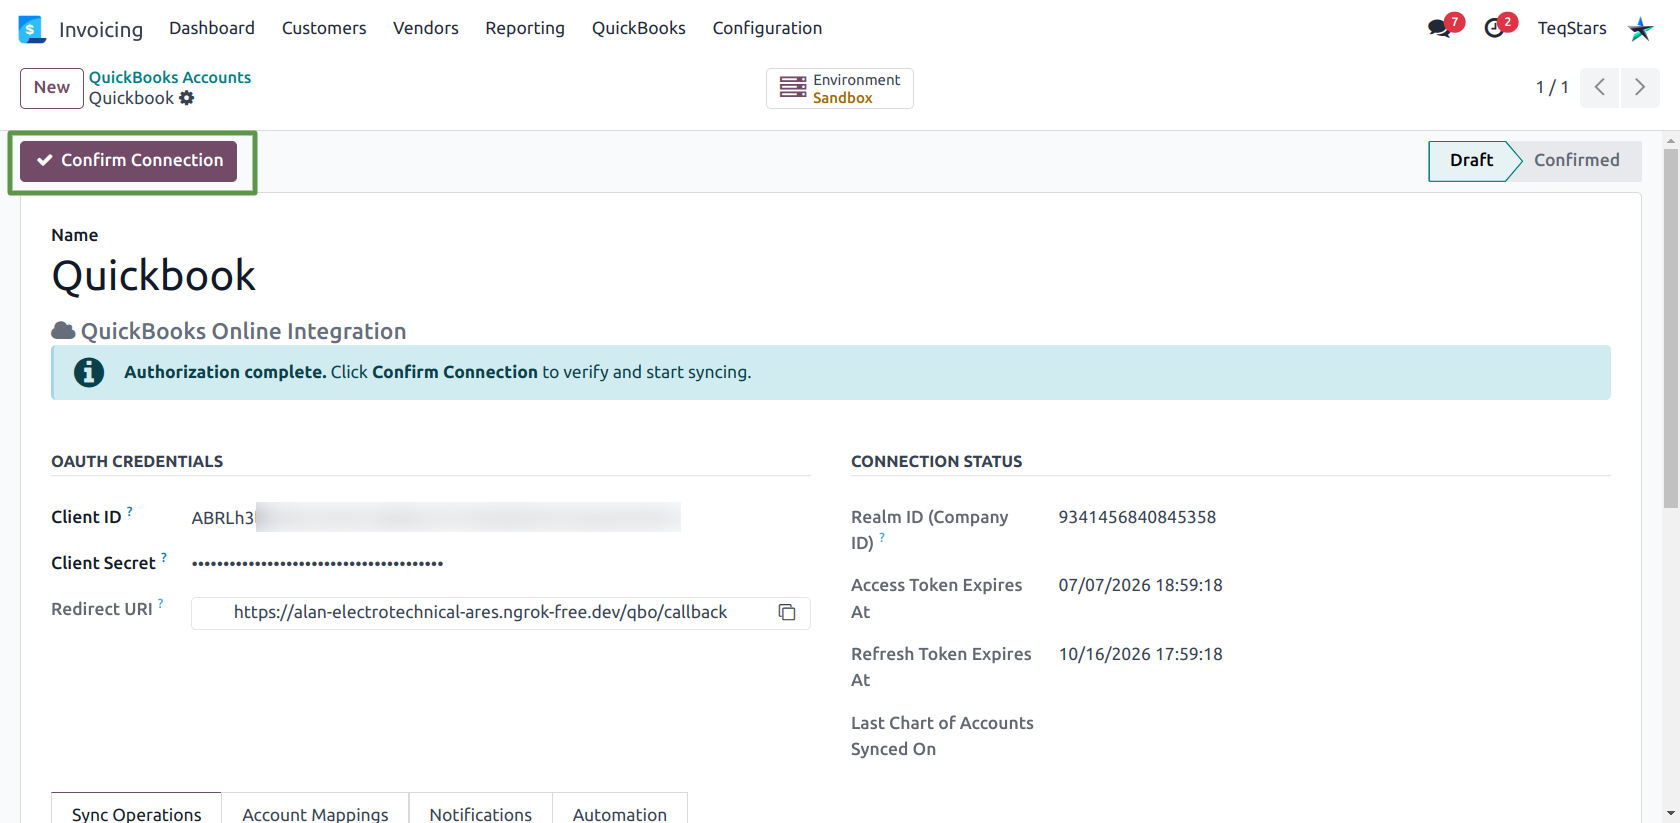
On success the connection moves to Confirmed and a confirmation message appears.
Connection status
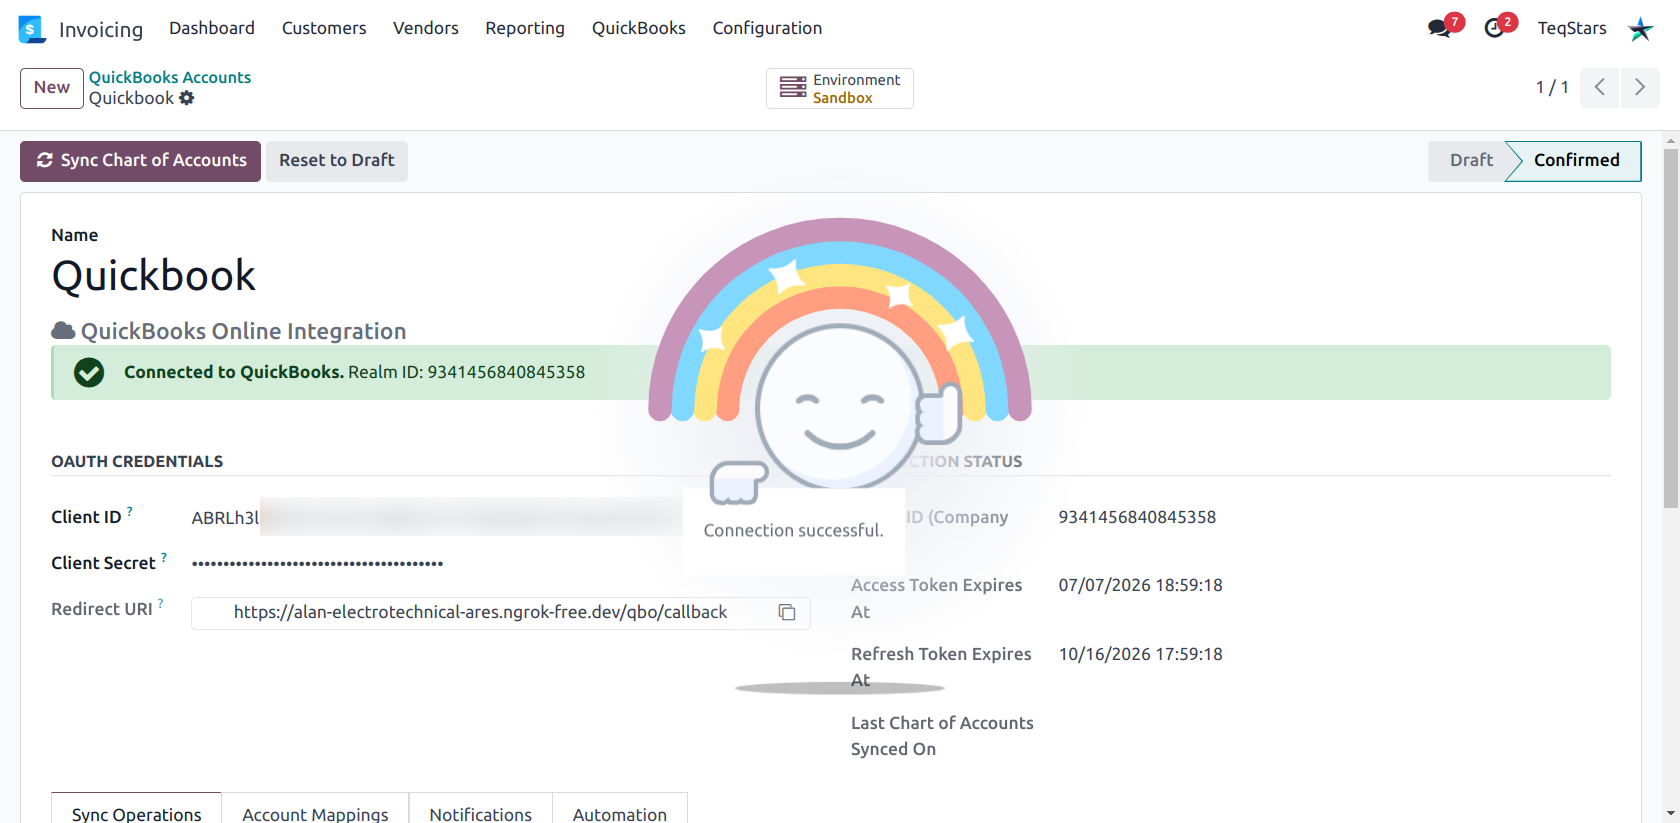
Once connected, the Connection Status panel shows what the connector knows about your grant:
Realm ID (Company ID) — the QuickBooks company this connection is bound to.
Access Token Expires At — short-lived (about one hour). Odoo refreshes it automatically shortly before it expires, and again if a call comes back unauthorized.
Refresh Token Expires At — long-lived (about 100 days). Every successful refresh extends it.
Last Chart of Accounts Synced On — timestamp of the last Chart of Accounts import.
Important
If the refresh token expires, or the connection is revoked from the QuickBooks side, the connector marks the connection not connected, returns it to Draft, and asks you to click Authorize again. No documents sync until you do.
Tip
A connection left unused for more than 100 days will need re-authorization, because the refresh token is only extended when it is actually used.
Reset to Draft
Reset to Draft puts the connection back in Draft and stops every sync path — auto-export on confirm, the wizard, and the scheduled actions all check for a Confirmed connection first. Your credentials and tokens are kept, so you can simply click Confirm Connection again to resume.