
Connect Dropbox
Dropbox uses OAuth2 sign-in. You first create an app in the Dropbox App Console, then connect from Odoo with one click.
Step 1: Create an app in the Dropbox App Console
Go to the Dropbox App Console and click Create app.
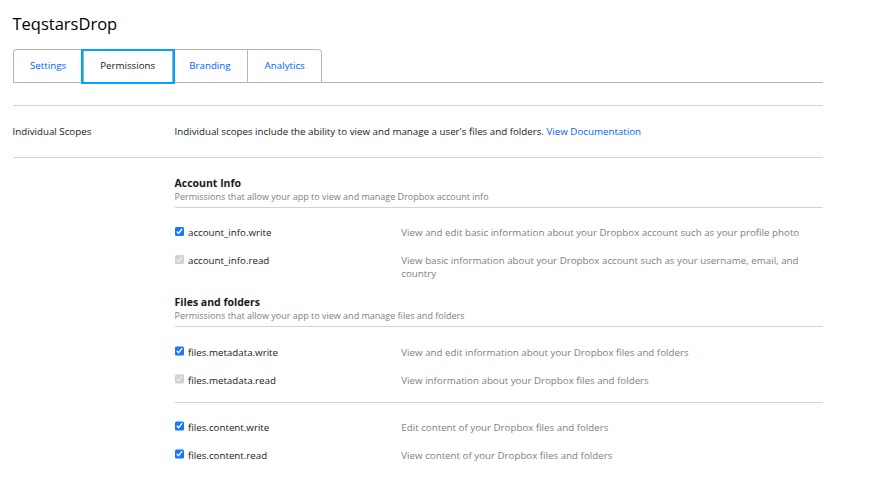
Choose Scoped access and the access type your team needs (
App folderfor an isolated folder, orFull Dropbox).On the app’s Permissions tab, enable the following scopes:
account_info.read, files.metadata.read, files.metadata.write, files.content.read, files.content.write
Warning
Enable all the scopes above. If you add one later, click Generate Access Token again to re-approve the app.
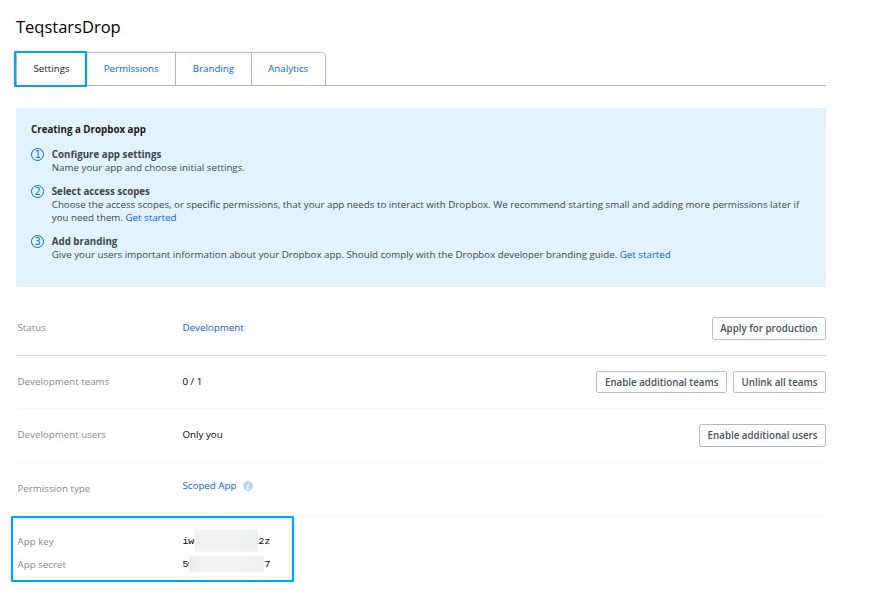
On the Settings tab:
Leave the Redirect URIs field for now. You fill it in in Step 3.
Copy the App key (Client ID) and App secret (Client Secret).
Tip
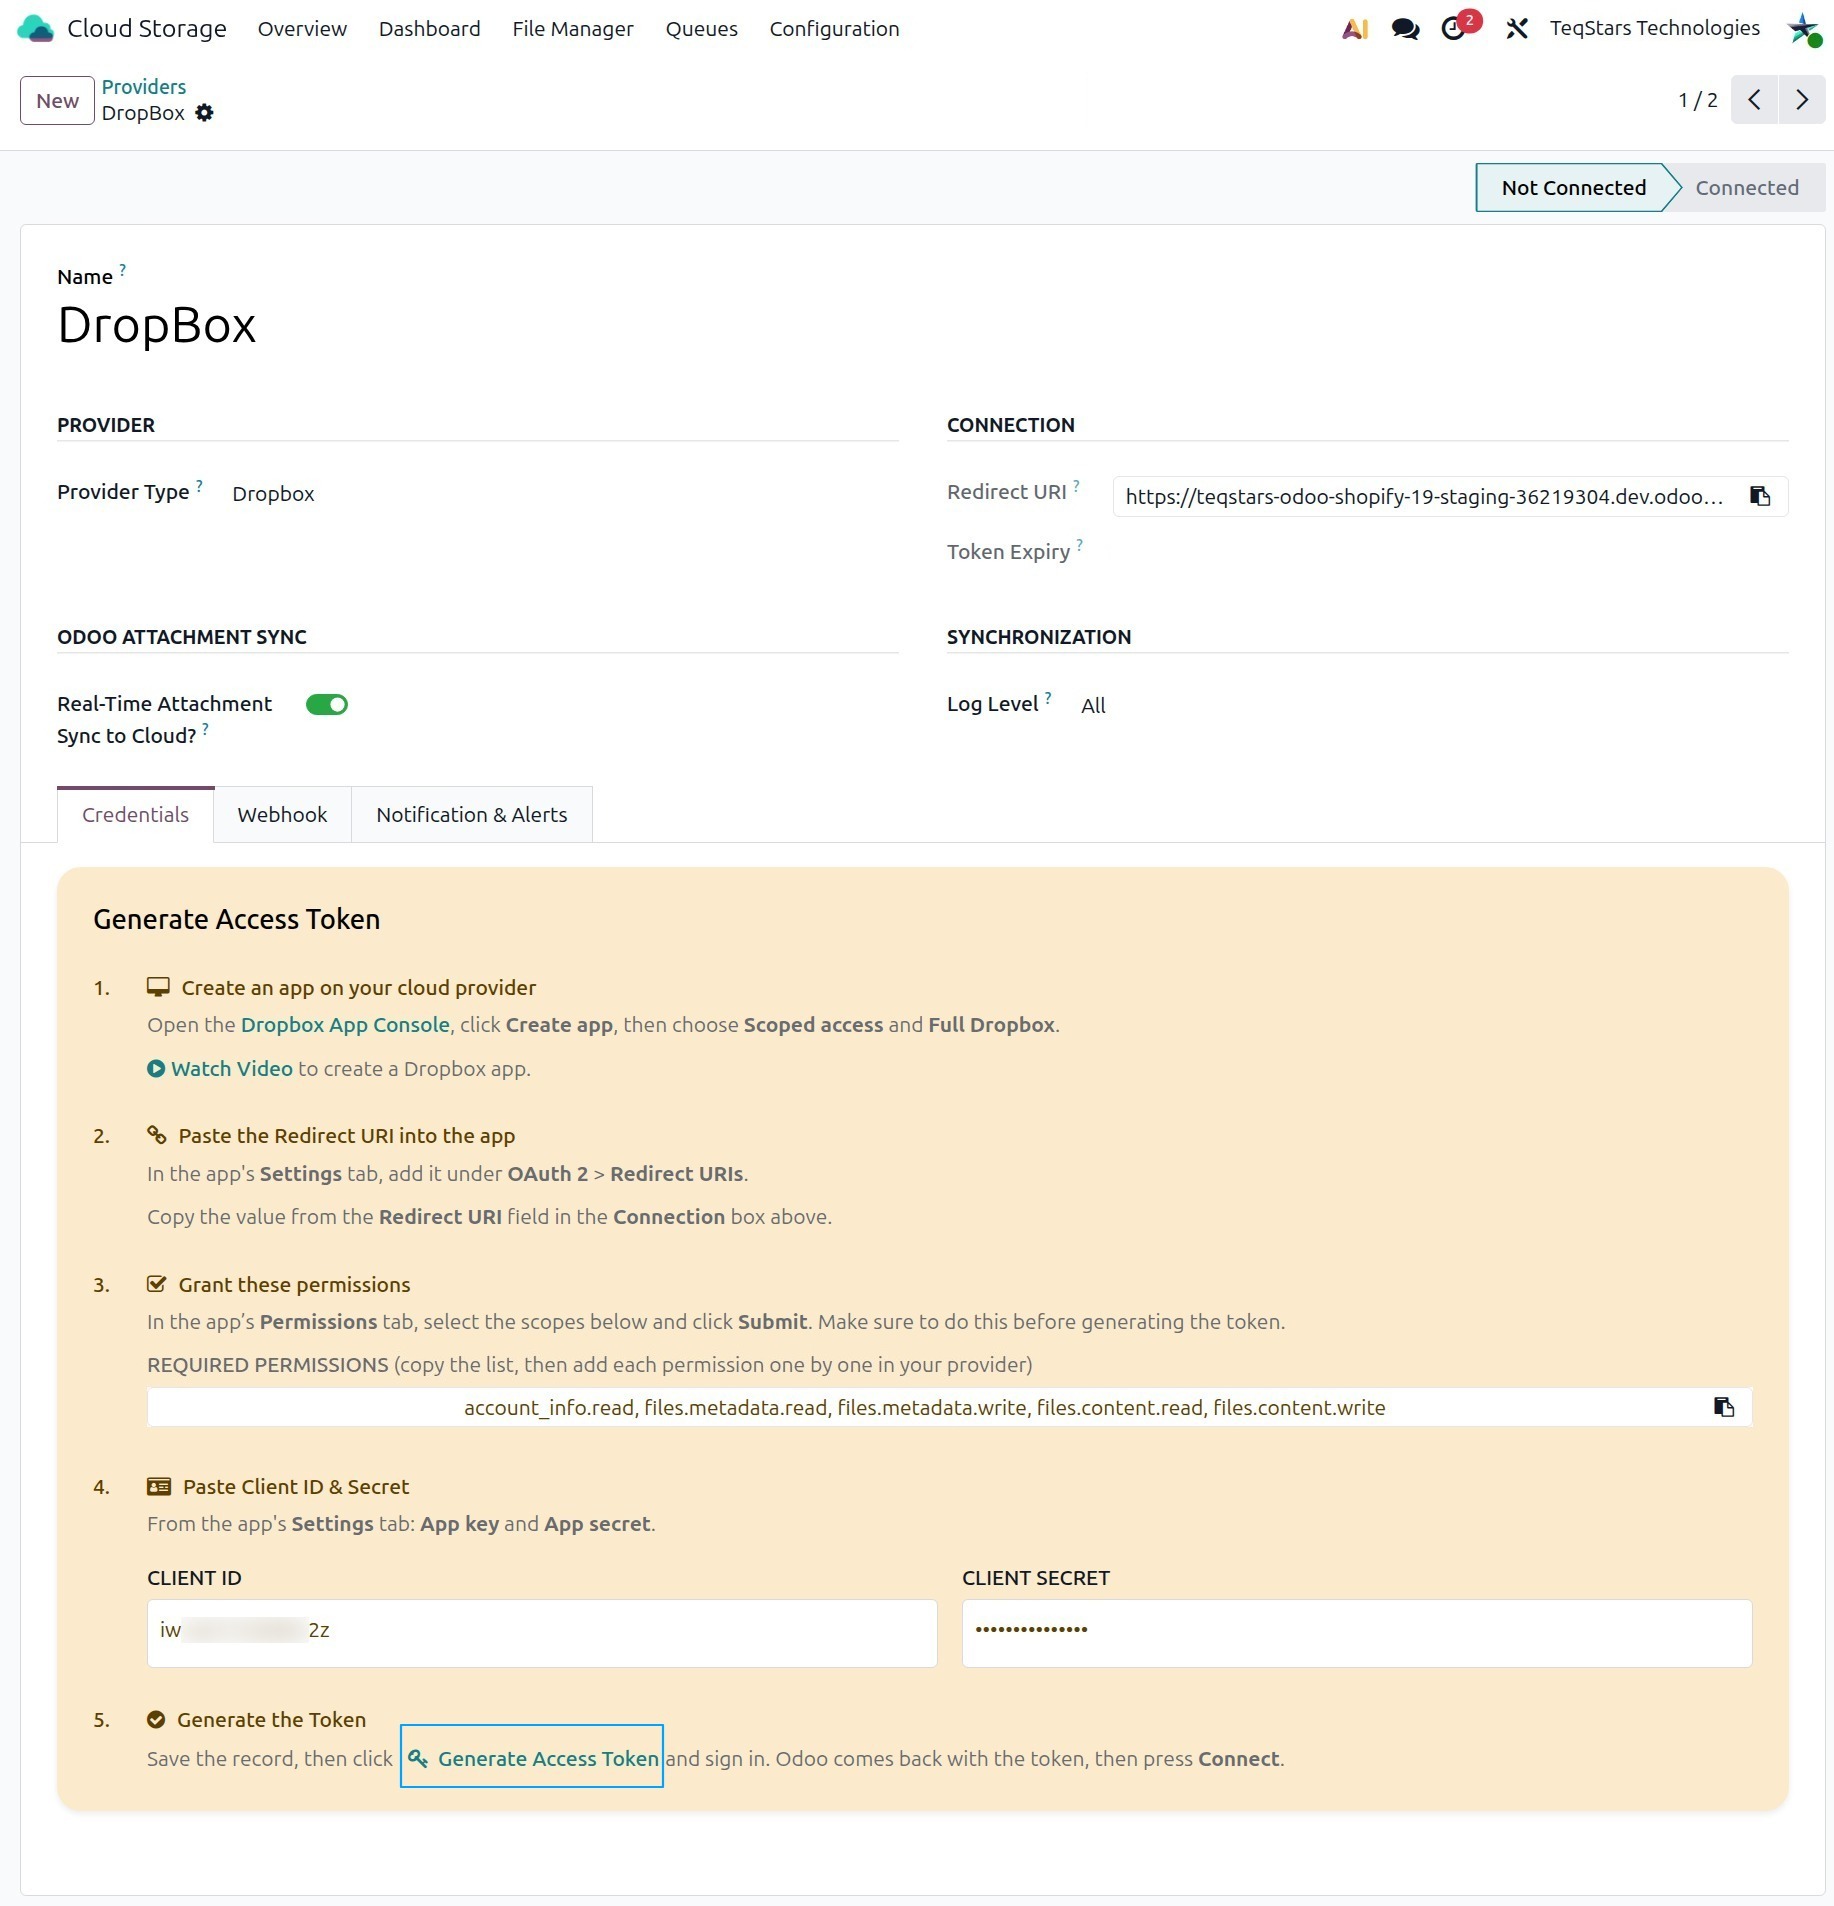
The Required Permissions field shows the permissions needed. If any permission is missing after sign-in, the provider will not connect.
Step 2: Create the provider in Odoo
Navigate to and click New.
Set a friendly Name (e.g.
DropBox) and chooseDropboxas the Provider Type.Open the Credentials tab and fill in the Client ID (App key) and Client Secret (App secret) from Step 1.
Save the record. The status bar stays on Not Connected until you finish Step 4.
Step 3: Redirect URI
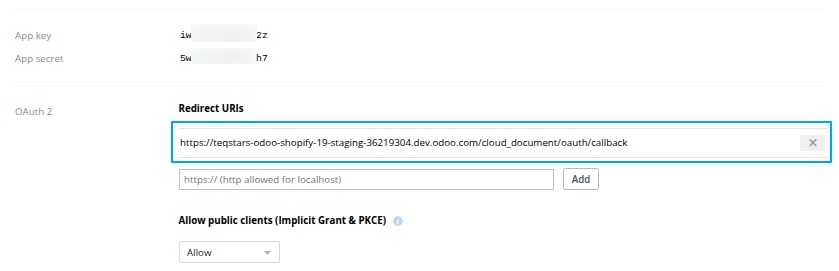
Copy the Redirect URI from the provider form with the clipboard icon.
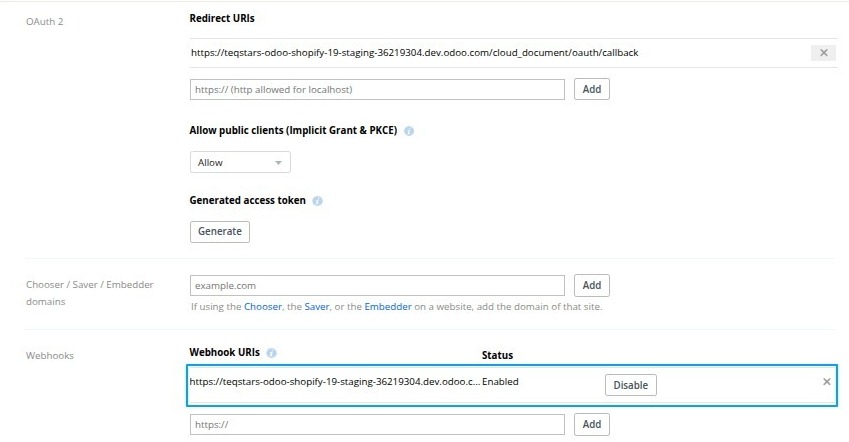
In your Dropbox app, add it under and click Add.
Warning
Paste the exact value, with no trailing slash, before Step 4. A mismatch is the most common cause of a failed sign-in.
Step 4: Connect and test
On the Credentials tab, click Generate Access Token. Odoo saves the Client ID and Client Secret, then sends you to the Dropbox sign-in page.
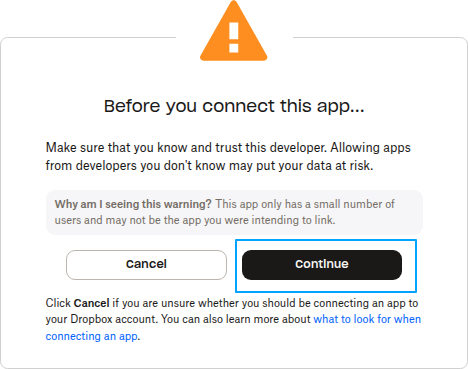
Dropbox first asks you to confirm the developer of the app. Click Continue.
Note
This warning appears because your Dropbox app is still in Development status and has only a few linked users. It is your own app, so it is safe to continue.
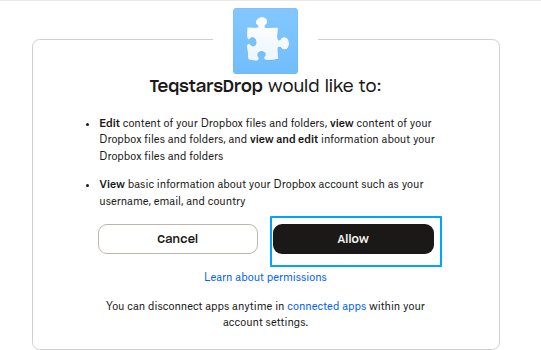
Dropbox then lists the permissions the app is asking for. Check that they match the scopes from Step 1 and click Allow.
Dropbox sends you back to the provider form and Odoo stores the access token. The Connect and Test Connection buttons now appear in the header.
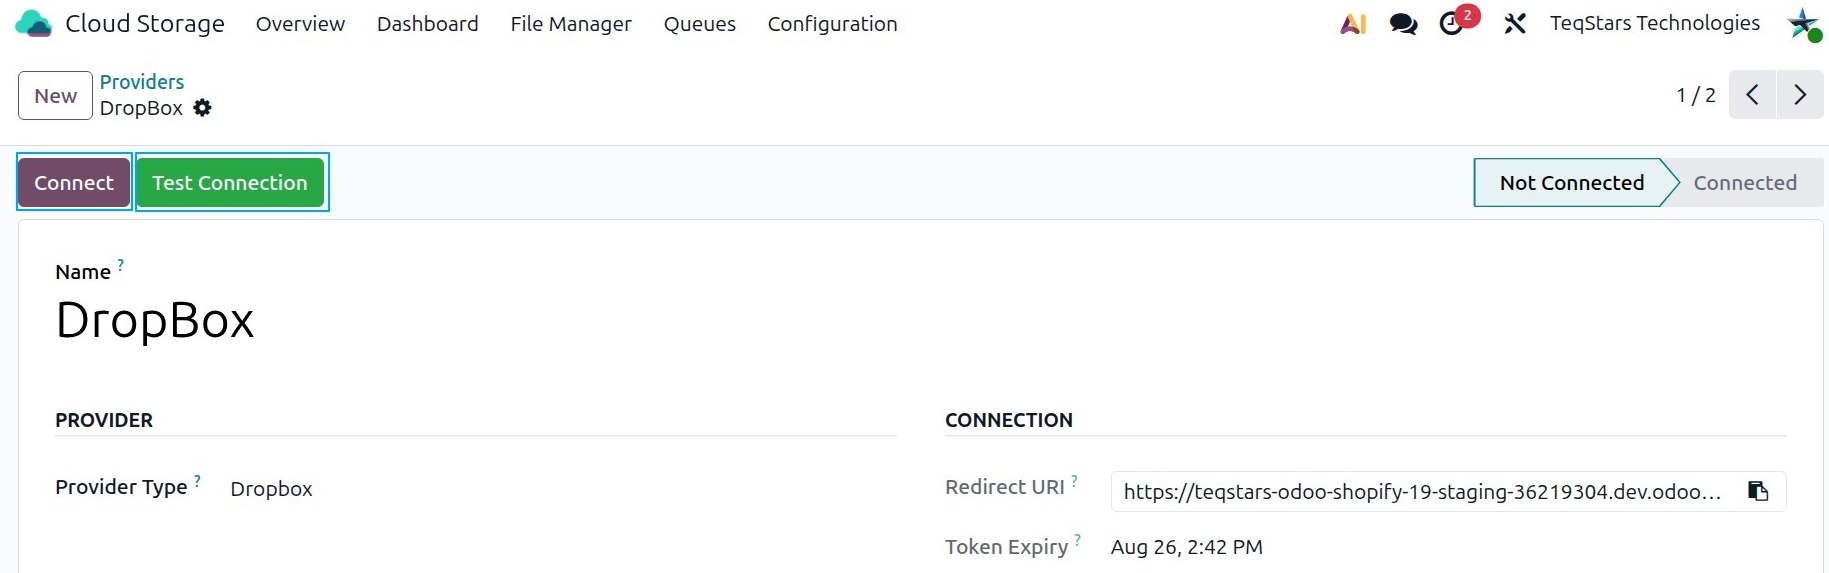
Click Test Connection and verify that the success message appears.
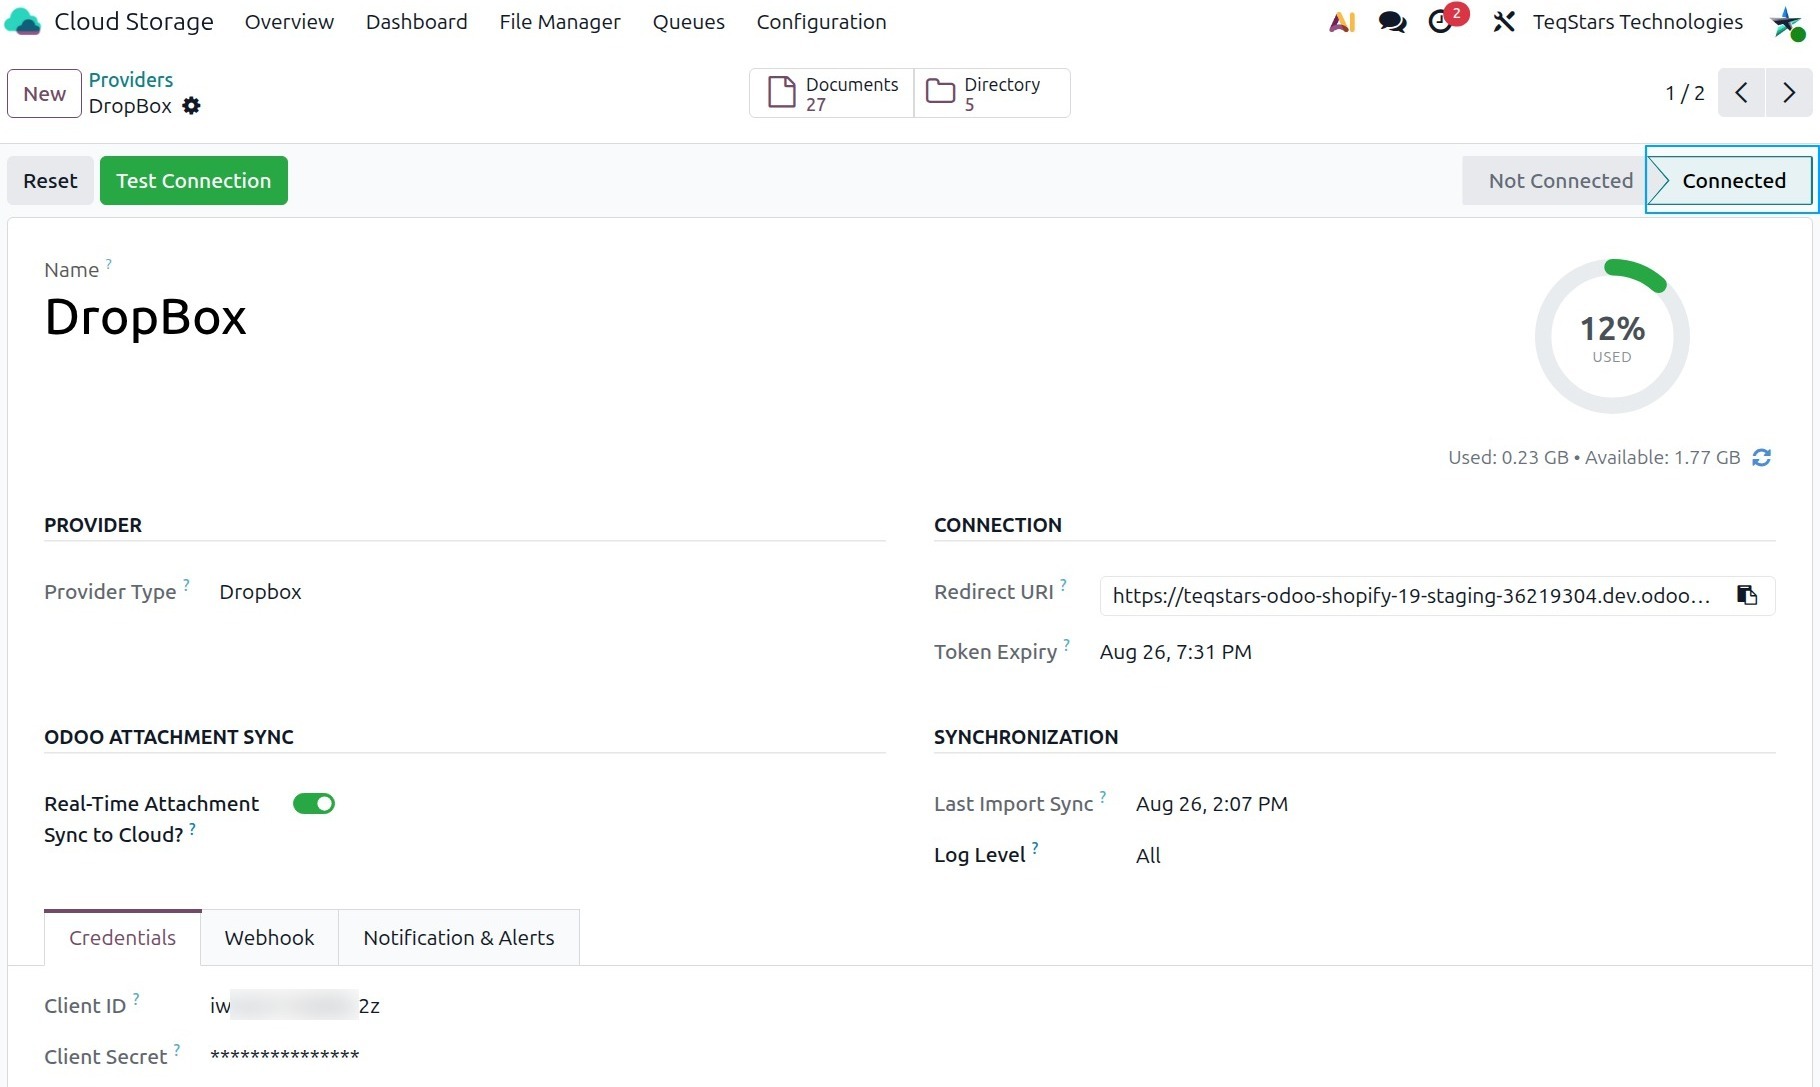
Click Connect to activate the provider. The status moves from Not Connected to Connected.
Note
Access tokens are renewed automatically. You only need to reconnect if you revoke the app access in Dropbox or change the Client ID or Client Secret in Odoo.
Step 5: Webhook Configurations
What webhooks do
Webhooks allow Dropbox to instantly inform Odoo when something happens in your Dropbox (a file or folder added, renamed, moved, or deleted).
This means Odoo updates automatically without waiting for the scheduled actions.
It helps keep your documents in sync in real time.
How to enable or disable
Open your Dropbox provider.
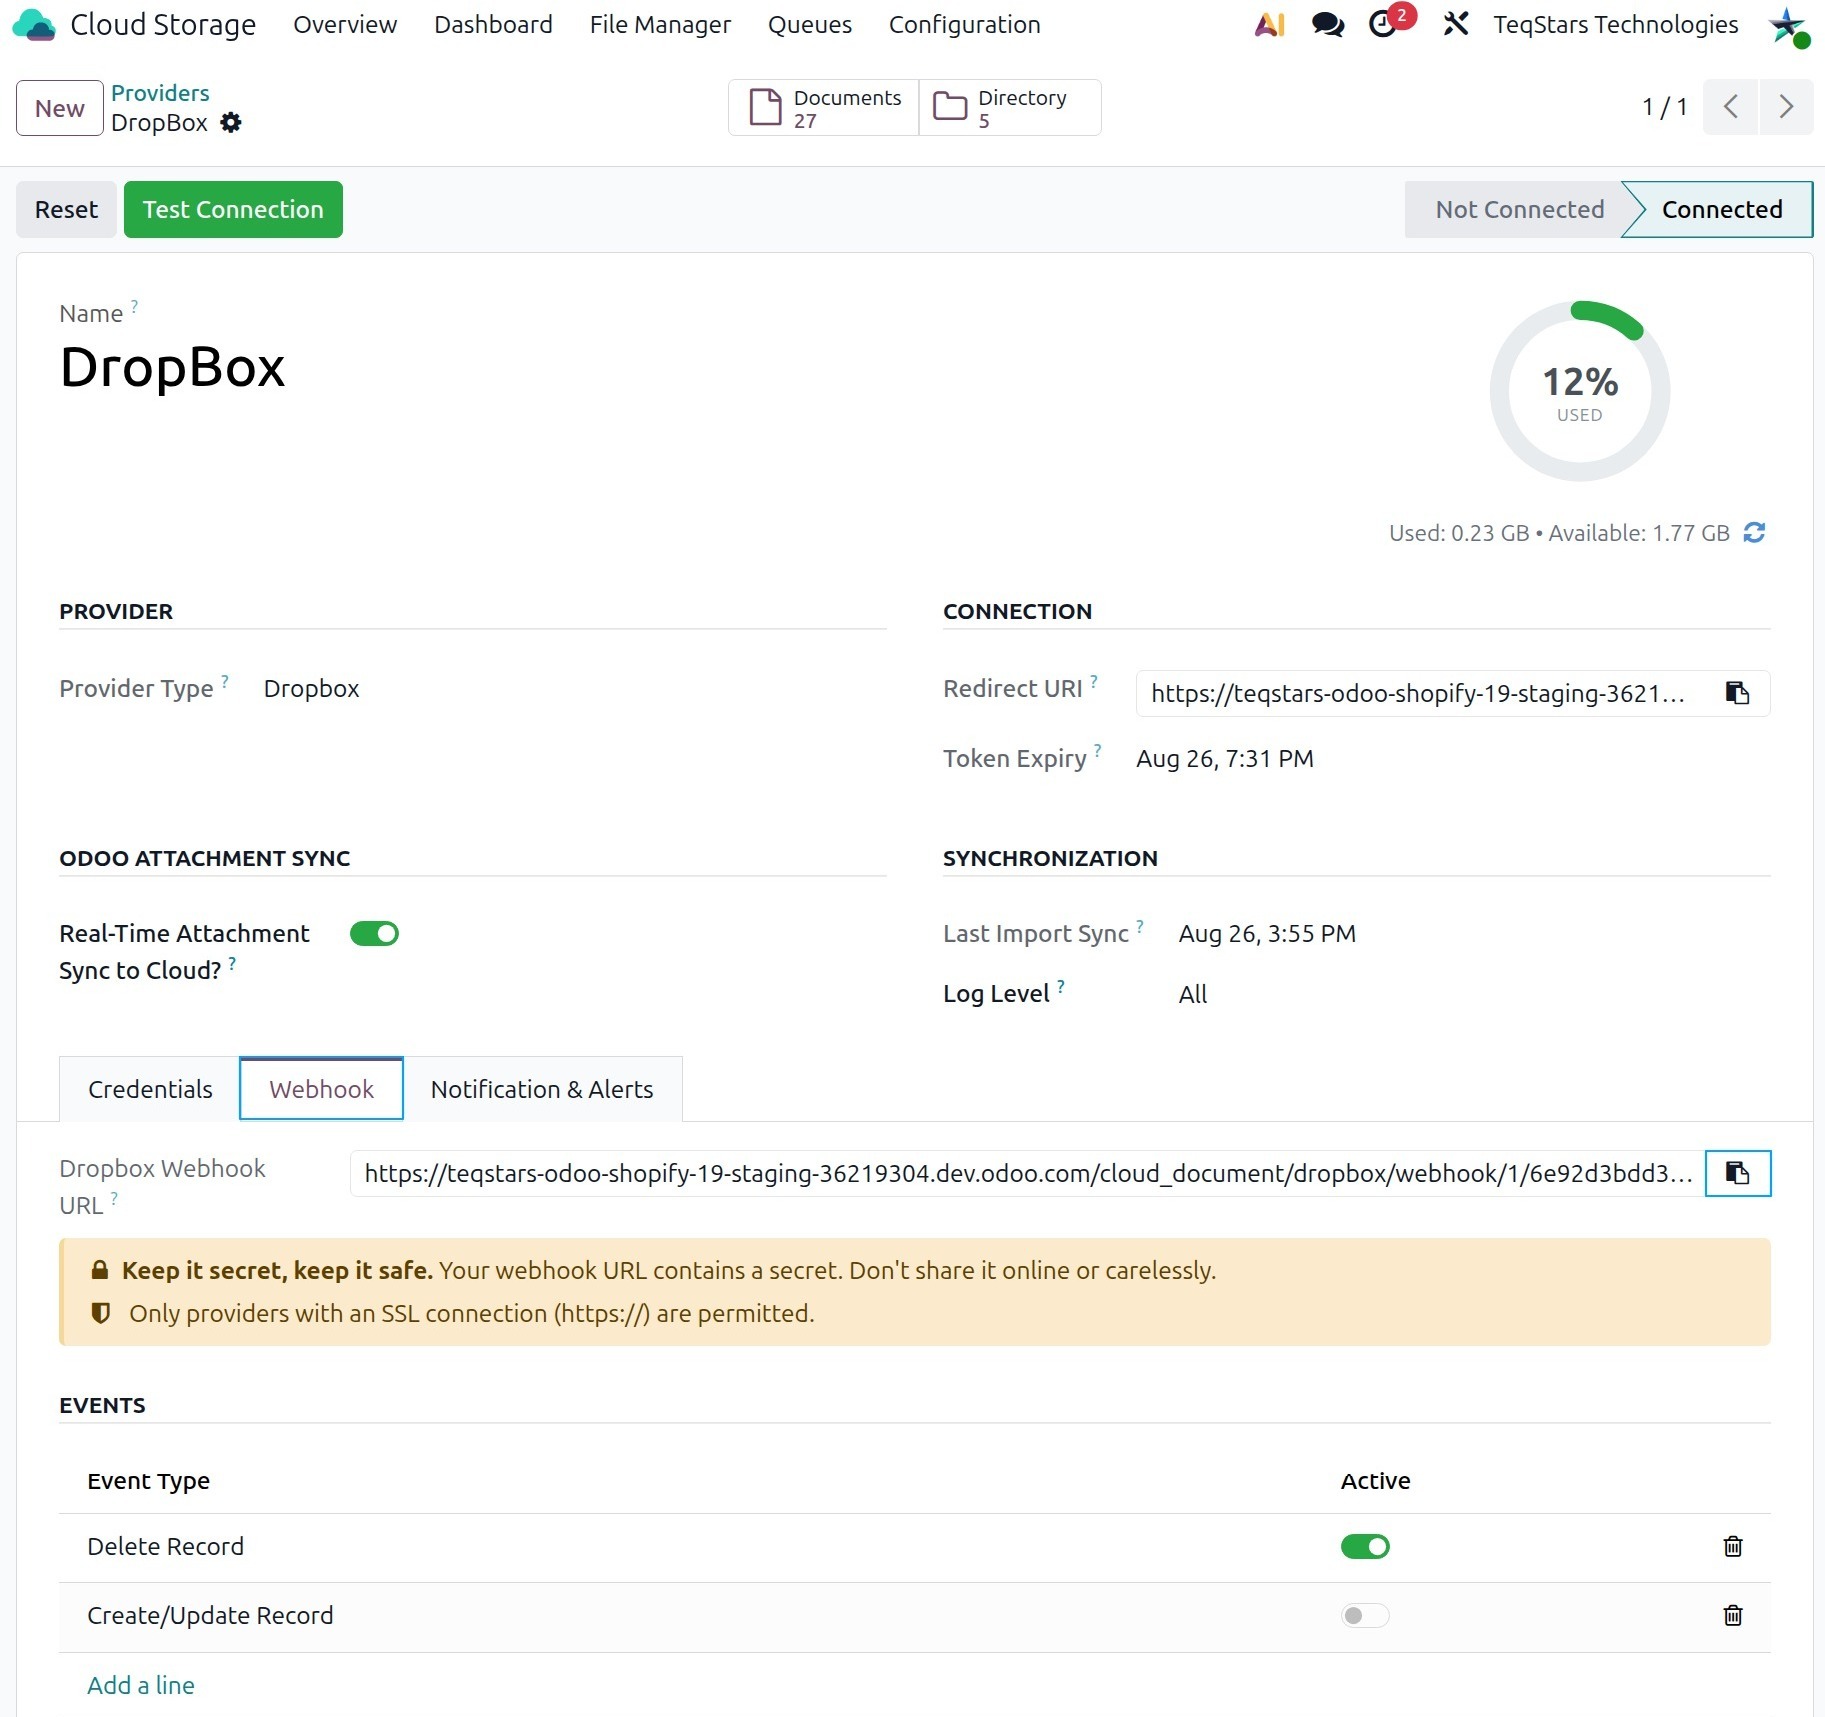
Open the Webhook tab.
Enable Active on the event lines you want, and save.
The Dropbox Webhook URL now appears. Copy it, paste it into your Dropbox App Console under and click Add.
Warning
The Dropbox Webhook URL contains a secret. Do not share it online or paste it anywhere other than your own Dropbox App Console.
Webhook Event Types
Create/Update Record
Triggered when a file or folder is added or modified in Dropbox.
Odoo automatically creates or updates the matching document or directory.
Delete Record
Triggered when a file or folder is deleted in Dropbox.
Odoo removes the matching document or directory.
Note
Your Odoo URL must use https://. Webhooks will not work on localhost or an intranet.
The provider must be in Connected state.
See also