
Import Inventory Into Odoo
Bring the quantities of your Octopia offers into Odoo as an inventory adjustment in the instance warehouse.
Prerequisites
A confirmed instance with a Warehouse and a Sales Channel set.
Listing items that are listed and linked to Odoo products with an Internal Reference (SKU). Service and tracked (lot or serial) products are skipped.
Method - 1: Manual Inventory Import
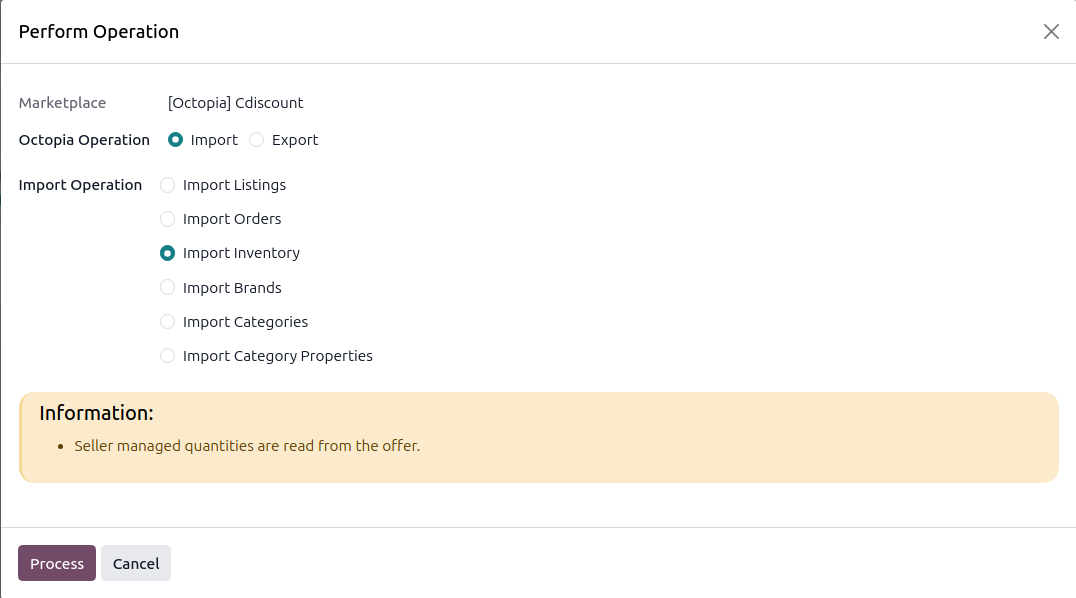
Click the Operations button on the instance card in .
Choose Import, select Import Inventory, and click Process.
Stock is matched by offer id and written to the stock location of the instance warehouse. With Validate Inventory Adjustment? enabled the adjustment is validated automatically, otherwise process it from .
How It Works
Offers are read in batches of their seller SKU, and only those changed since the last stock import are asked for.
Only the quantity of the Seller delivery entry is applied. An offer without one is fulfilment managed: Octopia holds those goods in its own warehouse, so their quantity is never imported and a log line says how many were left alone.
A SKU that contains a comma cannot be requested from Octopia, it is logged and skipped.
The date of the last stock import moves only when Octopia could be read completely, so a partial read is simply repeated.
Method - 2: Automatic Inventory Import
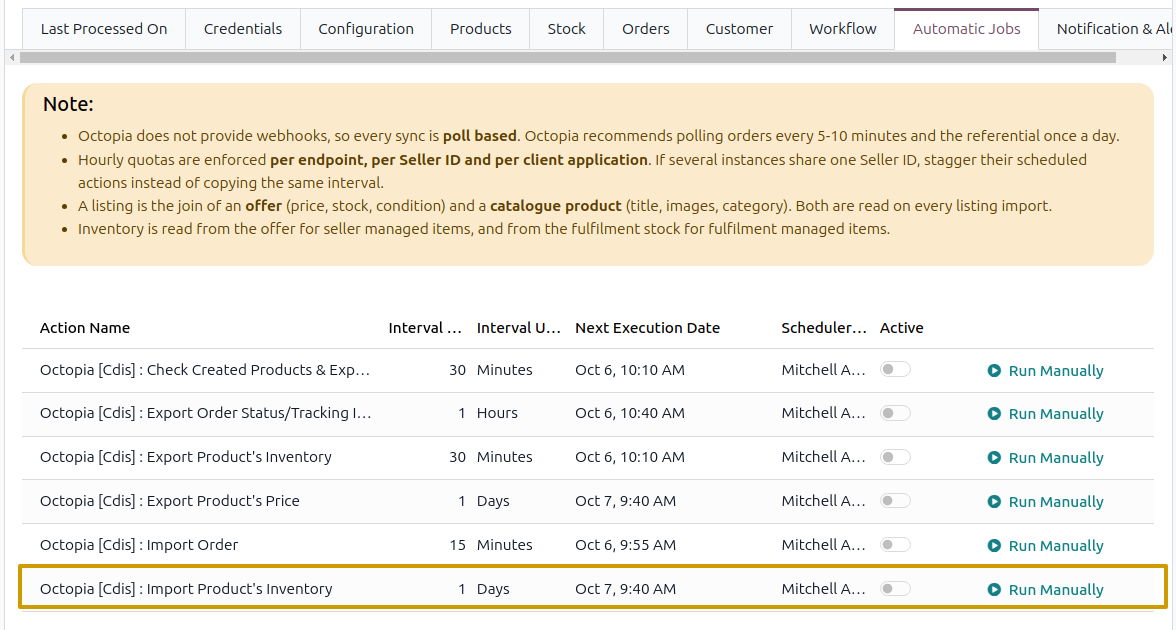
Go to your Octopia instance by navigating to .
Open the Automatic Jobs tab and configure the Import Product’s Inventory automatic action by setting Interval Number, Interval Unit, and enable Active (daily by default).
Once enabled, Odoo automatically imports stock from Octopia at the selected time intervals.
Note
When no sales channel is set on the instance, the scheduled action writes an error to the log instead of failing.
See also