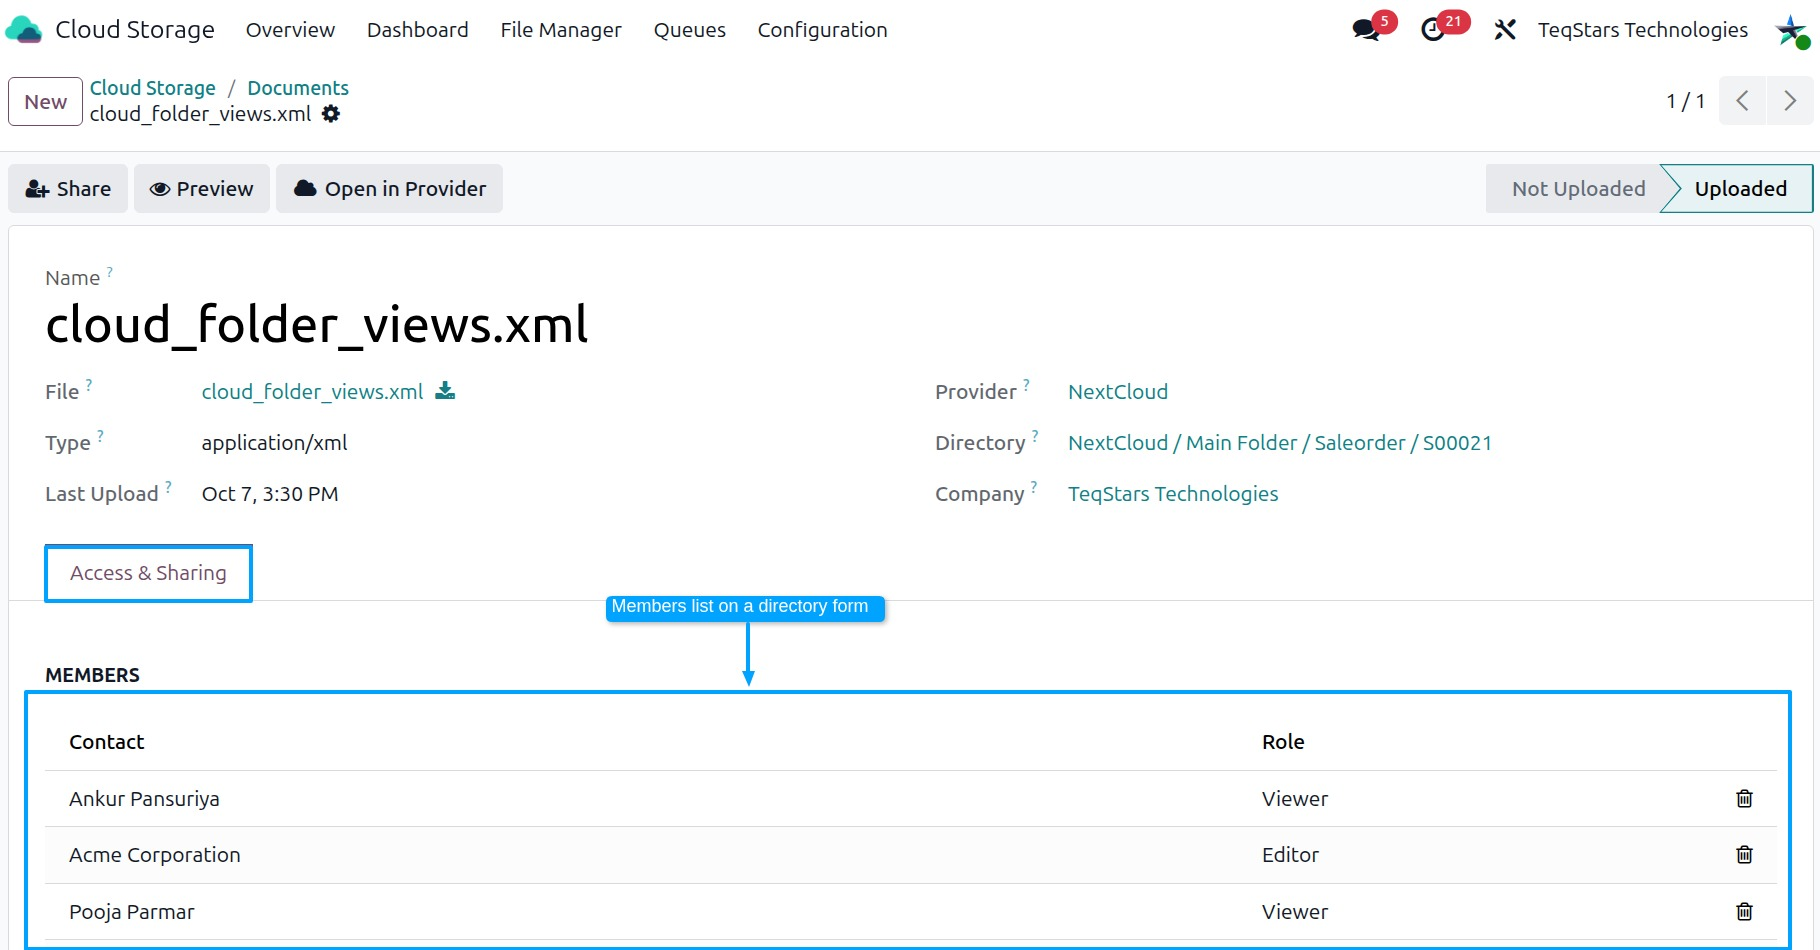
Open the share wizard
Go to .
Open the directory you want to share, or open the document inside it. Its form view opens.
On the form view, click the share button. The share wizard opens.
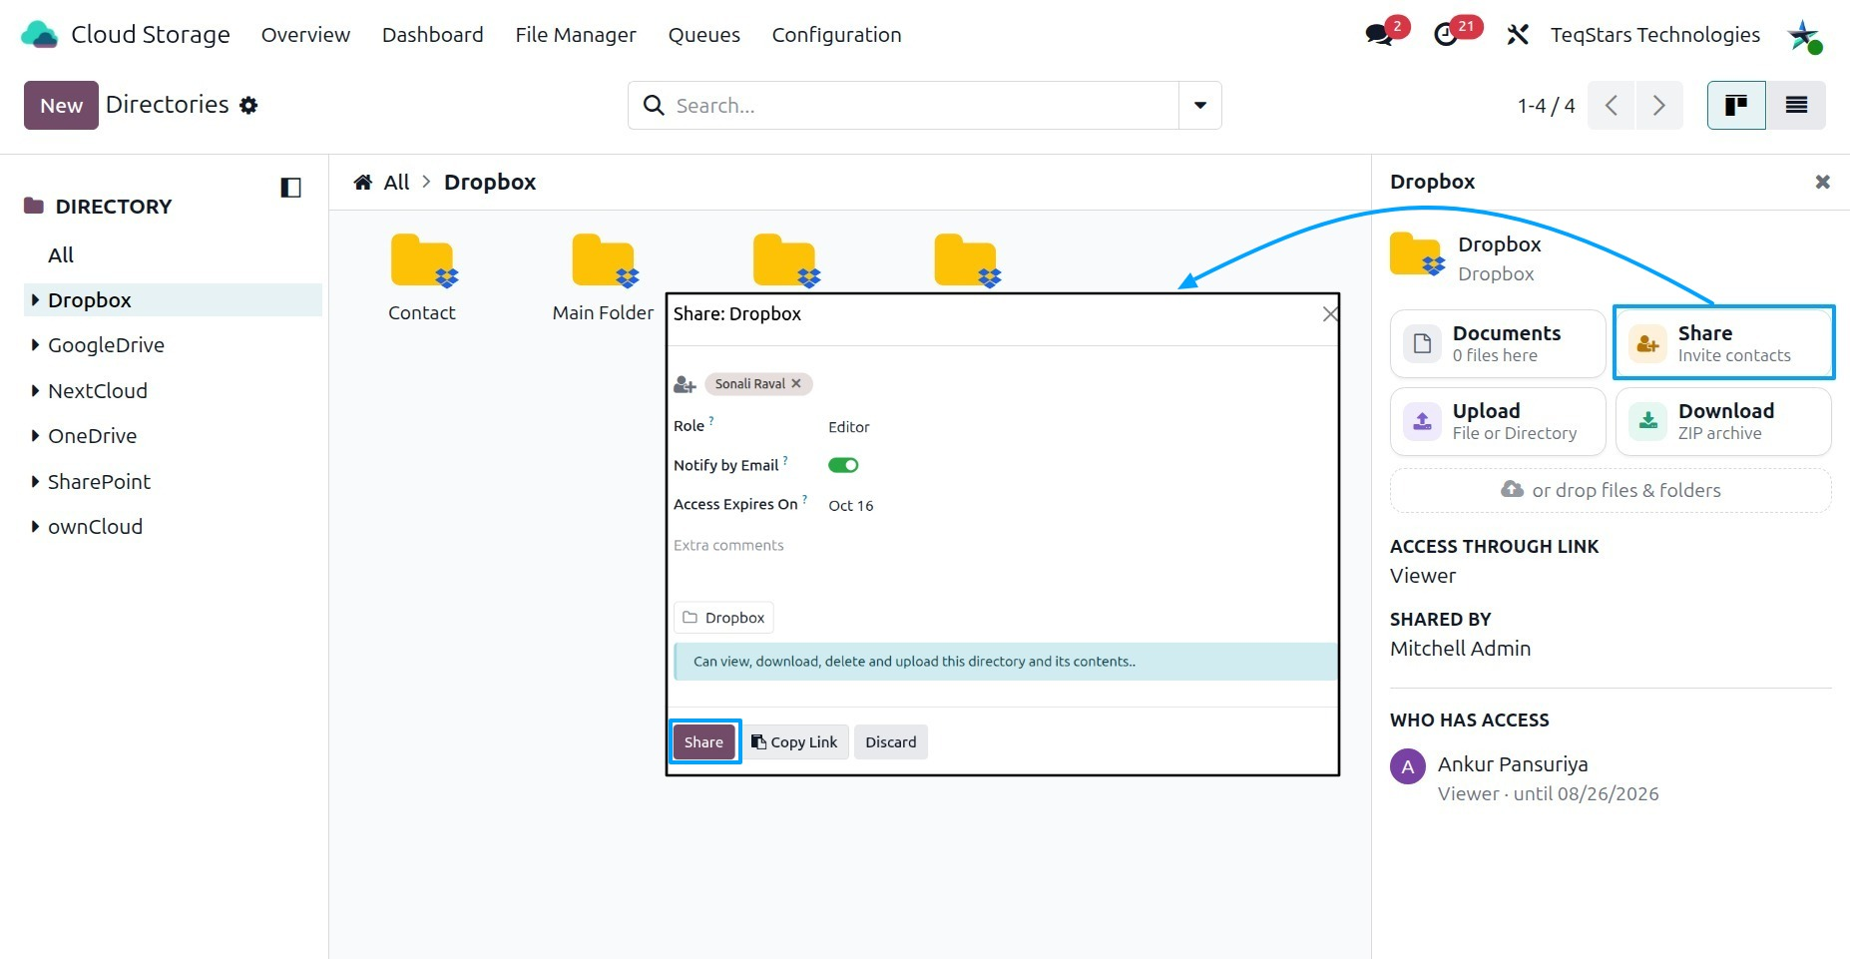
The wizard shows the name of what you share in Document Name or Directory Name. People with access and Internal users show who can already open it. These lists are read-only here. To change or remove that access, use Members on the form view (see Manage members).
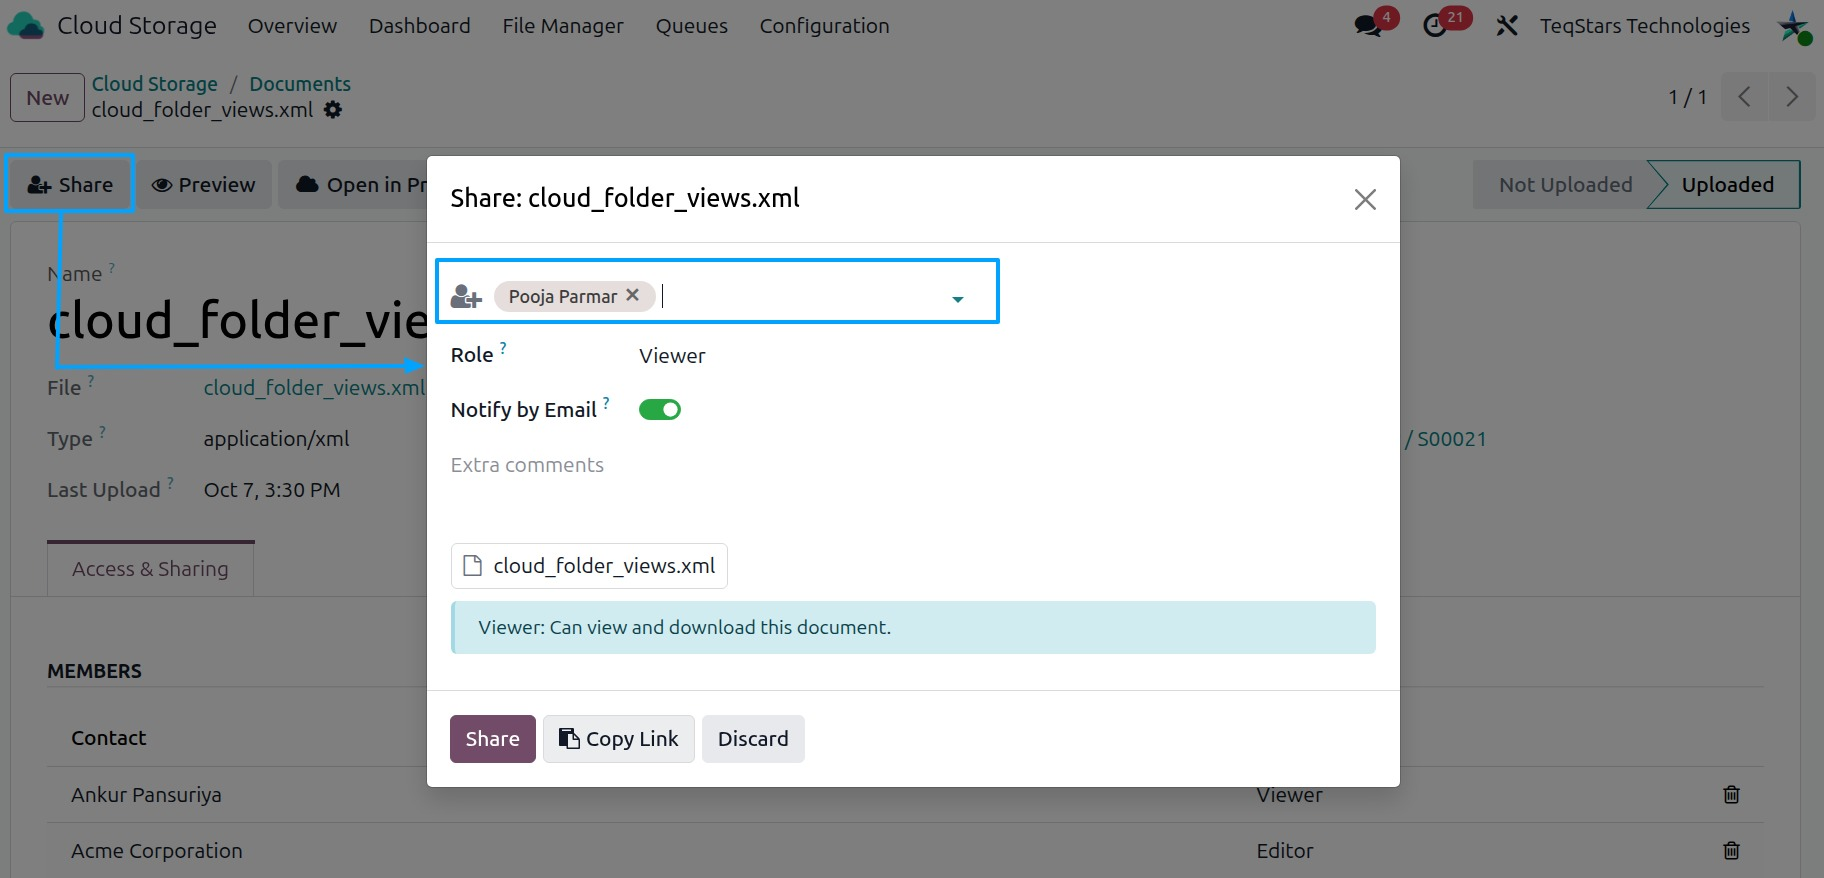
Add people and choose a role
In Recipients, select the internal users and contacts you want to share with.
In Role, choose what they can do:
Viewer: they can see the file.
Editor: they can see and change the file.
When you share a directory, the people you add get access to what it holds.
Set an access expiry date
Set Access Expires On to end access for the new recipients on that date. Leave it empty to keep access with no end date.
Notify recipients by email
Tick Notify by Email to send the recipients an email about the share.
Optionally, add a message in Extra comments. It goes into the email.
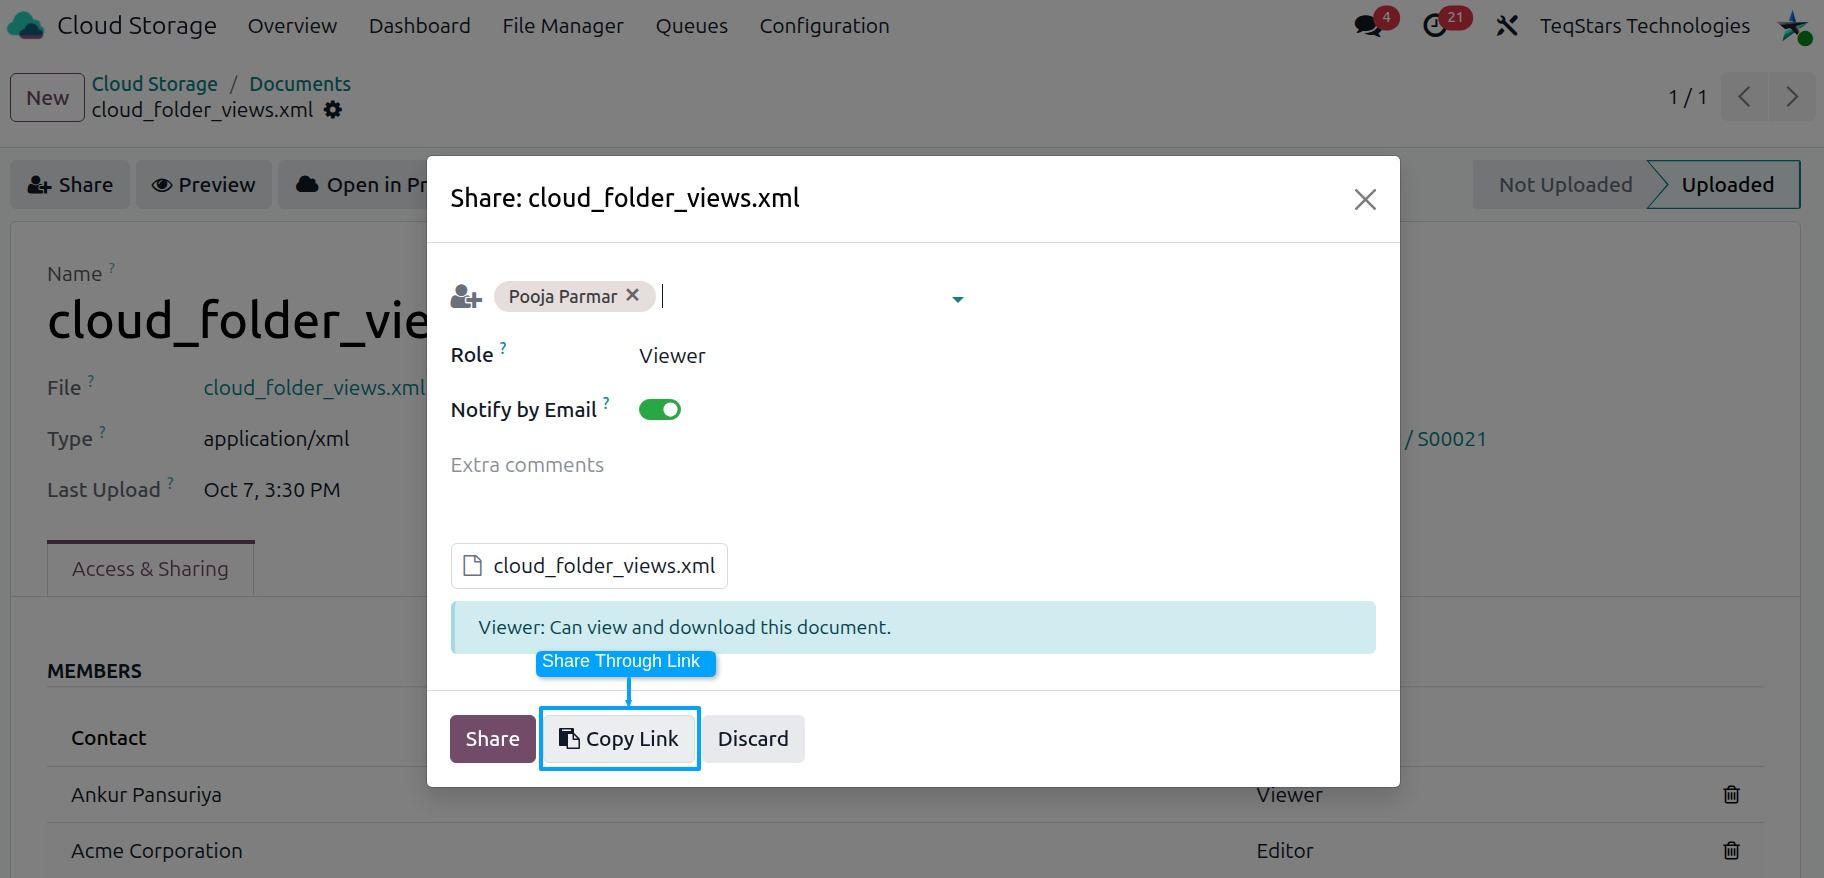
Share through a link
Turn on Access through link.
Optionally, set Link Expires On. The link stops working after that date.
Copy the link from Share Link and send it to the people who need it.
Manage members
The share wizard adds people. You change or remove access on the form view of the document or directory itself, in Members. It lists the same people as People with access in the wizard.
Go to .
Open the directory, or the document inside it.
Find the Members list on the form view. Each line shows a Contact, their Email, their Role and Access Expires On.
To change access, edit the Role or Access Expires On on that line.
To take access back, remove the line.
Save the record.