
Import Returns From Bol.com To Odoo
When a customer initiates a return on Bol.com, the connector pulls the return into Odoo so your warehouse and customer-service teams can process it from one place. Returns can be imported manually or via a scheduled action.
Note
The Import Return for Status setting on the instance (Configurations) controls which returns are imported: Unhandled (default) or Handled. It can only be changed while the instance is not confirmed.
Important
A return is created in Odoo only when the Bol.com order already exists in Odoo for the same instance and the returned product’s EAN matches the Barcode of an Odoo product. Otherwise the return is skipped and an error is written to the log ().
Method - 1: Manual Return Import
Go to the menu in Odoo.
Click on the
Operationsbutton from the instance record.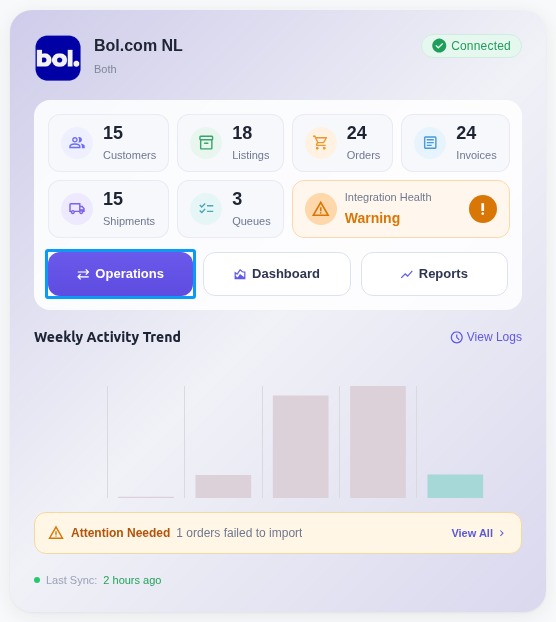
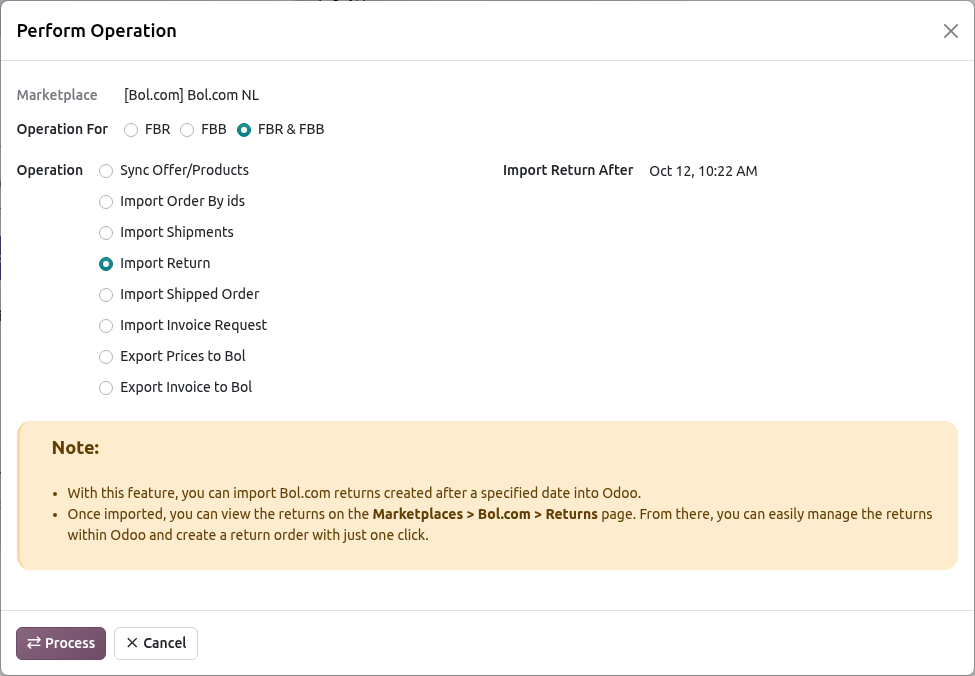
In the wizard, set:
Operation For:
FBR & FBB.Operation:
Import Return.Import Return After: starting date for the import (defaults to Last Return Imported On, or to 3 days ago if no return was imported yet).
Note
The operation creates a Bol.com Return Queue that is processed in the background by a scheduled job. Once processed, the returns are visible under , where you can review and process them. Returns already imported are updated (status and processing results) instead of duplicated.
Click PROCESS.
Method - 2: Automatic Return Import
Use the scheduled action to pull returns automatically.
Go to and open the Bol.com instance.
Open the Automatic Jobs tab.
Find Import Returns and configure:
Interval Number and Interval Unit (created as every 1 hour by default).
Active: toggle on.
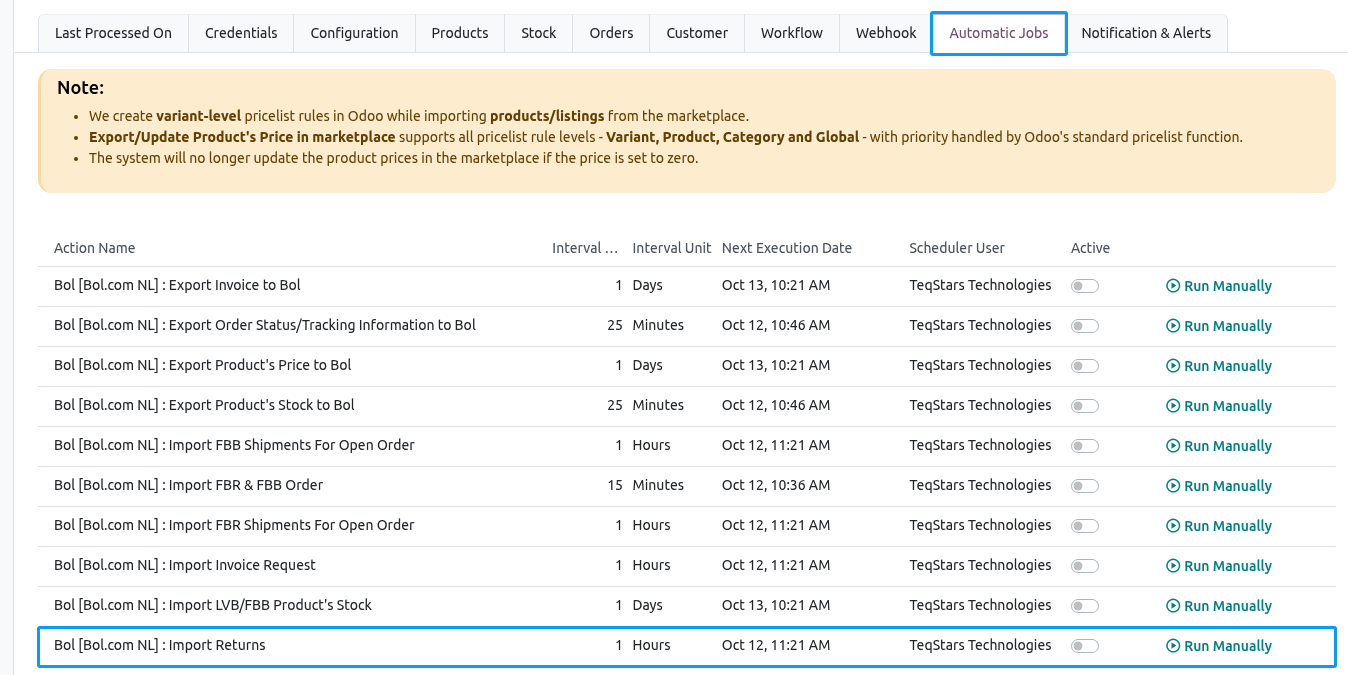
The job runs only for a confirmed instance, uses the Import Return for Status filter for the fulfilment methods enabled on the instance, and updates Last Return Imported On after each run. Like the manual import, it creates a return queue that is processed in the background.
Managing Imported Returns
Once returns are imported, manage them from the Returns dashboard.
Navigate to .
Click a return record to open its details.
The list opens filtered on To Handle returns by default; remove the filter to see Handled ones. The record shows the Return Reason, the related Odoo Order, the Expected Quantity, the customer’s notes under the Comment by Customer tab, and the results reported by Bol.com under the Processing Results tab.
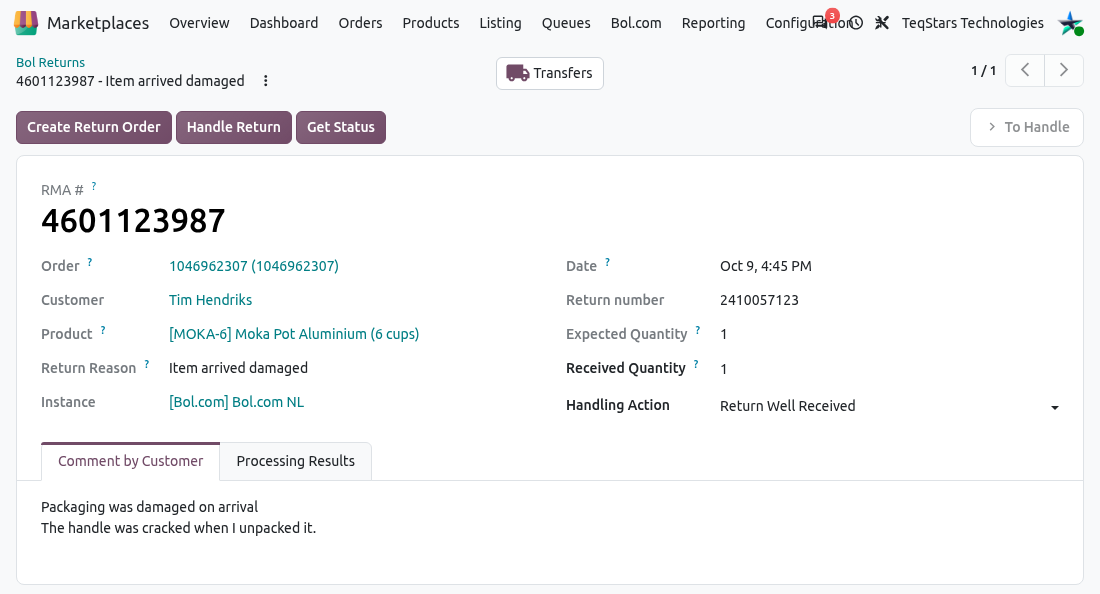
The header exposes three actions:
Create Return Order: generate a return transfer (incoming Receipt) in Odoo for the returned product, with the Received Quantity, so your warehouse can process the physical return. This requires a Received Quantity greater than zero and a validated delivery on the order. The return is created for you to validate manually; the button disappears once a return transfer exists. You can open the order’s transfers from the Transfers smart button.
Handle Return: submit your final decision to Bol.com. Before clicking, set Received Quantity and Handling Action on the return form; the button then asks for confirmation. Available Handling Actions:
Return Well Received: item received and return accepted.
Exchange Item: replace the returned item.
Item does not meet return conditions: reject the return.
Repair Item: send the item for repair.
Customer still keeps items (cancel return): customer keeps the item; return is cancelled.
Still Approved: reverses an earlier rejection. Bol.com accepts it only for a return that was previously answered with Exchange Item, Item does not meet return conditions, Repair Item or Customer still keeps items.
Odoo sends the action and the Received Quantity to Bol.com and waits for confirmation. On success the record transitions from
To HandletoHandledand can no longer be changed; on failure the error is shown and the return staysTo Handle. A Handling Action is mandatory.Get Status: fetch the latest status and processing results of this return from Bol.com on demand.
The Create Return Order, Handle Return and Get Status buttons are shown only while the return is To Handle.