
Create a Bol.com instance in Odoo
To create your Bol.com instance in Odoo, navigate to and click New.
Name: Choose a meaningful name for your instance (e.g.
Bol.com NL).Marketplace: Select Bol.com from the drop-down.
Credentials
On the Credentials tab, enter the API credentials issued by Bol.com.
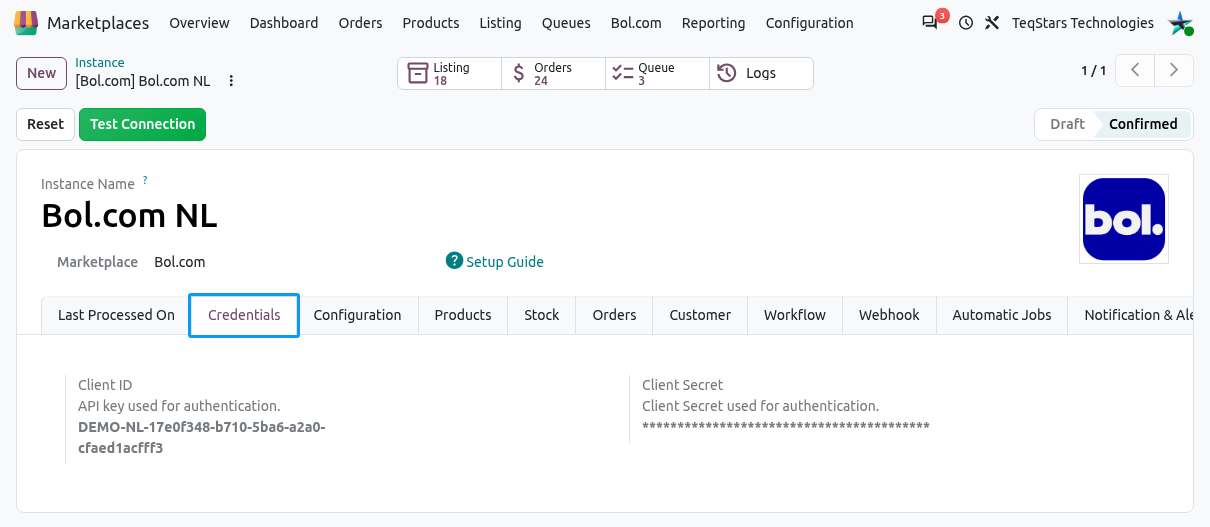
Client ID: Paste the Client ID generated from your Bol.com seller account.
Client Secret: Paste the corresponding Client Secret.
If you don’t have API credentials yet, follow Bol.com official guide:
See also
Test the Connection
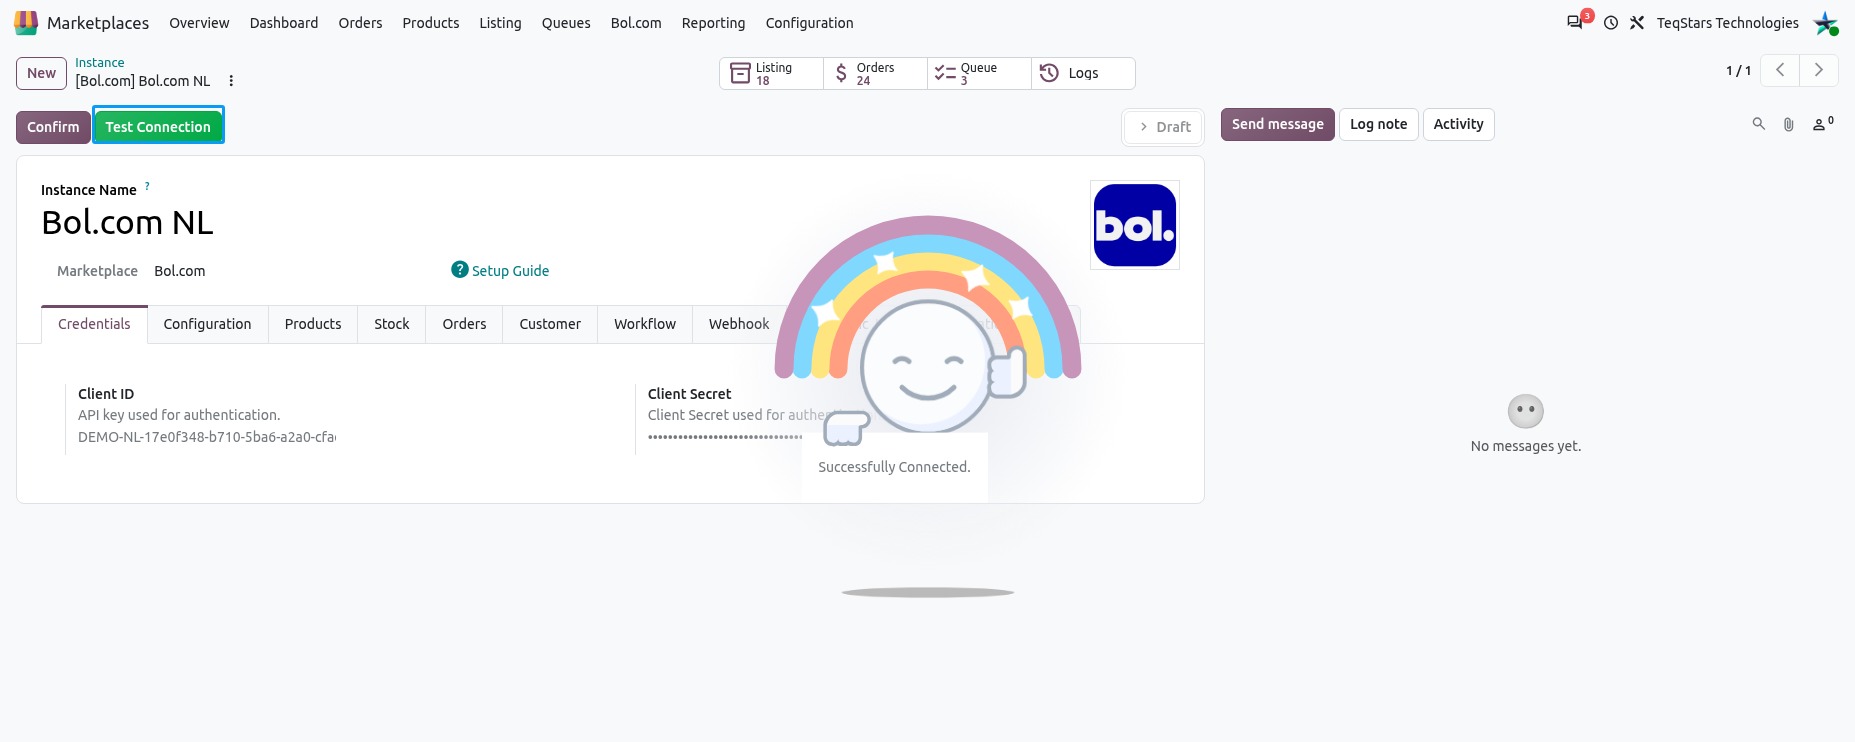
Click Test Connection.
If the credentials are valid, Odoo requests an access token from Bol.com and shows a “Successfully Connected.” message.
If the test fails, Odoo displays: “Test Connection Failed: Invalid Credentials.” Verify the Client ID and Client Secret generated in your Bol.com seller account.
Let’s begin with the instance configuration process for the Bol Odoo Connector. By following configurations you’ll be able to set up and customize the integration according to your business needs. Let’s get started!
Last Processed On
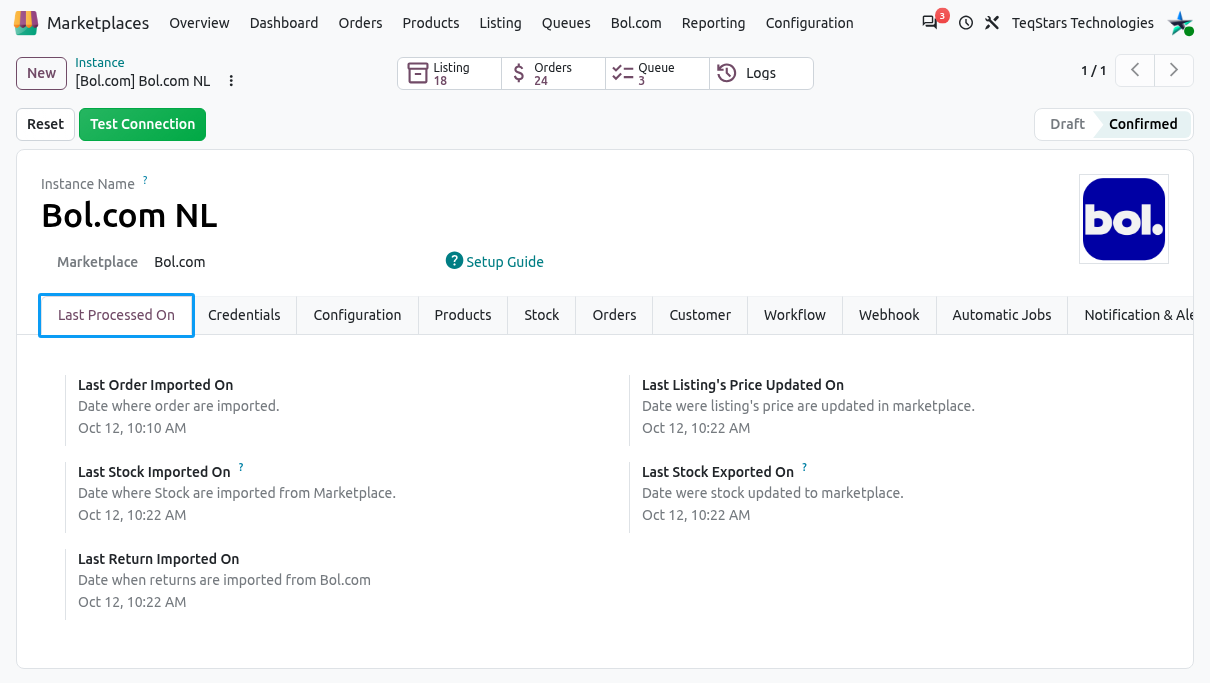
Last Processed On shows the date and time of the last run of each operation (orders, returns, stock import, stock export, price export). The tab appears once the instance has left the Draft state.
Stock export, price export and return import use these dates to process only the records changed since the last run. The first return import (when no date is stored yet) looks back 3 days.
Order import does not use Last Order Imported On as a filter; use Import Order After and Order Status (see Orders Configurations) to control which orders are imported.
Configurations
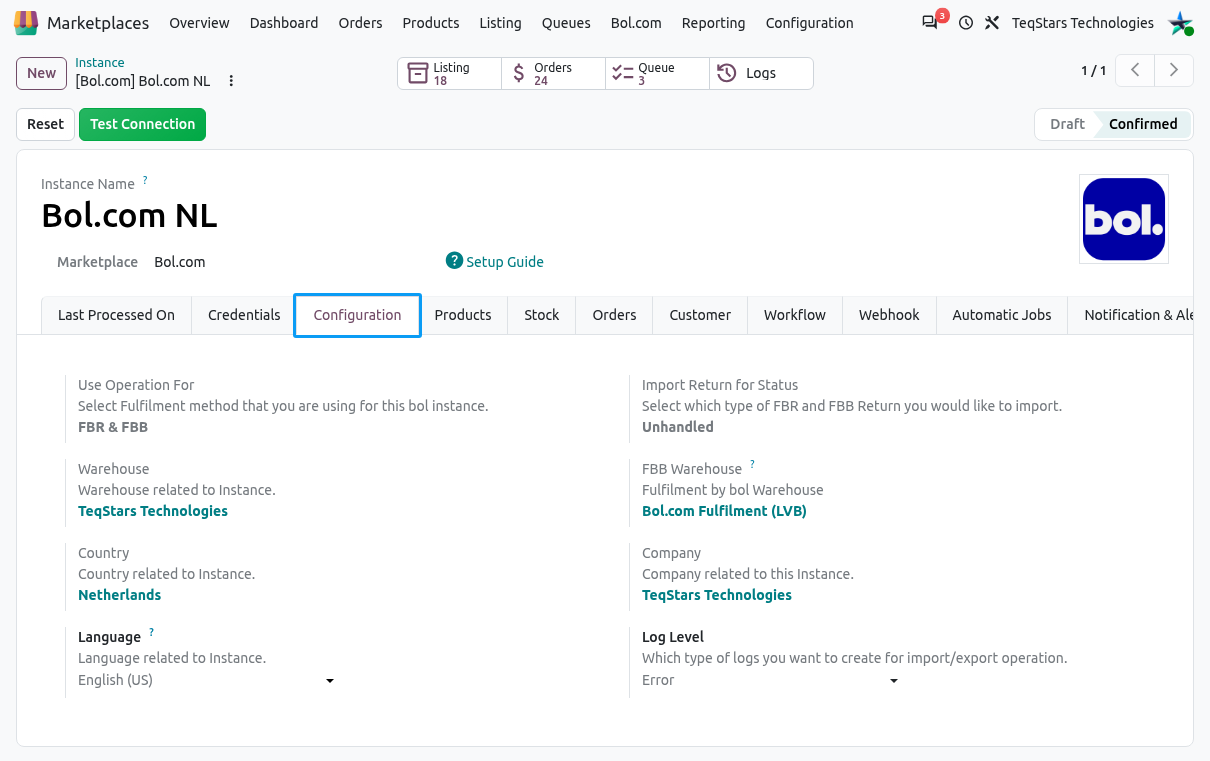
Use Operation For: Select the fulfillment method. You can choose between
FBR,FBB, orFBR & FBB.Import Return for Status: Choose the type of returns you wish to import. You can select either
Unhandled, orHandled.Warehouse: This warehouse will be utilized for FBR orders and also for exporting stock to Bol.com. The field is hidden when Use Operation For is
FBB.FBB Warehouse: this warehouse will be utilized for FBB orders and also for importing stock from Bol.com. It is shown and required only when Use Operation For is
FBBorFBR & FBB.Company: Choose company related to instance.
Log Level: choose which type of log level would you like to have. You can choose between
All,Success, orError. default to Error. The system will retrieve logs for each marketplace operation. To view the logs, navigate toQueue Batch Limit (Only visible in developer mode): default to 100 records. we aren’t suggesting to change this.
Note
To modify the Queue Batch Limit, activate the developer mode and navigate to and click on the Configuration tab.
Country and Language: Set the country and language context for the instance.
Product Configurations
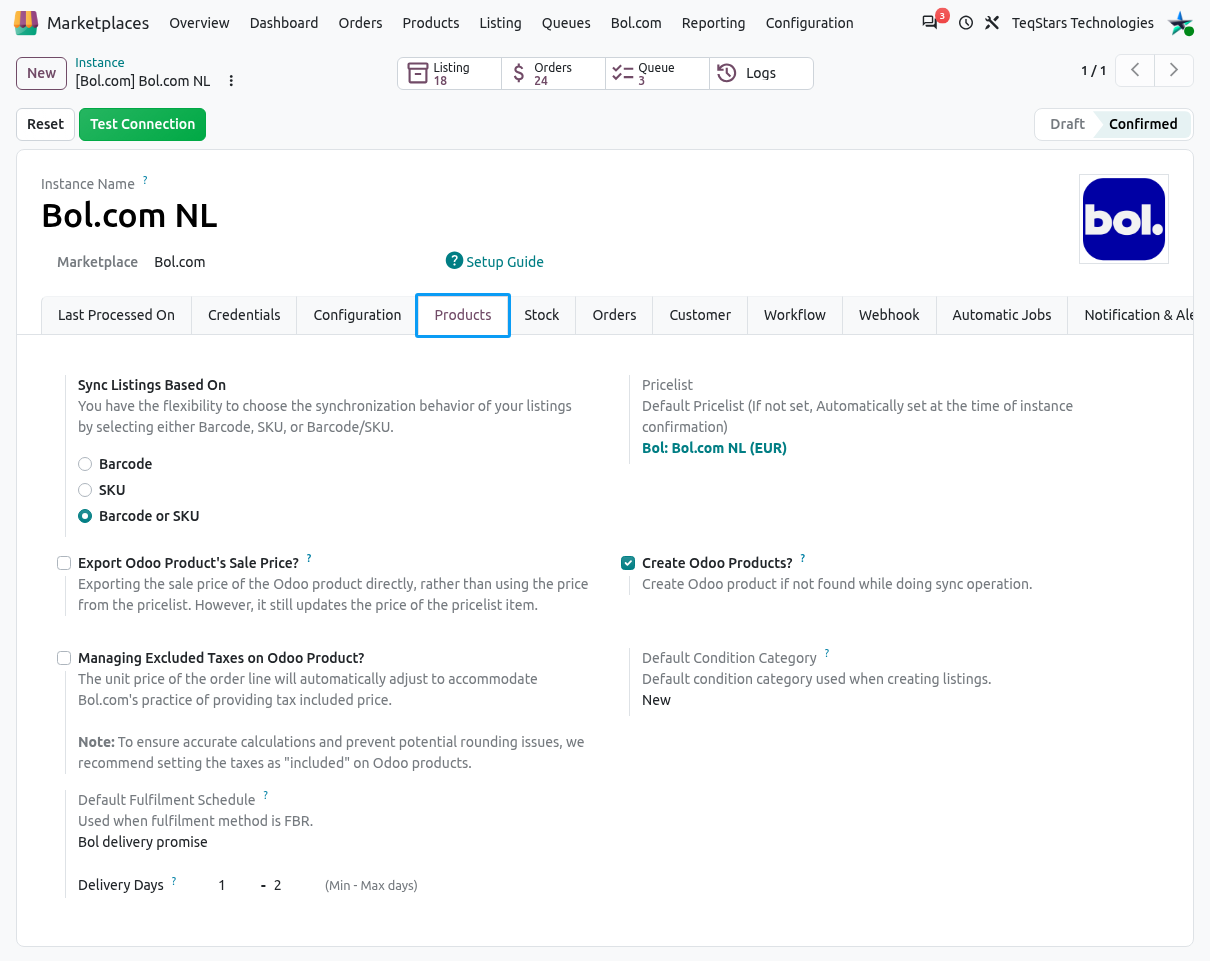
Sync Listings Based On: Parameter used to match Bol.com offers to Odoo products during sync. Choose
Barcode,SKU, orBarcode or SKU.Tip
Bol.com offers always have unique barcodes, so matching by Barcode is strongly recommended.
Pricelist: Pricelist used for price import and export, and set on imported Bol.com orders. Leave blank to let the connector create a default Bol.com pricelist when the instance is confirmed. The field becomes read-only once the instance is confirmed.
Export Odoo Product’s Sale Price?: When enabled, the connector exports the product’s sale price directly, bypassing the price from the configured pricelist (the pricelist item is still updated). Disabled by default.
Create Odoo Products?: When enabled, the connector automatically creates a new Odoo product if no match is found via Sync Listings Based On.
Tip
If you already have existing products in your Odoo ERP system, it is not recommended to enable the Create Odoo Products? option in the Instance.
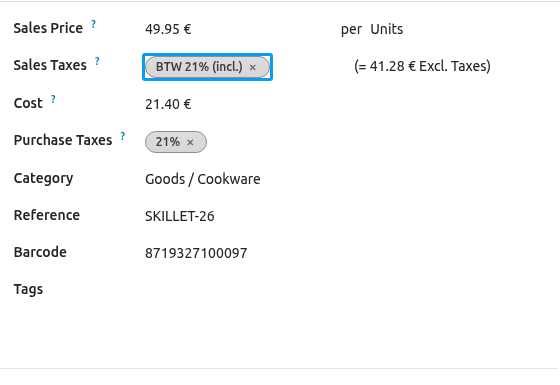
Managing Excluded Taxes on Odoo Product?: Enable this if you are managing excluded taxes on products.
Default Offer/Product Settings
These defaults are applied when a new listing is created from an Odoo product.
Default Condition Category: Condition of the product on Bol.com. Options:
New,Second hand,Refurbished. Default:New.Default Condition State: Required when condition is Second hand. Options:
As new,Good,Moderate,Reasonable.Default Refurbished Grade: Required when condition is Refurbished. Options:
A - near-mint,B - light scratches,C - low cosmetic quality.Default Margin Adjustment: Enable for refurbished products where VAT was already paid (0% tax rate).
Default Fulfilment Schedule: Controls delivery promise shown on Bol.com. Shown only when Use Operation For is
FBRorFBR & FBB. Options:My delivery promise,Shipping via bol,Bol delivery promise. Default:Bol delivery promise.Default Min Days To Customer / Default Max Days To Customer (shown as Delivery Days): Delivery window in days, shown only for the
Bol delivery promiseschedule. Default: 2 - 3. Max must not be lower than Min.Default Ultimate Order Time: Latest order time for next-day delivery promise (12:00-23:00). Shown and required when min=0 and max=1.
Note
The condition fields and fulfilment fields are shown on the Products tab. Default Condition State, Default Refurbished Grade and Default Margin Adjustment appear only for the matching condition category. The condition category and fulfilment schedule become read-only once the instance is confirmed.
Stock Configurations
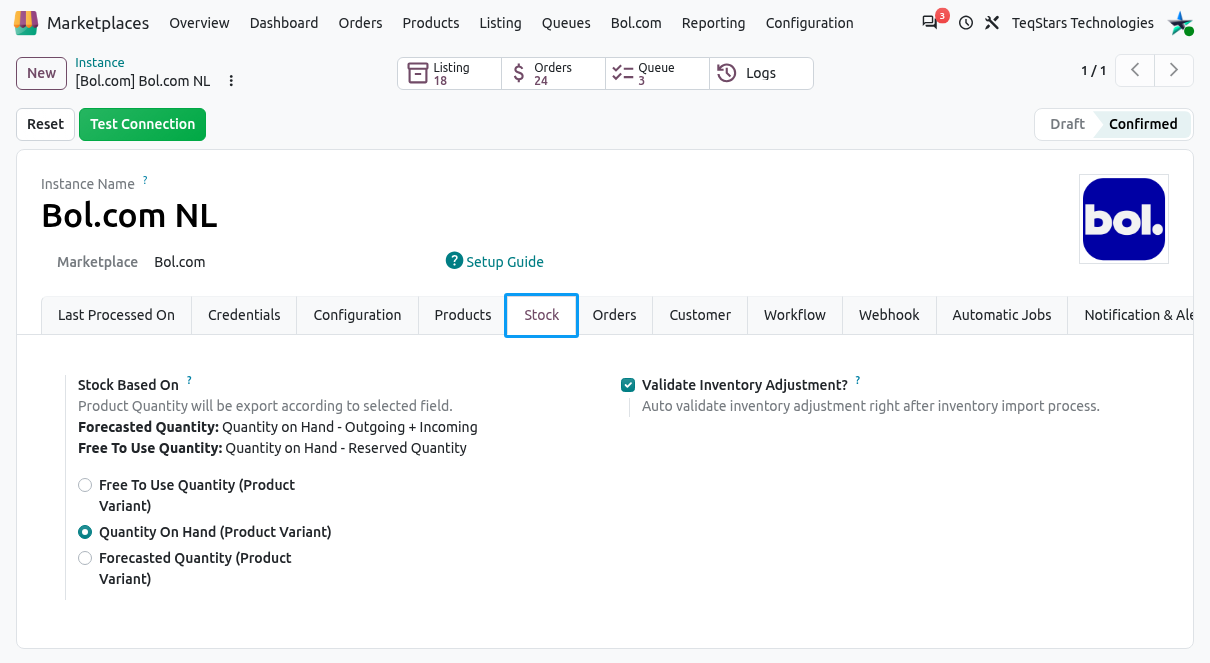
Stock Based On
When exporting Inventory from Odoo to Bol.com, you can choose
Free To Use Quantity,Quantity On HandorForecasted Quantityconfiguration based on your requirements, ensuring accurate inventory management between Bol.com and Odoo. This field is editable by system administrators only. .. tip:- **Forecasted Quantity**: Quantity on Hand - Outgoing + Incoming - **Free To Use Quantity**: Quantity on Hand - Reserved Quantity
Validate Inventory Adjustment?: The system automatically confirms the inventory adjustment after importing inventory data from Bol.com to Odoo. By enabling Validate Inventory Adjustment?, the inventory adjustment is automatically marked as validated without requiring manual intervention.
Orders Configurations
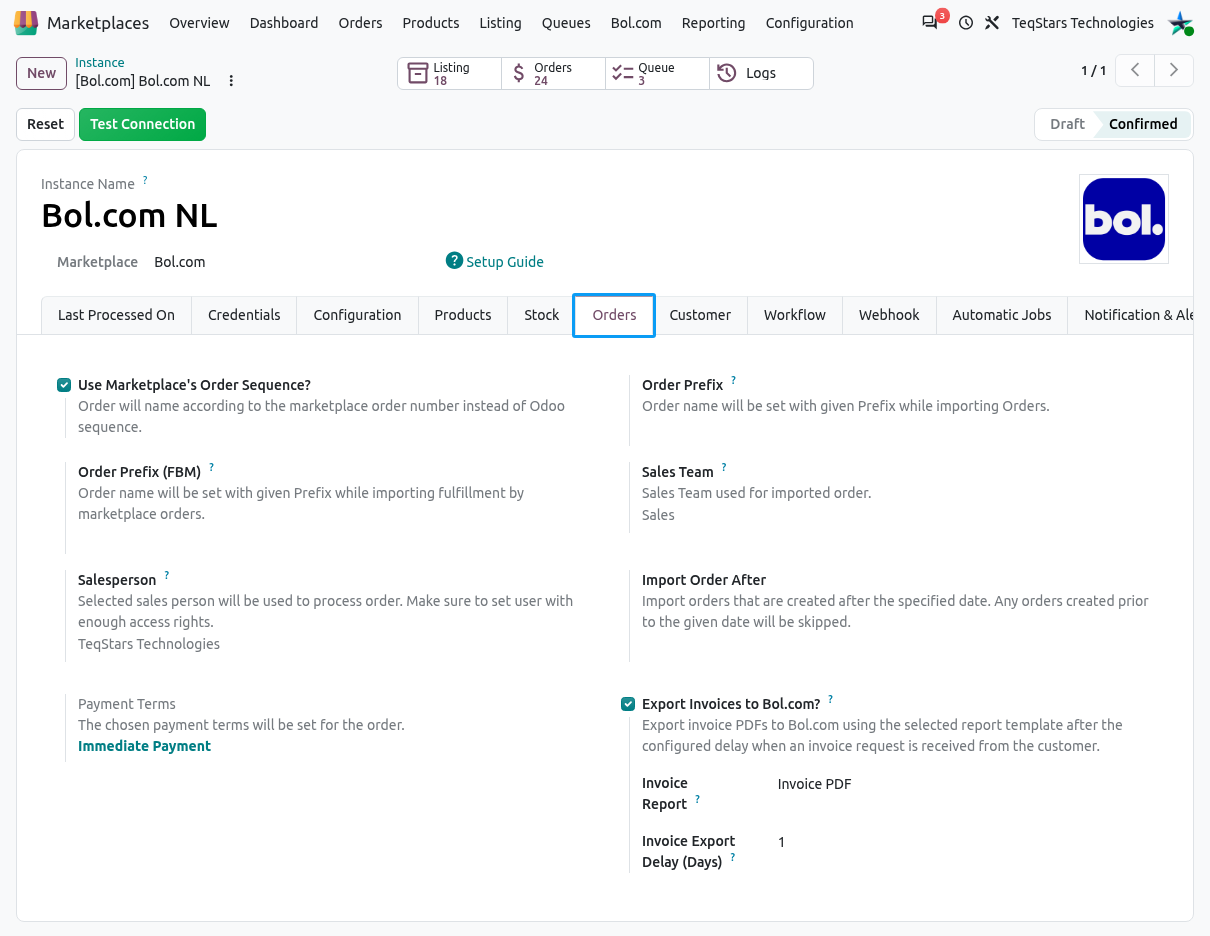
Use Marketplace’s Order Sequence?: Allows you to name orders in Odoo based on the Bol.com order number rather than using the default Odoo sequence. This ensures that the order names in Odoo correspond directly to the order numbers generated by the Bol.com platform, providing consistency and easier cross-referencing between Odoo and the Bol.com.
Order Prefix: Allows you to specify a prefix that will be added to the names of imported orders. When importing orders from Bol.com to Odoo, the connector will automatically set the order name with the given prefix. This helps to easily identify and distinguish the imported orders in Odoo.
Order Prefix (FBM): Prefix for fulfillment by Bol.com (FBB) orders.
Example
if you set the prefix as
BOL-, an order number/name “12345” will becomeBOL-12345after importing.
Delivery Product (Only visible in developer mode): The product used when the connector automatically creates a new delivery method from a carrier returned by a Bol.com shipment.
Sales Team: By configuring this, you can ensure that all imported orders from Bol.com are automatically assigned to the specified default Sales Team in Odoo.
Salesperson: Select a salesperson who will be responsible for processing the orders received from Bol.com. It is important to ensure that the assigned user has sufficient access rights in Odoo.
Import Order After: You can import orders from Bol.com that have been generated after a particular date. By defining this date, any orders generated prior to the specified date will be skipped during the import process.
Analytic Account (Visible when Analytic Accounting is enabled): The configured analytic account will be assigned to all sales orders created by the connector. This means that the Analytic Default Rule set up in Odoo will not be applied to Marketplace orders.
Create Single Invoice? (Only visible in developer mode): When enabled, the system will wait to create an invoice until all products within the order are fully ready to be invoiced, preventing multiple partial invoices for a single order.
Order Status (Only visible in developer mode): Filter orders by their fulfillment status at the time of Import Orders. default to
OPEN.Payment Terms: Specify the default payment terms that will be automatically applied to all imported Bol.com sales orders.
- Export Invoices to Bol.com?: Enable this feature to automatically export generated invoice PDFs back to Bol.com when an invoice request is received from a customer.
Invoice Report: Select the specific Odoo PDF report template used to generate the invoice document.
Invoice Export Delay (Days): The invoice is exported only once its invoice date is more than this number of days in the past. Default: 1.
Note
Both Import Invoice Request and Export Invoice to Bol scheduled actions are switched on and off together with this setting. The invoice is uploaded only when the sales order is fully invoiced and its invoice is posted. After 3 failed automatic attempts a request is no longer retried by the scheduled action; it can still be uploaded manually from the record.
Customer Configurations
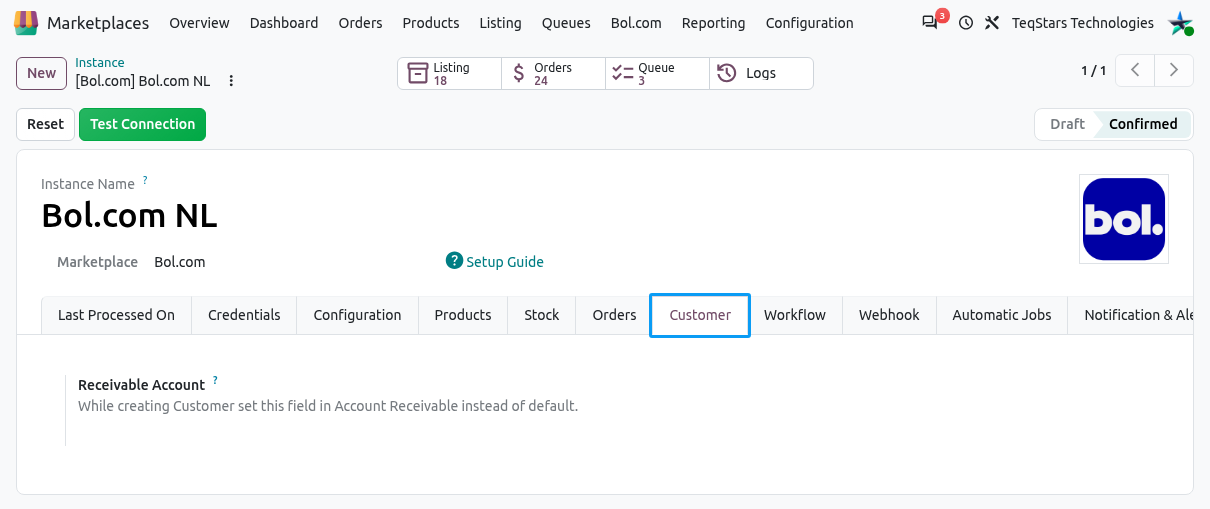
Receivable Account: Allows you to specify the default account for receivables when creating customers. By setting this field to Account Receivable instead of the default account, you ensure that the receivable transactions, such as invoices and payments, associated with the customer are correctly accounted for in the Odoo.
Workflow Configurations
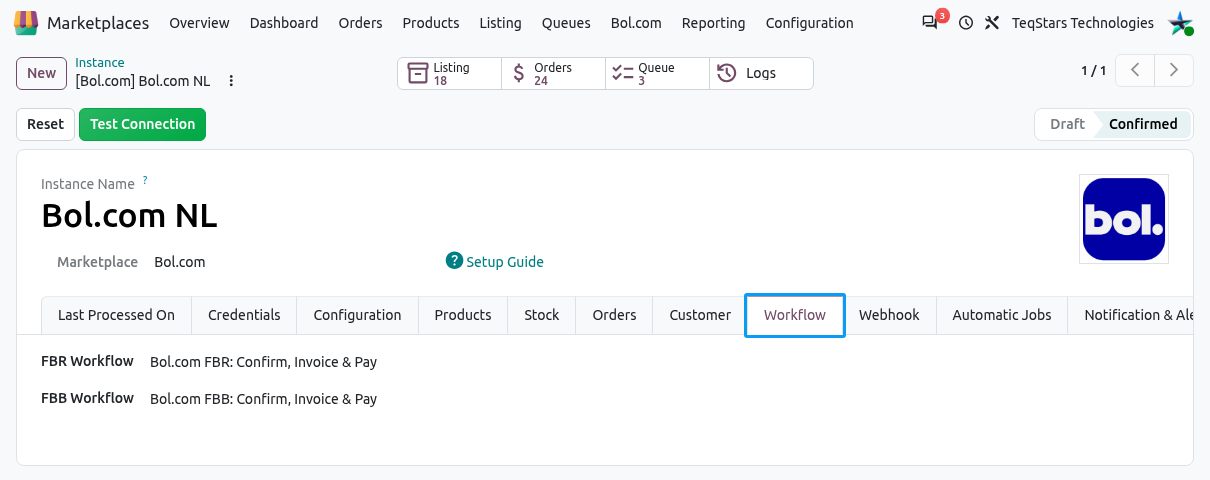
FBR Workflow & FBB Workflow: It enables the automatic processing of imported orders. This workflow automates various steps, including confirming orders, creating invoices, validating invoices, and registering payments.
Webhook Configurations
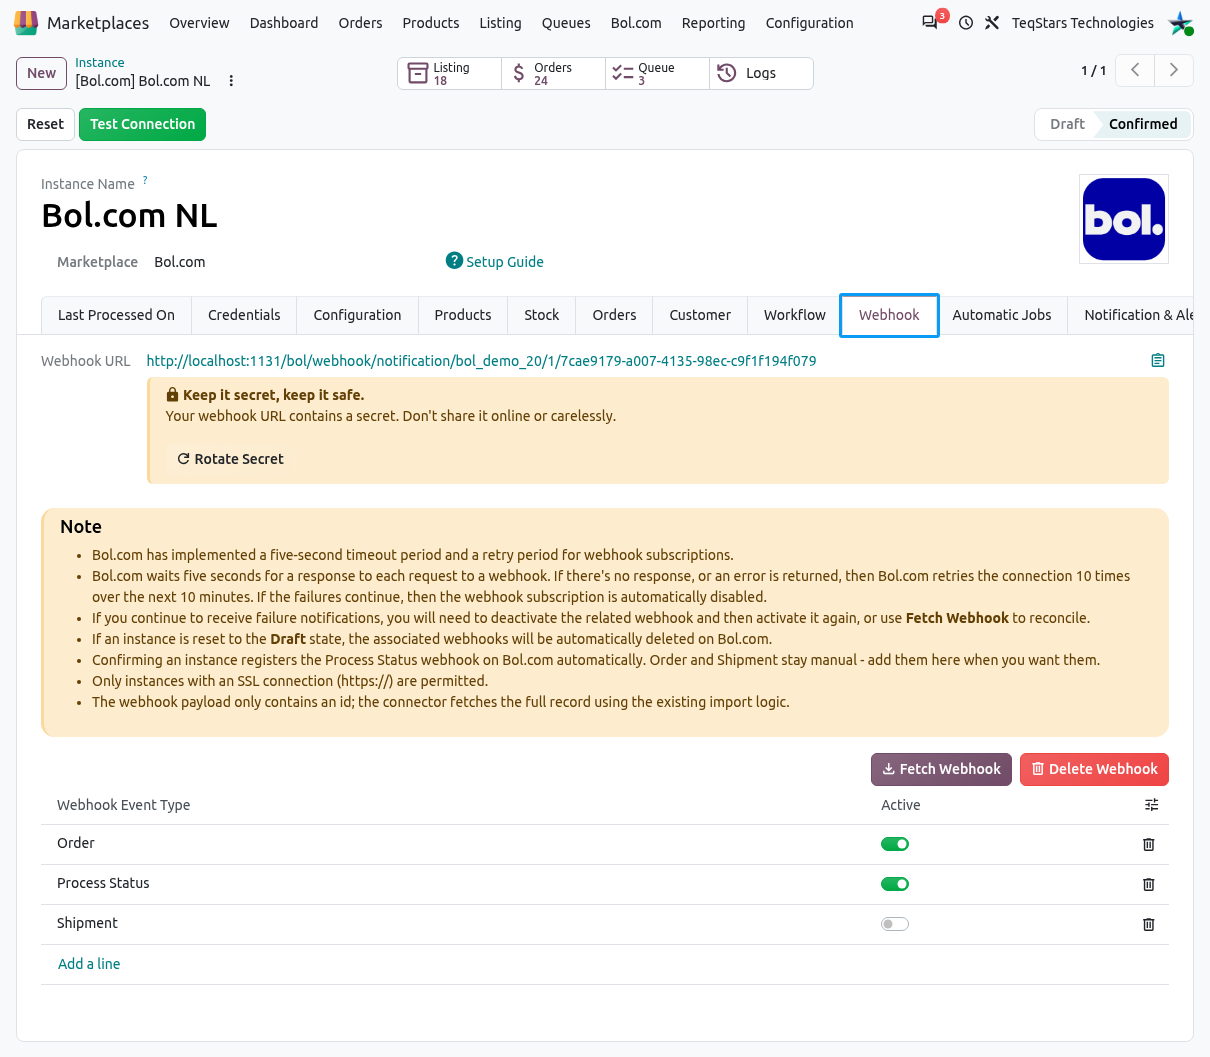
- What webhooks do
Webhooks allow Bol.com to instantly inform Odoo when something happens in your account (like a new order, shipment, or process status).
This means Odoo updates automatically without waiting for Automatic Jobs.
It helps keep your data in sync in real time.
What is enabled automatically
When you Confirm the instance, the connector registers the Process Status webhook on Bol.com for you, so the results of background operations (offers, stock, price, shipments, invoices) reach Odoo without any manual step.
The Order and Shipment webhooks are not enabled automatically. Add them yourself when you want real-time order and shipment updates, as described below.
The webhook URL is created for the instance as soon as it is saved, and is shown at the top of the Webhook tab.
How to enable or disable
Go to and open your Bol.com instance.
Open the Webhook tab.
Add a new line, select the Webhook Event Type, enable Active, and save.
Fetch Webhook
This option reads the webhook subscriptions registered on Bol.com for this instance’s webhook URL and updates the Webhook tab to match them.
For each event found on Bol.com, the matching webhook line is created or updated in Odoo, and its Active setting follows whether the subscription is enabled on Bol.com.
Webhook lines that are active in Odoo but have no subscription on Bol.com are switched off in Odoo.
It helps ensure both Bol.com and Odoo are using the same configuration.
Delete Webhook
This option removes the webhook lines of your instance and deletes the matching subscriptions on Bol.com.
It is useful when you want to reset or reconfigure everything from scratch.
Clicking Delete Webhook will clear all existing webhook connections linked to your instance.
Rotate Secret
The webhook URL contains a secret. Keep it private; if you think it is no longer secure, click Rotate Secret.
Odoo deletes the active subscriptions on Bol.com, generates a new URL and registers the active webhooks again on the new URL.
Note
Make sure your instance is in Confirmed state to receive webhook updates from Bol.com.
To stop updates,
You can Turn off Active for Webhook Event Types.
Delete the webhook line.
Reset the instance to Draft state.
Webhook Event Types
Each event represents something that happens on Bol.com for your account. Select the events you need on the Webhook tab; only the active events are pushed to Odoo.
Order (
ORDER)Triggered when a new order is placed or an existing order changes on Bol.com.
Shipment (
SHIPMENT)Triggered when a shipment is created or updated on Bol.com.
Process Status (
PROCESS_STATUS)Triggered when a background operation sent to Bol.com is processed, such as creating an offer or exporting stock, price, or shipment information.
Note
Your Odoo URL must use https://. Webhooks will not work if your system is not using a secure connection.
The instance must be in Confirmed state. Webhooks will only work after the instance is in confirmed state.
Confirming the instance registers the Process Status webhook automatically. This needs a secure (https://) Odoo URL. If the URL is not secure, the instance is still confirmed, but the webhook is skipped. Odoo then shows a warning and creates a Bol.com Webhook HTTPS Required activity, and you add the webhook manually once the URL is secure.
The Order and Shipment webhooks always stay manual, so a shop that already uses them keeps exactly the notifications it had.
If an instance is reset to the Draft state, the active webhooks are automatically deleted on Bol.com. When you confirm again, only Process Status is registered again; switch Order and Shipment back on yourself if you need them.
Warning
Webhook processing runs in a background thread after Bol.com calls your endpoint.
Use to review success and errors for webhook operations.
Bol.com waits five seconds for a response to each webhook call. If there is no response or an error is returned, Bol.com retries up to 10 times over the next 10 minutes; if the failures continue, the subscription is automatically disabled. To recover it, turn Active off and on again, or use Fetch Webhook to reconcile.
The polling Automatic Jobs are not switched off by webhooks. Keep the jobs you need Active as a fallback, so data is still synchronized even if a webhook call is missed.
A webhook is processed only when its event type is listed and Active; otherwise Odoo ignores the call. The webhook payload contains only an id, and Odoo fetches the full record from Bol.com.
Automatic Jobs Configurations
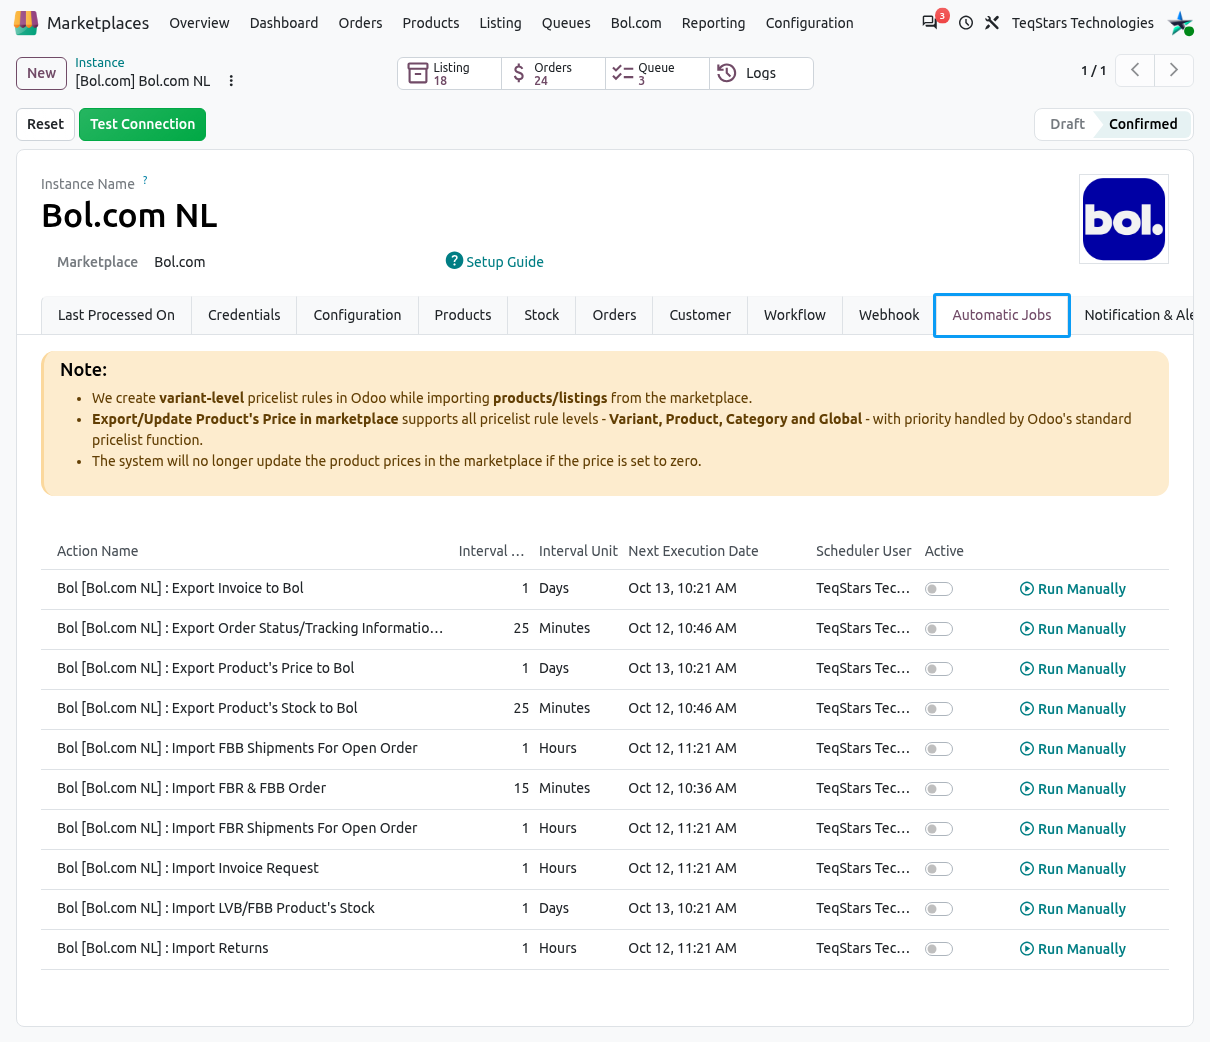
Automatic Jobs Configurations allow for the automation of various tasks related to exporting and importing data between Bol and Odoo. These jobs are scheduled to run automatically at specified intervals to keep the data synchronized and up to date. You can configure Interval Number, Interval Unit, and Active for each job. Here’s an explanation of each Automatic Job.
For each job, you can customize the Interval Number and Interval Unit (e.g., every 15 minutes, or every 1 day). Toggle the Active switch to enable or disable a job, or click the Run Manually button to execute a synchronization instantly.
Note
All scheduled jobs are created automatically when the instance is first saved, but they are created inactive. Switch Active on for each job you want to run. The two invoice jobs are switched on and off by the Export Invoices to Bol.com? setting. On a neutralized (staging/test) database the invoice jobs stay inactive and import/export requires Go Live to be enabled on the instance. The Automatic Jobs tab is visible to system administrators only. In developer mode, use the Refresh button on this tab to recreate or update jobs if they are missing or misconfigured.
Important
Price Export Note: The system skips exporting product prices when the price is set to zero.
Available Scheduled Actions
Default intervals: Import FBR & FBB Order - 15 minutes; Export Order Status/Tracking Information, Export Product’s Stock - 25 minutes; Import FBB/FBR Shipments, Import Returns, Import Invoice Request - 1 hour; Import LVB/FBB Product’s Stock, Export Product’s Price, Export Invoice to Bol - 1 day.
- Export Invoice to Bol
Automatically exports generated Odoo invoice PDFs back to the Bol.com portal. This job only processes exports if the Export Invoices to Bol.com? configuration is enabled. It ensures that invoices are only sent if the order is fully invoiced, posted, and the configured export delay has passed.
- Export Order Status/Tracking Information to Bol
This automatic job enables the automatic export of order status and tracking information from Odoo to Bol.
It ensures that the order updates, such as shipment status and tracking numbers, are reflected accurately in Bol.
Only done FBR deliveries are processed, and the delivery method must be linked to a Bol.com transporter. After 3 failed automatic attempts the delivery is marked as a marketplace exception and skipped by the job; use Update in Marketplace on the delivery to retry manually.
- Export Product’s Price to Bol
This automatic job enables the automatic export of product prices from Odoo to Bol.
Any changes in product prices in Odoo will be automatically reflected in the corresponding products on Bol.
Pricelist will be used while exporting price to Bol.
- Export Product’s Stock to Bol
This automatic job the connector automatically exports the inventory levels of products from Odoo to Bol.
It helps keep the product stock information synchronized between the two platforms, ensuring accurate stock availability on your Bol store.
Stock Based On configuration will be used while export stock.
- Import FBB Shipments For Open Order
Automatically retrieves shipment and tracking details from Bol.com for open orders that are being fulfilled by Bol.com (FBB), updating the records in Odoo.
- Import FBR & FBB Order
Automatically fetches new customer orders from Bol.com and creates Sales Orders in Odoo. This process respects your Order Configuration and automatically triggers the automation steps defined in your Workflow Configuration.
- Import FBR Shipments For Open Order
Retrieves shipment updates from Bol.com for your open FBR orders (useful if shipments were manually processed via the Bol.com Seller Dashboard instead of Odoo).
- Import Invoice Request
Automatically periodically contacts Bol.com to check if any customers have explicitly requested a VAT invoice and links the request to the corresponding Odoo Sales Order. This job only processes requests if the Export Invoices to Bol.com? configuration is enabled.
- Import LVB/FBB Product’s Stock
Automatically pulls your FBB (Fulfillment by Bol.com) / LVB (Logistiek via bol.com) warehouse stock levels into Odoo. This process respects the Validate Inventory Adjustment? setting.
- Import Returns
Automatically fetches customer returns from Bol.com and processes them in Odoo based on the Import Return for Status configured in your Configuration tab. Only returns registered since Last Return Imported On are fetched (the last 3 days on the first run).
Note
It’s highly recommended not to schedule all your processes to run at the exact same interval because it can consume a significant amount of your system resources. Instead, it’s recommended to gap between them. This helps ensure that your system resources are not overuse and can handle the workload more efficiently.
Notification & Alerts
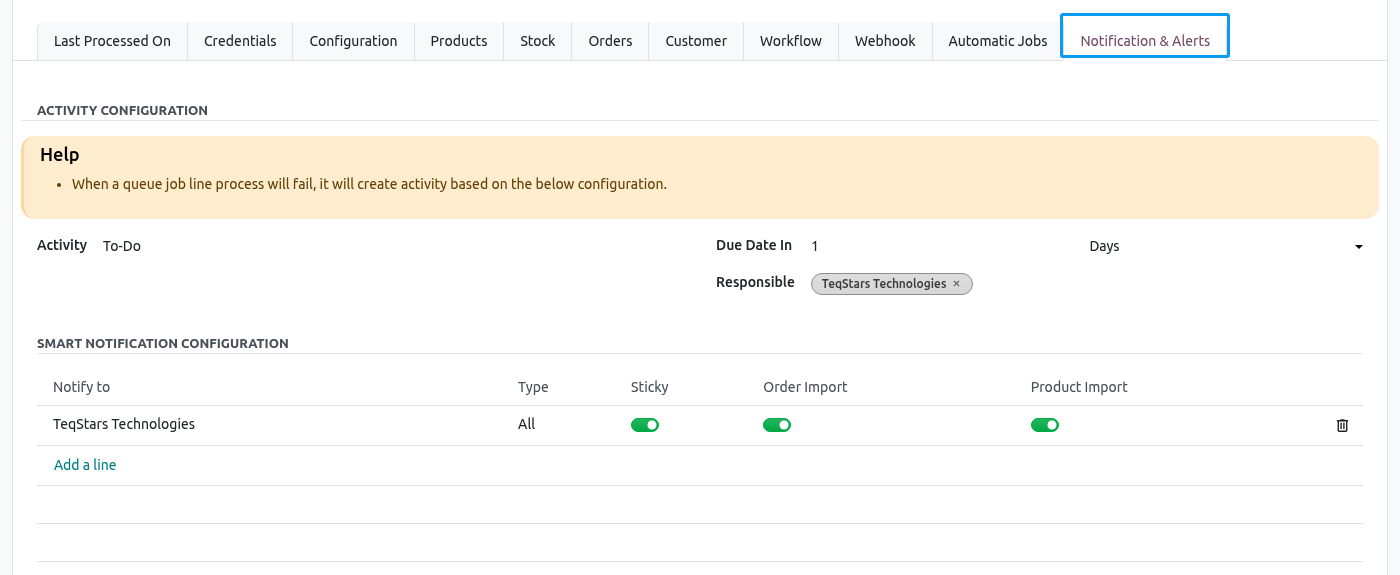
- Activity Configuration
When a queue job line process fails, the system create an activity based on the specified configuration.
By configuring Activity, Due Date In and Responsible the system can automatically generate an activity when a queue job line process fails. The activity will be assigned responsible person and categorized based on the specified type of activity. This helps ensure that appropriate follow-up actions are taken to address and resolve any issues or errors encountered during the Queue job process.
Smart Notification Configuration
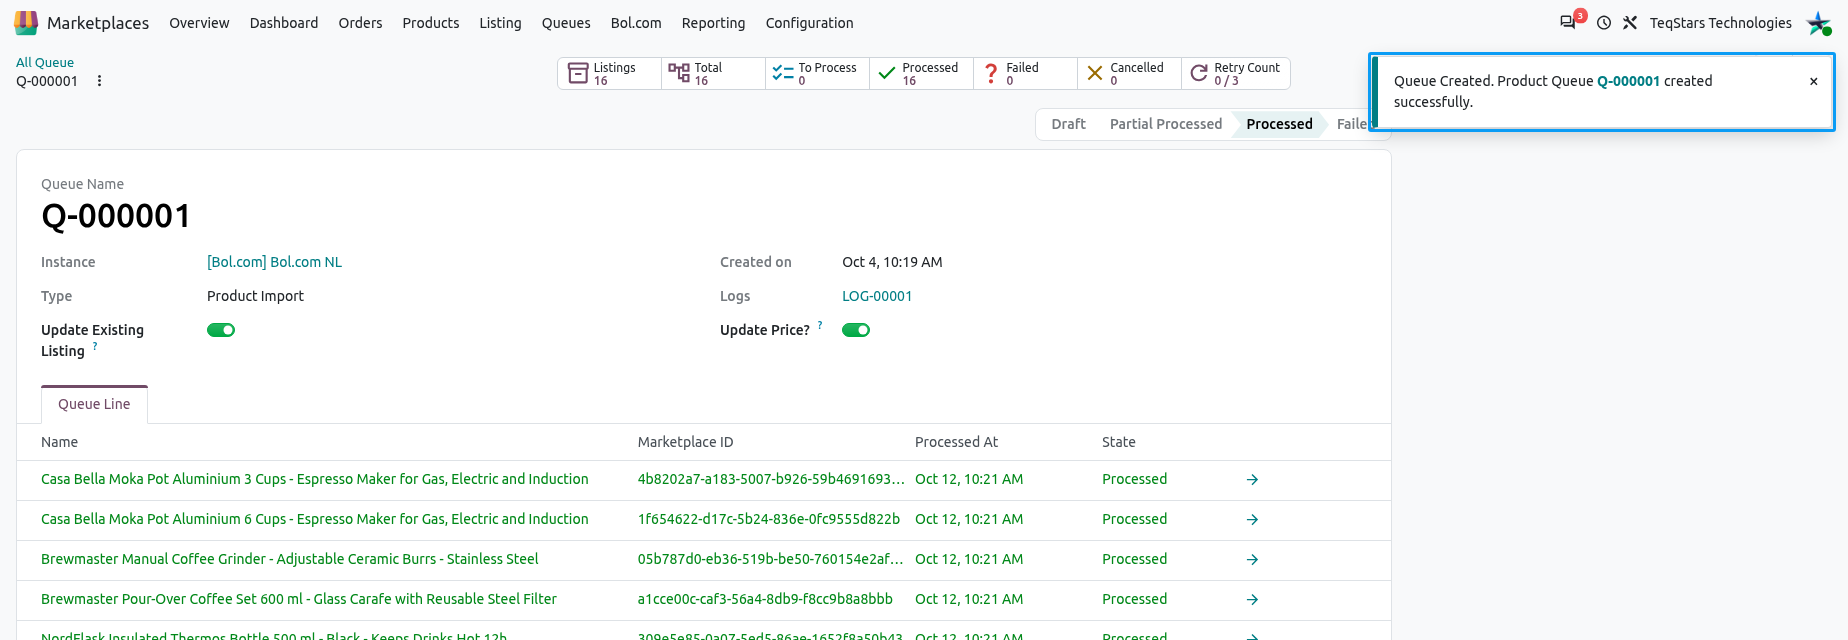
By configuring Smart Notification Configuration, users will receive timely updates regarding the success or failure of order processing and product imports. This helps them stay informed and take appropriate actions promptly when needed.
Confirming Instance
Once you are satisfied with the configuration, click the Confirm button. Upon pressing the Confirm button, your Bol Odoo Instance will be confirmed.
To revert a confirmed instance back to draft, click the Reset button.
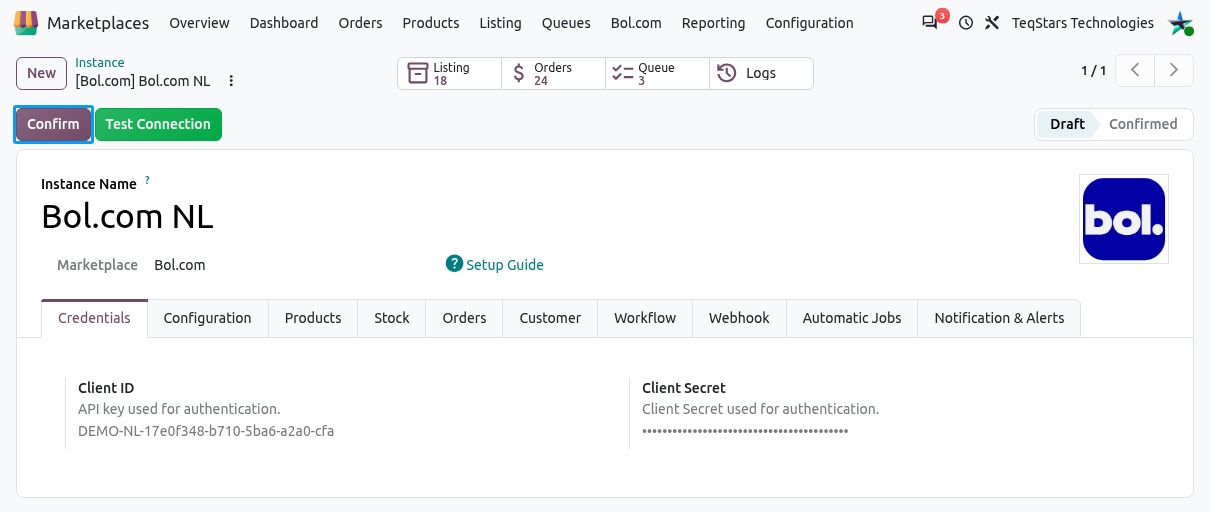
The instance moves to Confirmed state. On confirmation Odoo requests an access token, creates the default pricelist (EUR) if none is set, and registers the Process Status webhook. The connector is now ready to import offers, orders, returns, and invoice requests, and to export stock, prices, tracking information, and invoices. Most configuration fields become read-only while the instance is confirmed; click Reset to edit them.