
Shopify Return Management
Use Shopify Returns to manage customer returns between Shopify and Odoo. Returns created in Shopify can be imported into Odoo, and returns can also be created in Shopify from Odoo delivery orders. The connector keeps return information synchronized and automatically updates inventory, return receipts, and links related credit notes.
Important
Before working with Shopify returns, make sure the Shopify instance is in Confirmed state.
Where To Find Returns
Go to to see the list of imported returns.
Before You Start
Location Settings (Return Restock Warehouse)
Configure where returned items should be restocked when a Shopify return is processed.
Go to and open the Shopify location. Set the Return Restock Warehouse field to choose where returned items should be received.
Note
If Return Restock Warehouse is not set, returned items are restocked back into the warehouse they were fulfilled from. See Configure Shopify Location.
Importing Returns
Import Shopify returns into Odoo manually, automatically using scheduled jobs, or through webhooks. All imported returns are added to the return queue and processed automatically.
Manual Import
Go to and open your Shopify instance.
Click Operations and choose the operation Import Returns.
Enter the From and To dates to import Shopify returns processed during that time period.
Click Process.
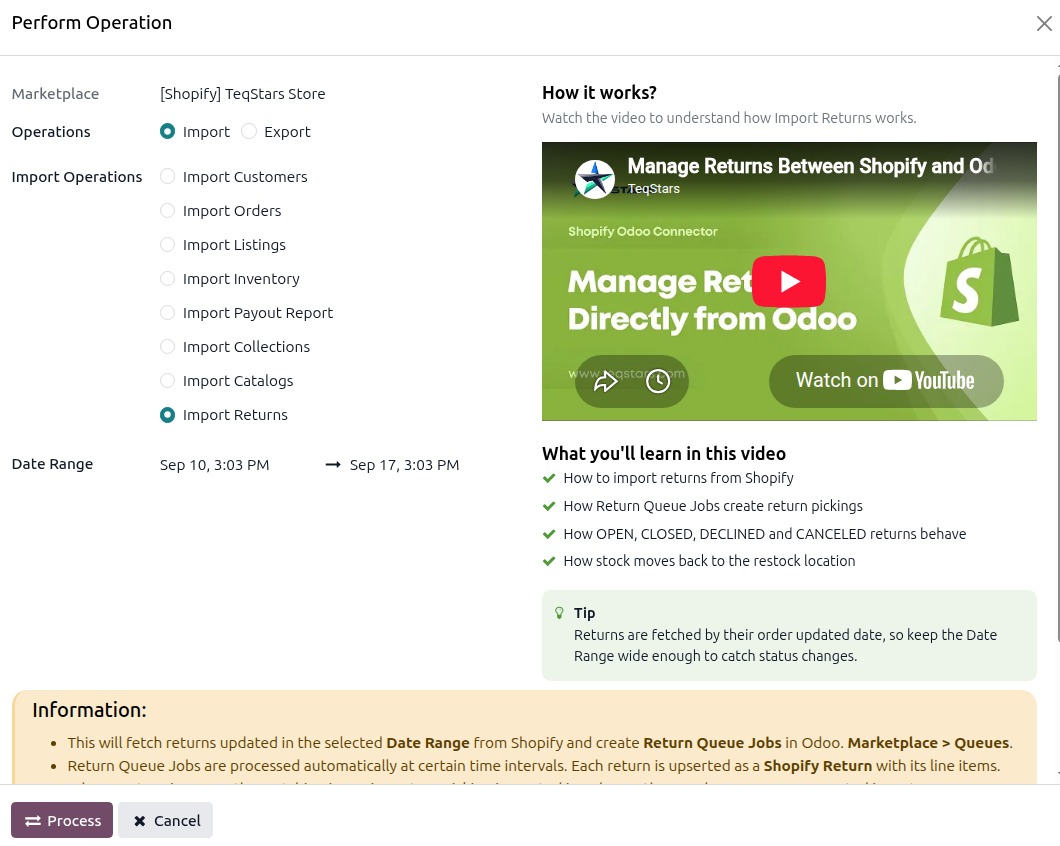
The connector fetches the matching returns and adds them to the return queue job. Imported returns appear under .
Automatic Import (Scheduled Action)
Go to and open your Shopify instance.
Open the Automatic Jobs tab.
Configure Import Returns by setting Interval Number, Interval Unit, and Active (default is every 30 minutes).
The job imports returns updated since Last Return Imported On and updates that date after each run.
Returns From Webhooks
Enable return webhooks to automatically synchronize returns from Shopify to Odoo. When a return is requested, approved, declined, closed, reopened, or canceled in Shopify, the update is sent to Odoo immediately.
Odoo does not update the return directly from the webhook. Instead, it adds the return to the return queue job, and that queue is processed automatically: it creates the return in Odoo when it is new, or updates the existing return, then runs the related inventory and accounting steps based on the return current status.
The following return webhooks are handled:
returns/request: a customer requests a return. Odoo creates a new return in Requested status.returns/approve: a return request is approved. Odoo updates the return to Open and prepares the incoming return receipt.returns/decline: a return request is declined. Odoo updates the return to Declined and cancels any pending receipt.returns/close: a return is closed (completed). Odoo updates the return to Closed, restocks the items when Shopify reports them as restocked, and creates or links the credit note.returns/reopen: a closed return is reopened. Odoo updates the return back to an in-progress (Open) state.returns/cancel: a return is cancelled. Odoo updates the return to Canceled and cancels any pending receipt.
For a declined return, the return shows the Decline Reason and the Decline Note.
Processing A Return
Open a return from to review the return details and perform available actions.
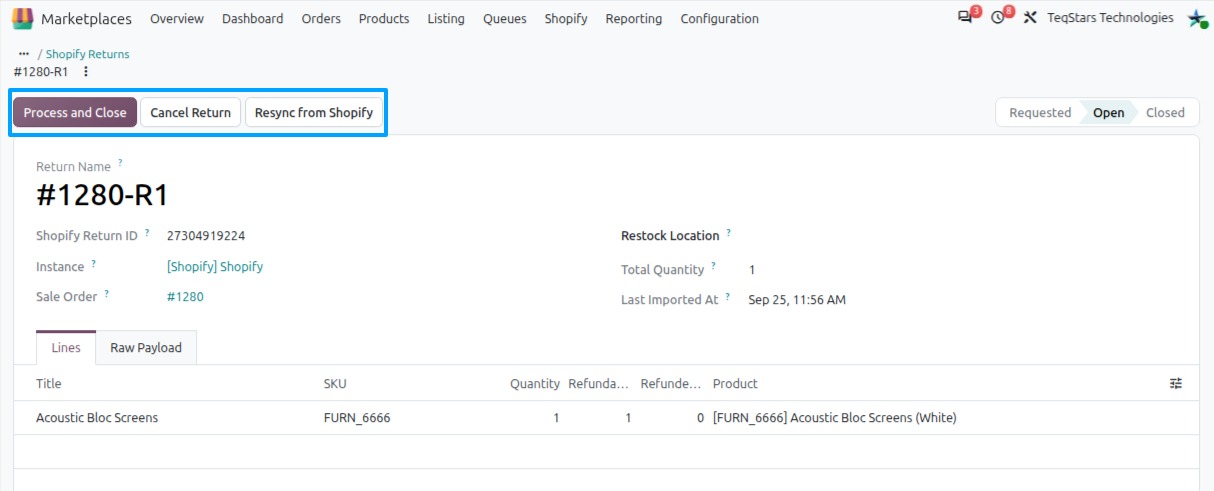
The following smart buttons are available:
Pickings: Opens the return receipt(s) created for this return. Use these receipts to review movement of returned items back into stock.
Return Moves: Opens the return stock moves linked to this return. These moves are created when returned items need to be restocked but no corresponding delivery order exists in Odoo.
Credit Notes: Opens the credit notes associated with this return. Use them to review refunds that were created or linked as part of the return process.
Process And Close
From an Open return, click Process and Close to open the wizard:
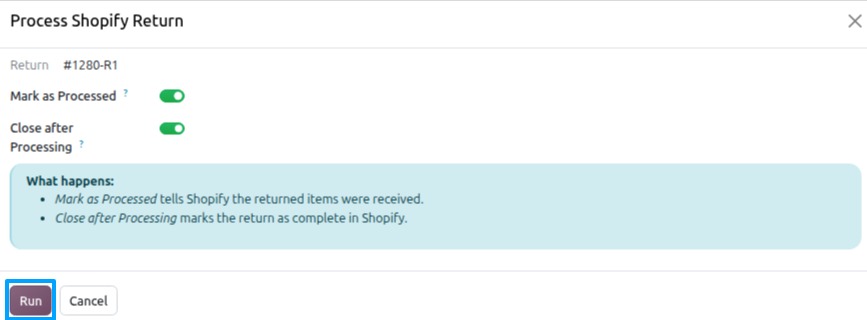
Mark as Processed: confirms that the returned items have been received and processed in Shopify.
Close after Processing: completes the return and changes its status to Closed.
Open Refund Wizard: opens the refund wizard for the linked credit note after the return is closed, allowing you to refund the customer.
Click Run to apply the selected actions.
Note
A Closed return restocks only the lines Shopify marked as restocked. If Shopify closed the return with no restock, nothing is restocked in Odoo until you use Force Restock.
Cancel Return
Available when the return is in Requested or Open status.
Cancels the return in Shopify and updates the status to Canceled.
Resync from Shopify
Retrieves the latest return data from Shopify.
Updates the return record in Odoo.
Applies any related inventory updates.
Force Restock
If returned items were received in your warehouse but Shopify did not restock them when closing the return, Odoo shows the Force Restock button.
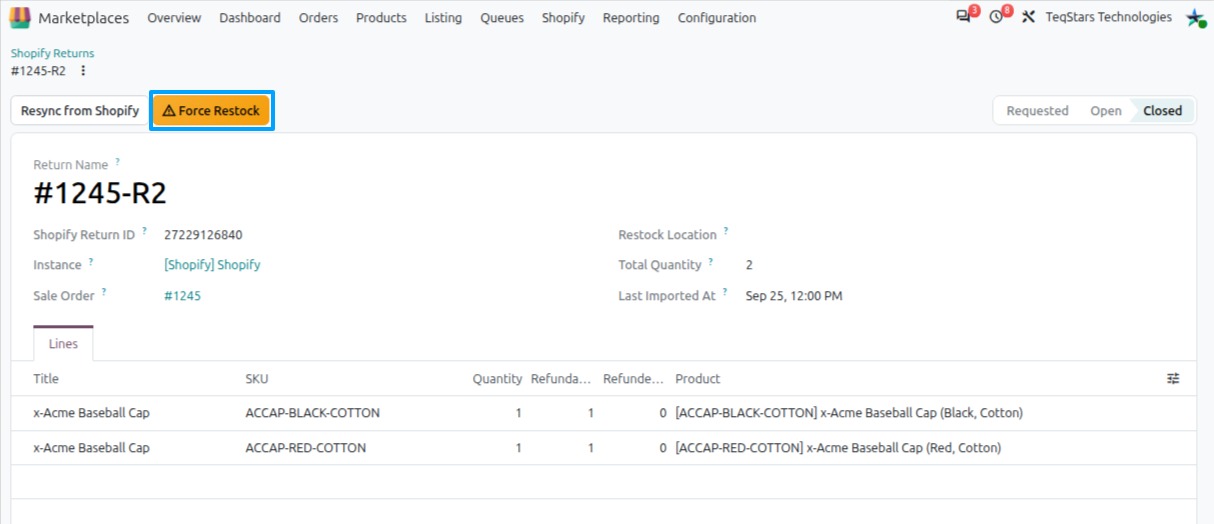
Warning
Because Shopify did not restock these items but Odoo does, the on-hand quantity for these products will differ between Odoo and Shopify after a Force Restock. Use it only when the items were really received back in your warehouse.
Click Force Restock and confirm. Odoo creates and validates the return receipt to restock the items, even though Shopify did not mark the return as restocked.
Note
The Force Restock button is shown only when the return is Closed and Shopify did not restock the returned items.
Create A Return From Odoo To Shopify
Create a Shopify return directly from a validated delivery in Odoo.
Open the outgoing delivery of the Shopify order. Once the delivery is Done and its fulfillment has been updated in Shopify, the Create Return in Shopify button appears in the header.
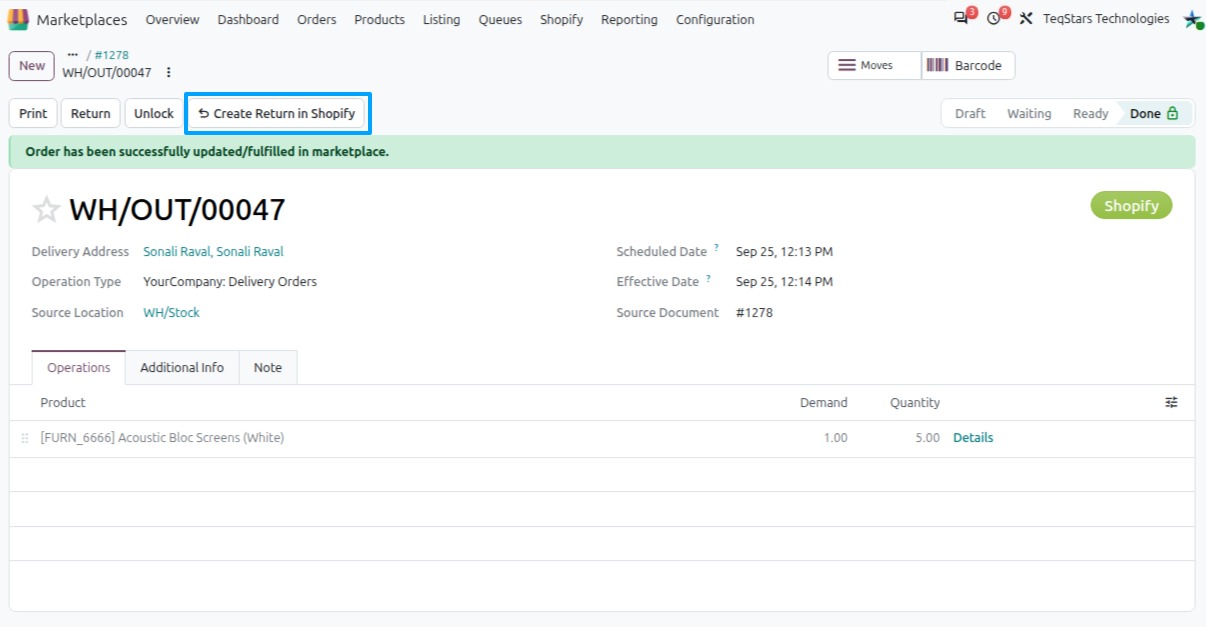
Click Create Return in Shopify and set, in the wizard:
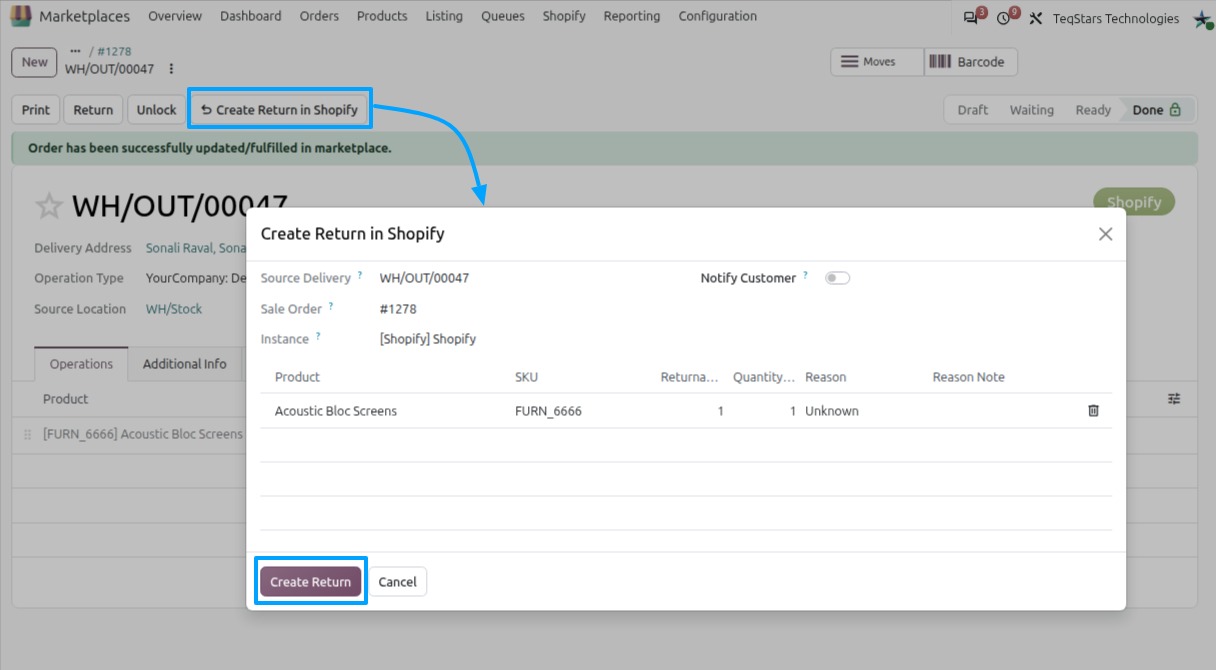
Enable Notify Customer to send a return confirmation email from Shopify.
For each item, specify the Quantity to Return and choose a Reason. Add a Reason Note when Other reason is selected.
Click Create Return. The connector creates the return in Shopify.
Note
The button checks Shopify for returnable items. If nothing is returnable for the order, the button is hidden and a Nothing to Return message is shown. You can also access the return from the sale order. The Shopify Returns smart button on the order opens its linked returns and shows the return count.
If a return import or processing fails, check to see the error details.