Configure Bol.com Connector
Create a Bol.com instance
To create your Bol.com instance in Odoo, navigate to and click on CREATE.
Choose a meaningful name for your account (e.g.
Bol.com), and selectBol.comon Marketplace.On Credentials tab, fill the Client ID and Client Secret. if you don’t have API credentials refer below link.
See also
Configurations
Let’s begin with the configurations.
General Configuration
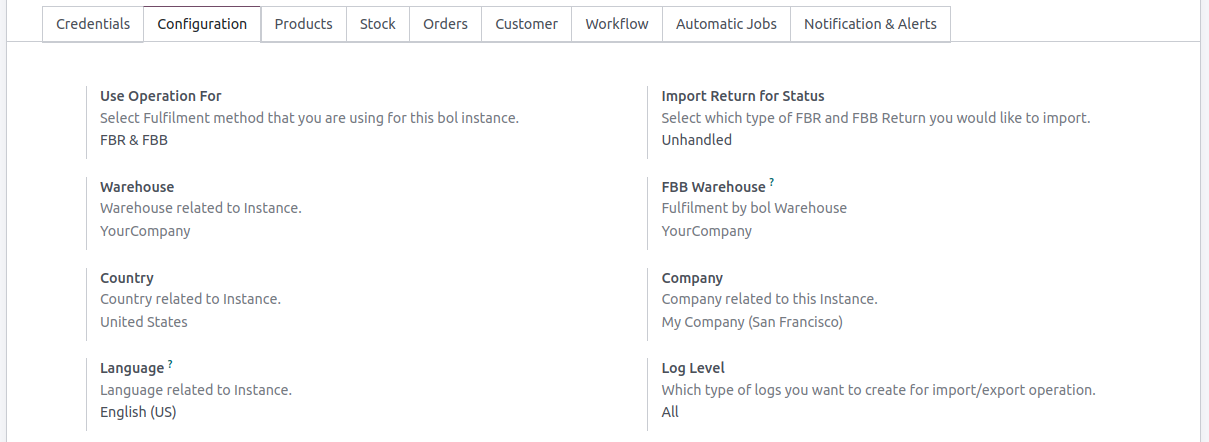
Use Operation For: Select the fulfillment method. You can choose between
FBR,FBB, orFBR & FBB.Import Return for Status: Choose the type of returns you wish to import. You can select either
Unhandled, orHandled.Warehouse: This warehouse will be utilized for FBR orders and also for exporting stock to Bol.com.
FBB Warehouse: this warehouse will be utilized for FBB orders and also for importing stock from Bol.com.
Company: Choose company related to instance.
Log Level: choose which type of log level would you like to have. You can choose between
ALL,SUCCESS, orError. default to Error. The system will retrieve logs for each marketplace operation. To view the logs, navigate toQueue Batch Limit: default to 100 records. we aren’t suggesting to change this.
Note
To modify the Log Level and Queue Batch Limit, activate the developer mode and navigate to and click on Configuration tab.
Product Configuration
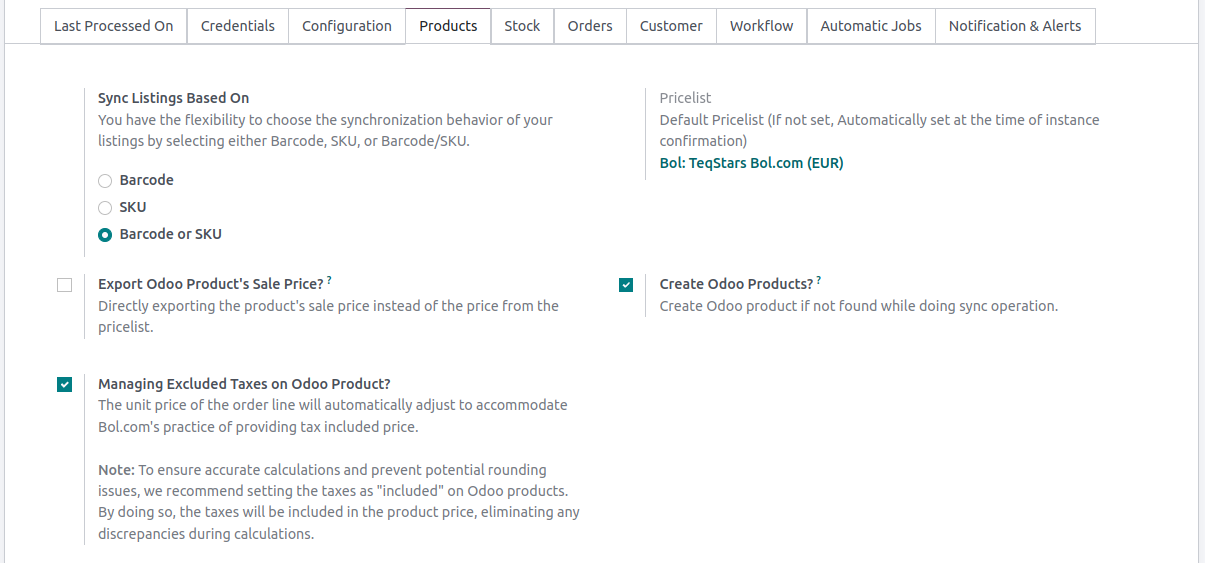
Sync Listings Based On: Select the parameter based on which you would like to synchronize the products/offers from Bol.com to Odoo. You have the option to choose between
Barcode,SKU, orBarcode and SKU.Pricelist: Pricelist refers to a pricing configuration that determines the prices of products during the product sync operation between Bol.com and Odoo. When prices are imported/exported during synchronization, this pricelist is used to set the appropriate prices. Keep it
blankif you don’t have Bol.com pricelist so that system will create a new pricelist automatically.Export Odoo Product’s Sale Price?: When exporting Odoo products, the standard behavior is to export the prices based on the pricelist configured in Instance. However, if you want to export the product’s sale price directly, bypassing the pricelist, you can customize the export functionality by enabling this option.
Create Odoo Products?: Enabling the this option allows the Bol.com Odoo Connector to automatically create new products in your Odoo catalog when a matching product is not found based on the SKU or Barcode as per configured in Sync Listings Based On. This feature streamlines the product synchronization process by creating products in Odoo, ensuring that all products from your Bol.com store are accurately represented in your Odoo product catalog.
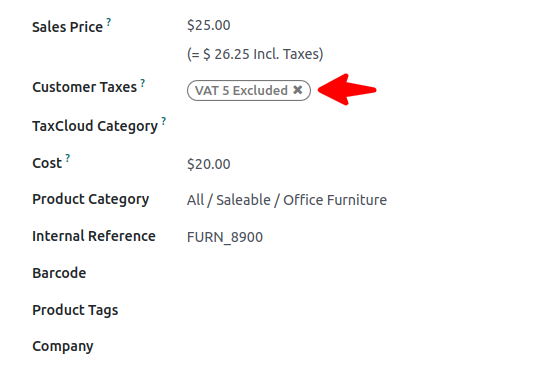
Managing Excluded Taxes on Odoo Product?: Enable this if you are managing excluded taxes on products.
Tip
Sync Listings Based On: It is recommended to use
Barcodesince Bol.com offer/products always have unique barcodes.
Important
Managing Excluded Taxes on Odoo Product?: While importing orders from Bol.com to Odoo unit price of the order line will automatically adjust to accommodate Bol.com’s practice of providing tax included price. It might be possible to have minor rounding issues during the calculation.
Stock Configuration
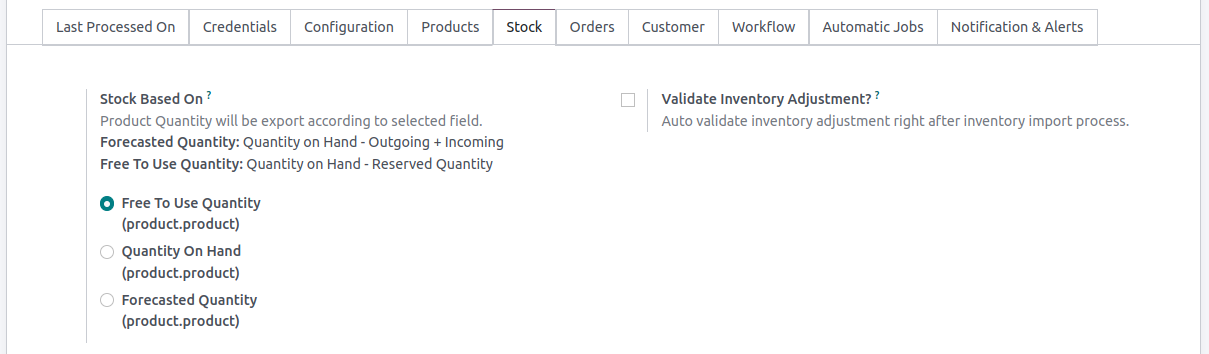
Stock Based On: When exporting Inventory from Odoo to Bol.com, you can choose
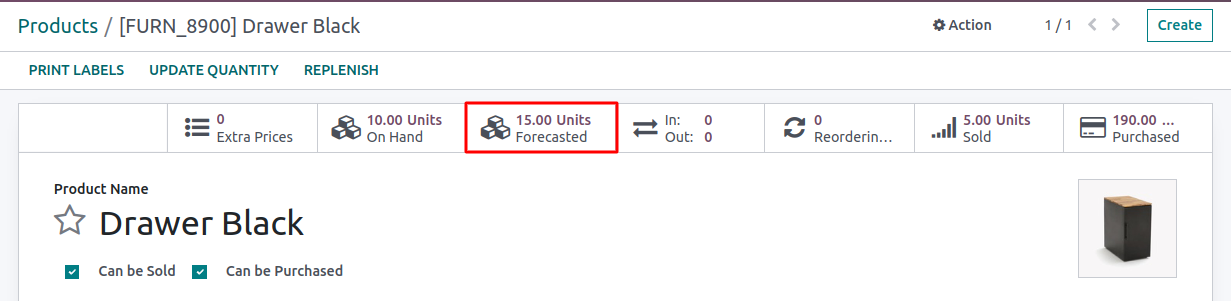
Free To Use Quantity,Quantity On HandorForecasted Quantityconfiguration based on your requirements, ensuring accurate inventory management between Bol.com and Odoo.Forecasted Quantity (Quantity on Hand - Outgoing + Incoming):
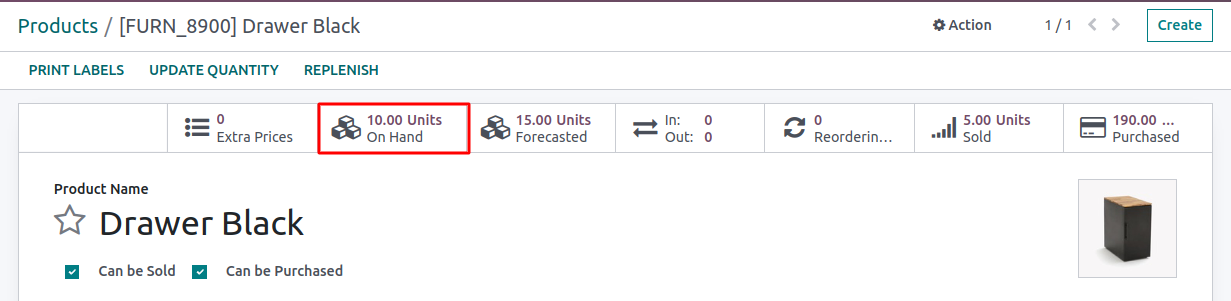
Quantity On Hand:
Free To Use Quantity (Quantity on Hand - Reserved Quantity):

Validate Inventory Adjustment?: The system automatically confirms the inventory adjustment after importing inventory data from Bol.com to Odoo. By enabling Validate Inventory Adjustment?, the inventory adjustment is automatically marked as validated without requiring manual intervention.
Note
During the process of importing stock or inventory from Bol.com to Odoo, only products with the Tracking field set to No Tracking will be processed. You can check Tracking under the Inventory tab on product view.
Order Configuration
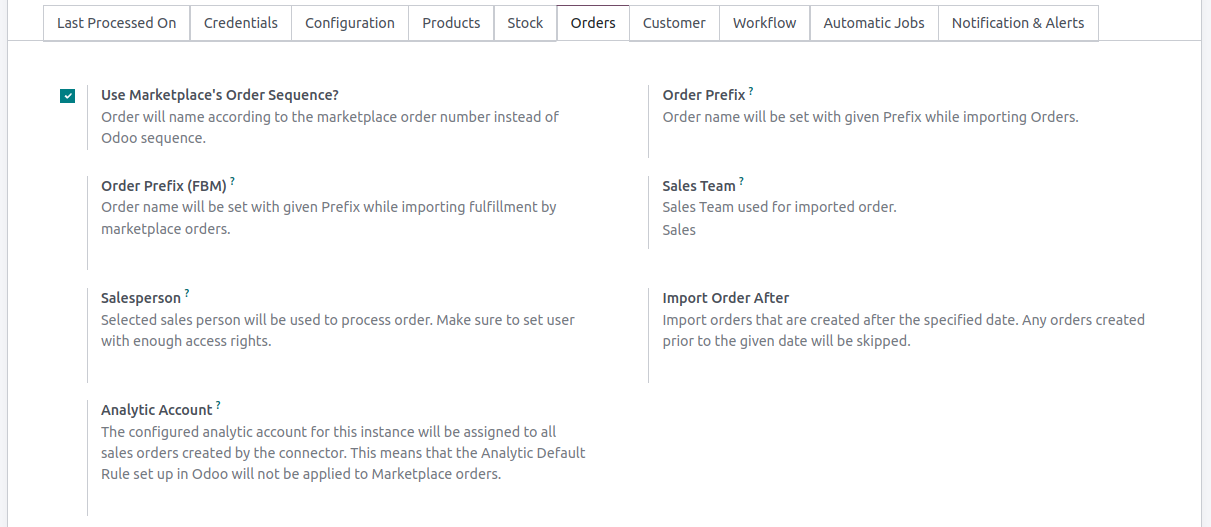
Use Marketplace’s Order Sequence?: Allows you to name orders in Odoo based on the Bol.com order number rather than using the default Odoo sequence. This ensures that the order names in Odoo correspond directly to the order numbers generated by the Bol.com platform, providing consistency and easier cross-referencing between Odoo and the Bol.com.
Order Prefix: Allows you to specify a prefix that will be added to the names of imported orders. When importing orders from Bol.com to Odoo, the connector will automatically set the order name with the given prefix. This helps to easily identify and distinguish the imported orders in Odoo.
Order Prefix (FBM): Prefix for fulfillment by Bol.com (FBB) orders.
Example
if you set the prefix as
BOL-, an order number/name “12345” will becomeBOL-12345after importing.
Delivery Product: The product used to model the delivery charge for orders or while creating new delivery method.
Sales Team: By configuring this, you can ensure that all imported orders from Bol.com are automatically assigned to the specified default Sales Team in Odoo.
Salesperson: Select a salesperson who will be responsible for processing the orders received from Bol.com. It is important to ensure that the assigned user has sufficient access rights in Odoo.
Import Order After: You can import orders from Bol.com that have been generated after a particular date. By defining this date, any orders generated prior to the specified date will be skipped during the import process.
Analytic Account: The configured analytic account will be assigned to all sales orders created by the connector. This means that the Analytic Default Rule set up in Odoo will not be applied to Marketplace orders.
Order Status: Filter orders by their fulfillment status at the time of Import Orders. default to
OPEN.
Note
To modify the Order Status and Delivery Product, activate the developer mode and navigate to and click on Orders tab.
Customer Configuration

Receivable Account: Allows you to specify the default account for receivables when creating customers. By setting this field to Account Receivable instead of the default account, you ensure that the receivable transactions, such as invoices and payments, associated with the customer are correctly accounted for in the Odoo.
Workflow Configuration

FBR Workflow & FBB Workflow: It enables the automatic processing of imported orders. This workflow automates various steps, including confirming orders, creating invoices, validating invoices, and registering payments.
Notification & Alerts
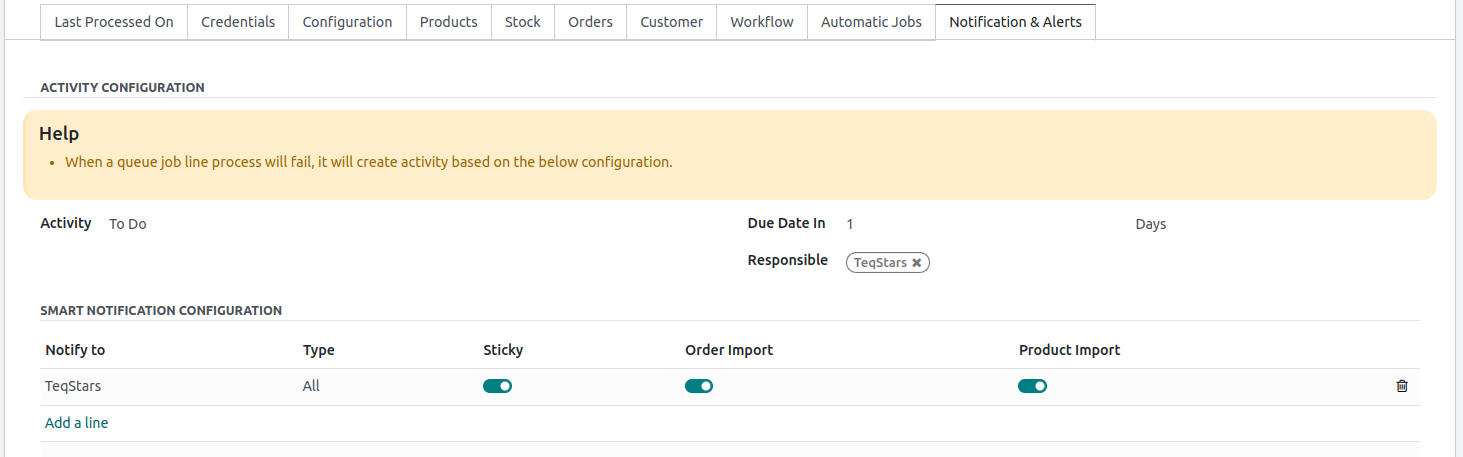
Activity Configuration: By configuring Activity, Due Date In and Responsible the system can automatically generate an activity when a queue job line process fails. The activity will be assigned responsible person and categorized based on the specified type of activity. This helps ensure that appropriate follow-up actions are taken to address and resolve any issues or errors encountered during the Queue job process.
- Smart Notification: